
Sep 29, 2017
Wire Harness Processing for Assembly
Wire harnesses are a systematic collection of wires or cables joined by a durable material to create an integrated unit. Electricians use wire harnesses for signal and power transmission in many applications, such as flat panel displays, automobiles, computers, heavy equipment, flight simulators and more.
As demand for those products shows no signs of slowing, it can be helpful for people working with electrical wire to understand how wire harnesses are processed. The wire harness manufacturing process varies depending on each wire harness’s design and performance requirements. Here, we explain how contract manufacturers use copper wire and wire-processing equipment to manufacture a wire harness assembly.
Wire Assembly Production Schedule Template for People and Equipment
Use the following template as a framework for wire harness assembly. It explains how to cut and strip UL1007 26 AWG hook up wire, as well as tin-dipping, housing, soldering and heat shrink tubing.
Gather the Appropriate Wire
Find the UL1007 26 AWG hook up wire based on the system-provided location, gathering black and red. Note that the part number is purposefully descriptive, denoting the UL style and AWG size. In this case, seven strands of 30 AWG copper wound together create a diameter equal to 26 AWG.
Cut and Strip the UL1007 26 AWG Hook Up Wire
With your materials gathered and ready for processing, the next step is to cut the wire to size and strip it. To cut the hook up wire, simply insert it into the wire-cutting machine.
Stripping the wire involves removing wire insulation to expose the core so you can attach terminals, connector housings or modules in the next step. You don’t need to take additional steps to strip a wire — the wire-cutting machine does this as well.
A system of checks and balances is a great tool to ensure you create a quality wiring harness. Each assembler or laborer should sign their initials after producing any portion of the assembly to show that they used a calibrated measuring device to assure accuracy. Incorporate in-process checks to document each assembler that touched the product and offer customers quality assurance. Once the assembly process is complete, a production manager should quality-check the entire job.
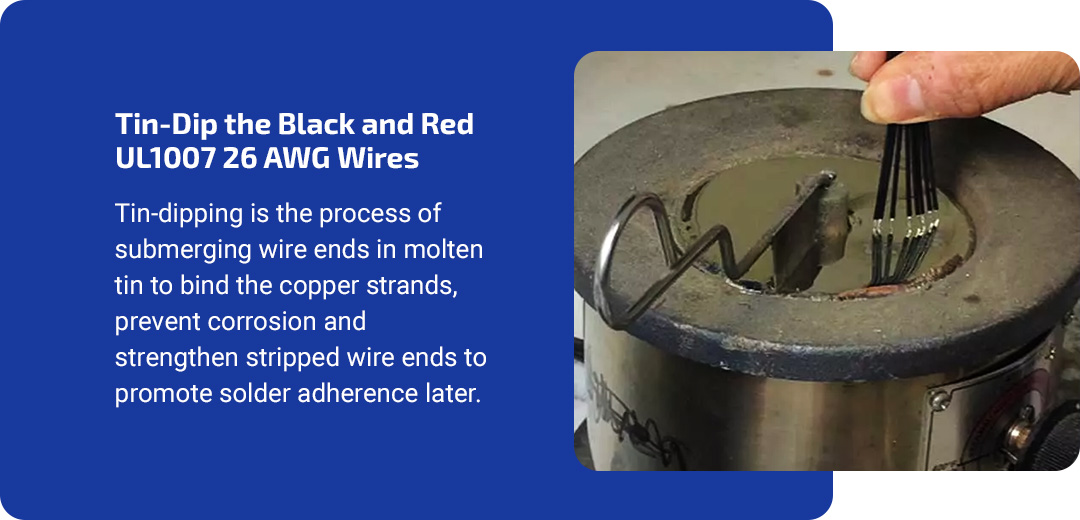
Tin-Dip the Black and Red UL1007 26 AWG Wires
Once you’ve cut and stripped the wire, it’s time to tin-dip. Tin-dipping is the process of submerging wire ends in molten tin to bind the copper strands, prevent corrosion and strengthen stripped wire ends to promote solder adherence later.
You’ll tin-dip one end and hand-crimp the other to a terminal.
Insert One Black and One Red Hookup Wire into the Same House
The housing is the component that the customer plugs into their device to connect the red and black copper wires as electricity conductors that power the device. A small piece on the terminal will bend as you insert it and audibly click once all the way in. Once you hear this click, give the wire a quick pull test to ensure it’s securely in place.
Solder the UL1007 Wires to the Motor
Next, you’ll solder the wire ends of the assembly to the customer’s motor. The exposed copper ends will wrap around two hooks, and you’ll apply solder to secure the wires to the motor. Keep in mind that the solder iron heats up to 750 degrees to liquify the solder for a short time. Once you remove the iron, the solder will harden within seconds. Using an overhanging magnified glass with a light during soldering is helpful to see exactly what you’re doing and ensure exceptional quality.
Apply Heat Shrink Tubing and Shrink Until Tight
Applying heat shrink tubing is the final step in wire harness assembly. Heat shrink tubing is a plastic sleeve that fits over the wire bundle and shrinks down tightly, protecting it from external factors that may harm it once connected to a bigger device.
Let WesBell Electronics Assemble Your Wire Harnesses
In addition to supplying bulk wire, cable and tubing products, WesBell Electronics offers services such as wire harness assembly for ultimate convenience. Once you submit your order, our assemblers will cut, strip and crimp the wire using wire-processing equipment before following your specifications to build the complete wire harness assembly. Contact WesBell Electronics today to learn more about our wire harness assembly services!


