Aug 21, 2024
How to Splice Type G-GC Mining Cables and Tools Required
Splicing large G-GC (Grounded, Ground-Check) mining cables is a critical task that ensures the continuity, safety, and reliability of power transmission in mining operations. These cables are used in harsh environments, often subjected to mechanical stress, moisture, and abrasive conditions. A proper splice not only restores the cable’s integrity but also ensures that the electrical and mechanical properties are maintained. This guide will walk you through the process of splicing Type G-GC mining cables, covering the tools required, the steps involved, and best practices to ensure a durable and safe splice.
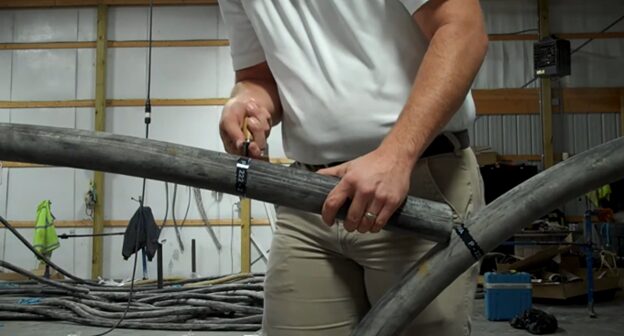
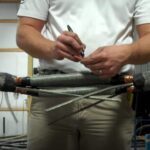
0:40 – Remove outer jacket
1:50 – Remove metal shield and conductor insulation
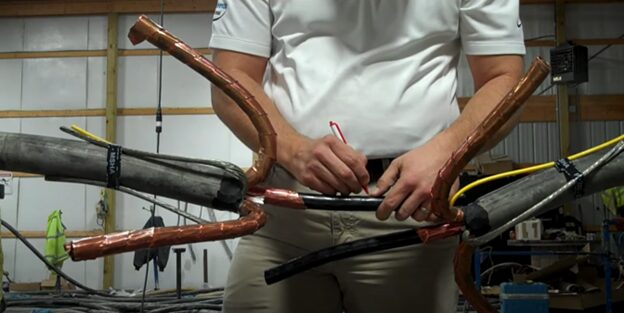
3:30 – Connect conductors together
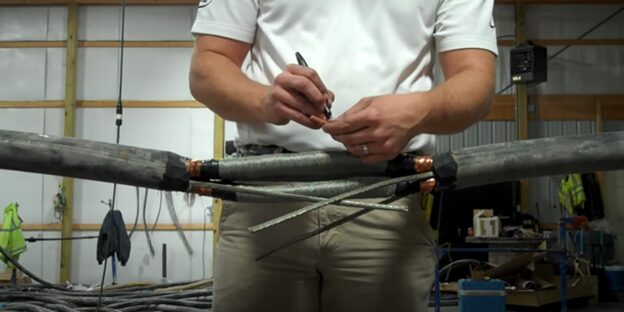
4:40 – Connect grounds
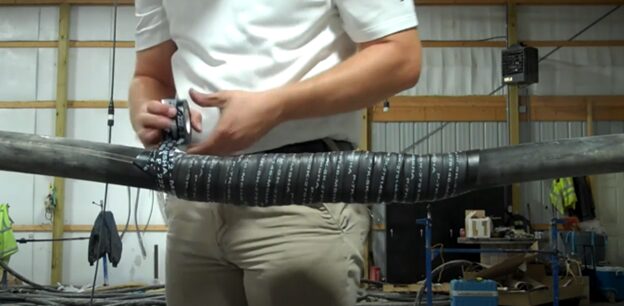
6:10 – Certified tape covering
Understanding G-GC Mining Cables
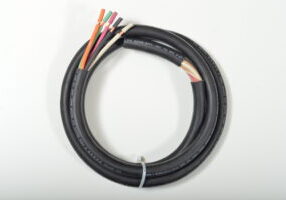
Before diving into the splicing process, it’s important to understand the structure of G-GC mining cables. These cables are designed with specific characteristics to withstand the demanding conditions of mining operations. Typically, a G-GC cable consists of:
- Conductor: Usually made of stranded bare copper, providing flexibility and excellent conductivity.
- Insulation: A layer of durable material, often ethylene propylene rubber (EPR), that surrounds each conductor to prevent electrical leakage.
- Grounding Conductors: Additional conductors used for grounding purposes, usually bare or tinned copper.
- Ground-Check Conductor: A small conductor that monitors the integrity of the grounding system, ensuring safety.
- Jacket: The outer layer, typically made of a tough material like chlorinated polyethylene (CPE), provides mechanical protection and resistance to environmental factors.
Tools and Materials Required
To splice a G-GC cable, you will need the following tools and materials:
- Cable stripping tools: To remove the outer jacket and insulation without damaging the conductors.
- Knife: A sharp, sturdy knife for cutting through layers of the cable.
- Crimping tool: Used to attach connectors to the conductors.
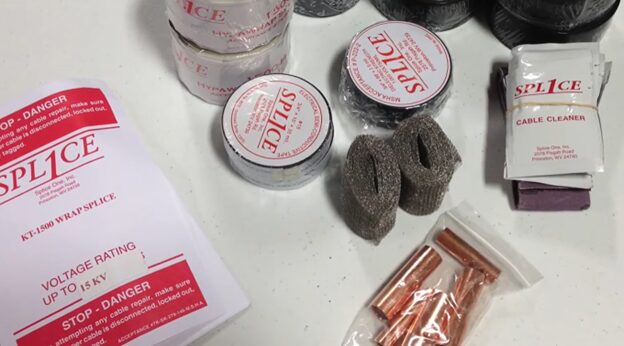
- Connectors or splicing kits: Specifically designed for G-GC cables, these kits usually include connectors, insulation materials, and instructions.
- Insulation tape: High-quality electrical tape for insulating the conductors.
- Heat shrink tubing: Provides additional insulation and mechanical protection.
- Soldering iron and solder (optional): For soldering connections, if required.
- Heat gun: To shrink the heat shrink tubing.
- Cleaning solvent and rags: To clean the cable ends before splicing.
- Multimeter: To check the continuity and integrity of the splice.
Step-by-Step Splicing Process
- Safety First
- Before starting, ensure that the cable is de-energized and tagged out according to safety protocols.
- Wear appropriate personal protective equipment (PPE) such as insulated gloves, safety glasses, and protective clothing.
- Preparing the Cable Ends
- Cut the cable: Use a sharp knife to cut the cable cleanly. Ensure that the ends are straight and even.
- Strip the outer jacket: Use a cable stripping tool to carefully remove the outer jacket. Be mindful not to damage the underlying insulation or conductors. The length of jacket to be removed depends on the splice kit instructions but typically ranges from 12 to 18 inches.
- Expose the conductors: Strip away the insulation from the individual conductors using the appropriate tool. The length of exposed conductor should match the length required for the connectors you are using.
- Splicing the Conductors
- Align the conductors: Position the conductors of both cable ends so that they align with each other. Ensure that the corresponding conductors (phase, ground, and ground-check) are correctly matched.
- Attach connectors: Depending on the type of connectors in your splice kit, either crimp or solder the connectors onto the conductors. Make sure the connections are secure, as loose connections can lead to high resistance and eventual failure.
- Insulate the connections: Once the conductors are connected, wrap them individually with insulation tape. Ensure there is enough overlap to completely cover the exposed metal, preventing any possibility of short circuits.
- Ground-check conductor: Pay special attention to the ground-check conductor. This small conductor must be connected properly to maintain the integrity of the grounding system. Use the appropriate connector and follow the same insulation process.
- Applying the Outer Insulation
- Reapply the outer jacket: If your splice kit includes materials for restoring the outer jacket, follow the instructions carefully. This might involve wrapping the cable with layers of insulating material.
- Use heat shrink tubing: Slide a piece of heat shrink tubing over the entire splice area. Use a heat gun to shrink the tubing, ensuring it fits tightly over the splice. This step adds an additional layer of protection against moisture and mechanical damage.
- Seal the ends: Ensure the ends of the heat shrink tubing are sealed properly. This prevents the ingress of moisture, which could compromise the splice over time.
- Testing the Splice
- Visual inspection: Check the splice for any visible defects, such as exposed conductors, uneven insulation, or gaps in the heat shrink tubing.
- Electrical testing: Use a multimeter to check the continuity of the conductors. Ensure that there is no short circuit between any of the conductors and that the ground-check circuit is intact.
- Mechanical testing: If possible, gently pull on the cable ends to ensure the splice is mechanically strong. The splice should withstand the mechanical stresses it will encounter in service.
Best Practices for Splicing G-GC Cables
- Use the Right Materials: Always use splice kits and connectors specifically designed for G-GC cables. These kits are engineered to restore the cable’s original properties, ensuring safety and durability.
- Follow Manufacturer Instructions: Adhere strictly to the instructions provided by the splice kit manufacturer. Different kits may have specific requirements for conductor preparation, connector attachment, and insulation application.
- Ensure Cleanliness: Before making any connections, clean the cable ends thoroughly. Dirt, oil, or moisture can lead to poor connections and eventual failure of the splice.
- Protect the Splice: After completing the splice, ensure that it is protected from physical damage. If the cable is to be buried or exposed to harsh conditions, consider additional protective measures such as conduit or armor.
- Regular Inspection: Even after a successful splice, it’s important to inspect the splice regularly, especially in high-stress environments. Look for signs of wear, moisture ingress, or mechanical damage.
Conclusion
Splicing large G-GC mining cables is a precise task that requires attention to detail, the right tools, and a thorough understanding of the cable’s structure. By following the steps outlined above and adhering to best practices, you can ensure that your splice will restore the cable’s functionality and safety. Properly spliced cables will continue to perform in the harsh conditions of mining operations, providing reliable power transmission and ensuring the safety of personnel and equipment.

