Aug 23, 2024
Using Romex NM-B Wire to Install a New Electrical Panel
Here’s a detailed breakdown of the process of installing a new electrical panel and wiring Romex NM-B cable to an outlet, light, and switch, all while adhering to the National Electrical Code (NEC) standards and best practices. The description assumes the installation is happening in a residential setting.
Preparation Phase
Before an electrician begins installing a new electrical panel and wiring Romex cables, thorough preparation is essential.
0:00 – Introduction
2:00 – Romex Wire explanation
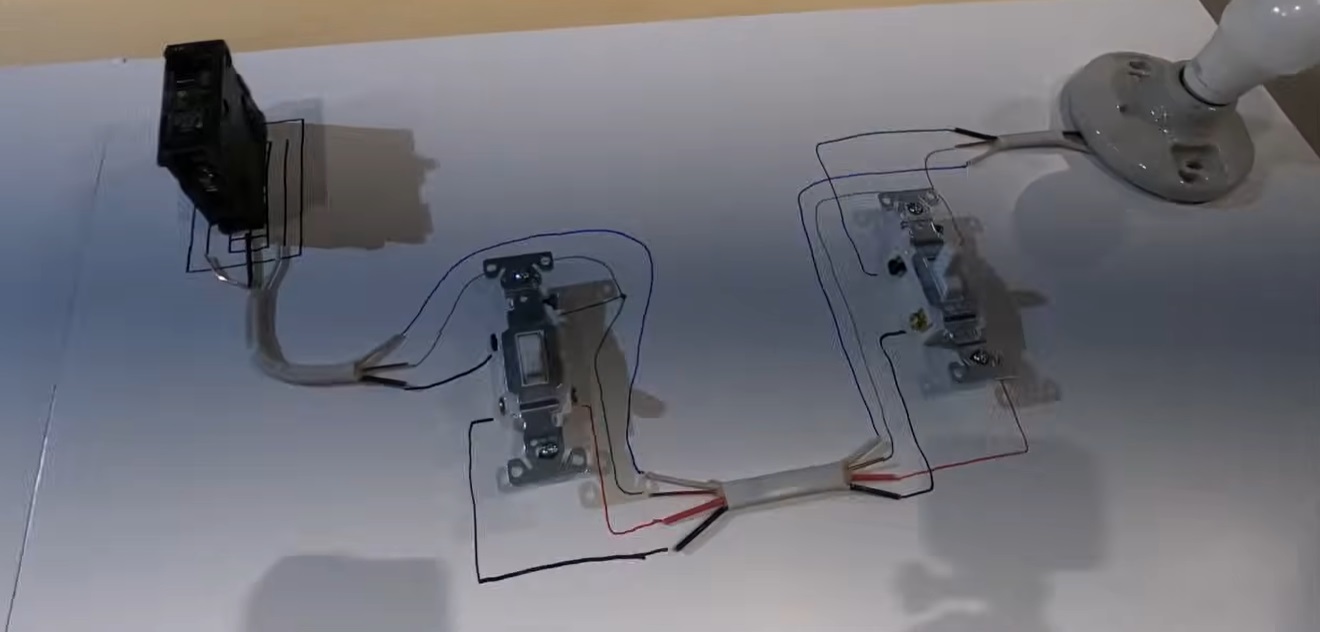
4:45 – Circuits drawing preparation
6:00 – Breakers and AMPs
8:30 – Romex 12-2 vs Romex 12-3
9:50 – Send power to 1 outlet
11:30 – Send power to 2 outlets
12:45 – Send power to a light
16:50 – Send power to a switch
21:00 – Outro
- Safety First:
- The main power supply from the utility company must be turned off at the main disconnect to prevent electric shock.
- Electricians typically wear insulated gloves, protective eyewear, and steel-toed boots for safety.
- Proper Lockout/Tagout procedures are used to ensure that no one accidentally turns the power on while work is being done.
- Obtaining Necessary Permits:
- Electrical work often requires local building permits to ensure compliance with safety codes. The electrician will ensure all permits are obtained and inspections are scheduled.
- Planning the Layout:
- The electrician will assess the house’s layout to determine the best locations for the new electrical panel, outlets, switches, and light fixtures.
- They will plan the routing of Romex wires to minimize wire runs and avoid obstacles such as HVAC ducts and plumbing.
- Material Preparation:
- The electrician will prepare the necessary materials, including a new electrical panel (breaker box), Romex (non-metallic sheathed) cables, outlets, switches, light fixtures, grounding rods, and various tools like wire strippers, fish tape, multimeters, and a drill.
Installation of the New Electrical Panel
The electrical panel (also called a breaker box or distribution board) is the heart of the home’s electrical system. It distributes electricity from the utility company to different circuits in the home.
- Choosing the Location:
- The new panel is installed in a location compliant with NEC standards, typically in a utility room, garage, or basement. The area around the panel must be clear for future access and maintenance.
- The panel must also be properly grounded, typically using a grounding rod driven into the earth outside the house.
- Mounting the Panel:
- The panel is mounted securely to the wall using screws. The electrician ensures the box is level and firmly attached to wall studs.
- Routing the Main Service Wires:
- The main service wires from the utility meter are routed into the panel via conduit. These wires are large gauge copper or aluminum conductors capable of carrying high current (usually 100 to 200 amps for residential installations).
- The electrician connects the main service wires to the main breaker inside the panel, which serves as the disconnect for the entire system.
- Installing Breakers:
- The electrician installs individual circuit breakers inside the panel. These breakers are designed to protect each circuit from overcurrent and short circuits.
- Each circuit breaker is labeled according to the circuit it controls (e.g., “Living Room Outlets,” “Kitchen Lights”).
- Grounding and Bonding:
- Grounding ensures that, in the event of a fault, electricity will flow safely into the earth, preventing shock hazards.
- The panel’s neutral bus bar is bonded to the ground, providing a path for stray electricity.
Running Romex Cable to the Outlet, Light, and Switch
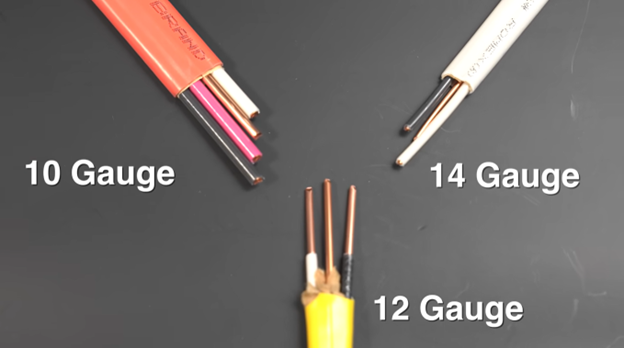
Romex cable is commonly used in residential wiring. It’s a type of non-metallic sheathed cable containing two or more insulated conductors and a bare ground wire.
- Drilling Holes for Romex Runs:
- The electrician drills holes in the wooden studs of the walls or the joists of the ceiling where the Romex will be routed. Care is taken to avoid drilling too close to the edges of the studs (as per NEC regulations).
- Pulling Romex Cable:
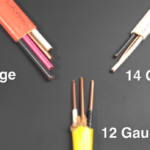
- The Romex 12/2 cable (20 amp) is pulled from the panel to each device (outlet, light, and switch). For example, if wiring an outlet, Romex with a 12-gauge wire is used for a 20-amp circuit, and a 14-gauge wire is used for a 15-amp circuit.
- Romex is run from the panel to a switch, then to a light fixture, and from the panel to an outlet. Typically, the electrician will secure the cable with staples every few feet and within 12 inches of a box to prevent movement, as required by code.
- Stripping the Cable:
- The outer sheathing of the Romex cable is stripped using a knife or a wire stripper, exposing the insulated wires (black, white, and bare ground). The individual wires are then stripped about ½ inch from the ends to prepare for connection
Wiring the Outlet
- Installing the Outlet Box:
- The electrician installs an outlet box at the desired location. The box is firmly attached to the studs and positioned at the correct height.
- A standard rectangular box is used for most outlets.
- Connecting the Wires to the Outlet:
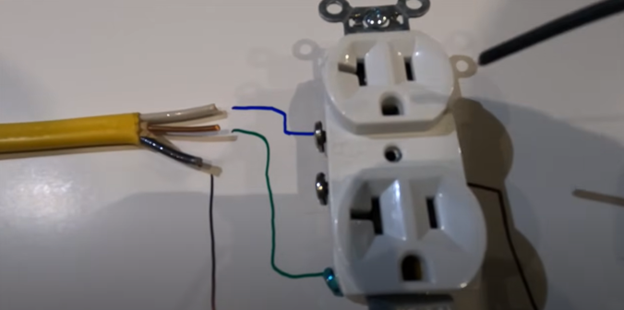
- The black (hot) wire is connected to the brass-colored screw on the outlet.
- The white (neutral) wire is connected to the silver-colored screw.
- The bare copper (ground) wire is connected to the green screw on the outlet and also bonded to the metal box if one is used.
- The electrician ensures that all connections are tight and that no bare wire is exposed.
- Securing the Outlet:
- The outlet is securely fastened to the box, and the cover plate is installed for safety and aesthetics.
Wiring the Light Fixture and Switch
- Installing the Switch Box:
- Similar to the outlet, a switch box is installed at a convenient height for the user. The electrician ensures it is firmly attached to the stud.
- Running Wires to the Switch and Light:
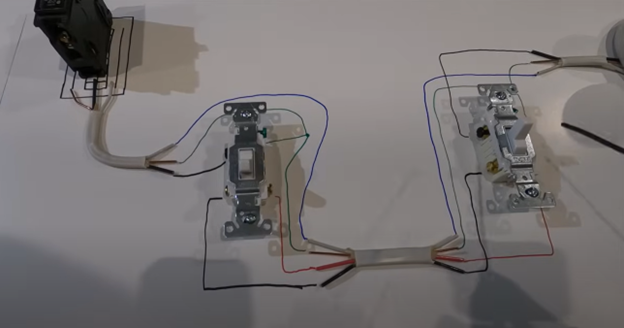
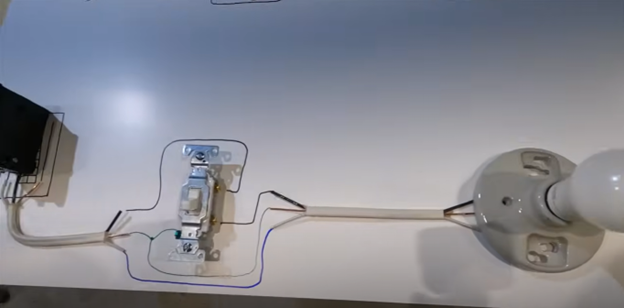
- Romex cable is run from the electrical panel to the switch box. Then, another Romex cable is run from the switch box to the location of the light fixture.
- Wiring the Switch:
- In a simple single-pole switch configuration, the black (hot) wire from the panel is connected to one terminal of the switch. The black wire leading to the light fixture is connected to the other terminal.
- The white (neutral) wires from both the panel and the light fixture are connected together with a wire nut inside the box.
- The bare ground wires are connected together, with one also attached to the switch’s grounding screw.
- Wiring the Light Fixture:
- At the light fixture location, the Romex is fed into the light box.
- The black (hot) wire is connected to the black wire from the light fixture, and the white (neutral) wire is connected to the white wire from the light fixture.
- The ground wire is attached to the fixture’s ground screw, ensuring the fixture is properly grounded.
- Installing the Light Fixture:
- The electrician installs the light fixture to the electrical box, ensuring it is securely attached and all wires are tucked away neatly to avoid pinching.
Final Connections and Testing
- Connecting Romex to the Panel:
- After all outlets, switches, and light fixtures are installed, the electrician connects the Romex cables to their respective circuit breakers in the panel.
- The hot wire (black) is attached to the circuit breaker, while the neutral (white) wire is connected to the neutral bus bar. The ground wire is connected to the ground bus bar.
- The electrician ensures all wires are neatly routed inside the panel, with no sharp bends or excessive stripping of the insulation.
- Testing the Installation:
- With all wiring complete, the electrician performs a series of tests to ensure everything is working properly.
- A continuity tester or multimeter is used to check the circuits for proper continuity, ensuring no shorts or open circuits exist.
- Voltage tests are conducted to confirm that the outlets, switches, and light fixtures are receiving the correct voltage.
- The electrician also tests the function of each switch and outlet to ensure they are operating correctly.
- Final Inspection:
- After testing, the work is ready for inspection by a local building or electrical inspector. The inspector will verify that the installation complies with local codes and standards.
- Re-energizing the System:
- Once the work passes inspection, the electrician turns the main power back on. The new circuits are energized, and the electrician performs a final check to ensure everything is functioning as expected.
Conclusion
Installing a new electrical panel and wiring Romex to an outlet, light, and switch is a complex process that requires careful planning, adherence to safety standards, and a thorough understanding of the NEC. Each step must be executed with precision, from mounting the panel and running the Romex cable to making the final connections and testing the system. Proper grounding, circuit protection, and correct wire connections ensure the electrical system will function safely and reliably for years to come.
An experienced electrician can complete this work efficiently while ensuring the safety of the home’s occupants. For DIY enthusiasts, it is highly recommended to consult a licensed electrician to avoid potential hazards and code violations.
Looking to learn more about how to run Romex and THHN wire? Here’s another quick video about when it can be used in conduit and when it shouldn’t.
0:00 – NM-B meaning
0:27 – Romex in conduit (Legal or Illegal)?
1:07 – When to use conduit
1:50 – Using THHN in conduit
2:27 – Conduit rules
2:50 – Don’t take Romex apart

