Aug 17, 2024
Crimp a 2/0 Lug to DLO Cable VS Crimping 22 Gauge Wires
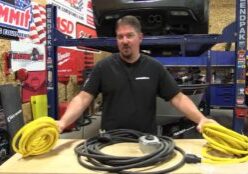
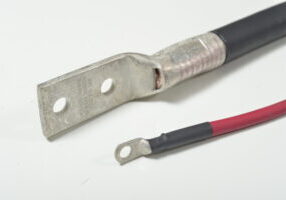
Crimp a 2/0 Lug to DLO
This process involves attaching a copper or aluminum lug to the end of the DLO cable to ensure a secure and conductive connection. Proper crimping is crucial for ensuring the safety and efficiency of the electrical system. Here is a step-by-step guide to crimping a 2/0 lug onto DLO cable:
0:00 – Intro about both crimps
1:34 – Tools for DLO Crimp
2:20 – Pull test
2:50 – Heat Shrink Tubing
3:15 – 22 Gauge ring terminal intro
4:03 – Tools, crimp and heat shrink
Tools and Materials Required
- 2/0 Lug: The lug should be appropriate for the type of wire (copper or aluminum) and should fit the DLO cable’s diameter.
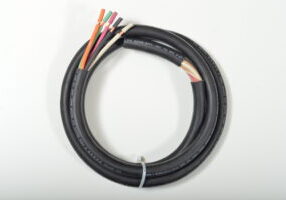
- DLO Cable: A flexible, high-strand-count cable, typically used in high-current, harsh environments.
- Cable Stripping Tool: A tool to strip the insulation off the cable.
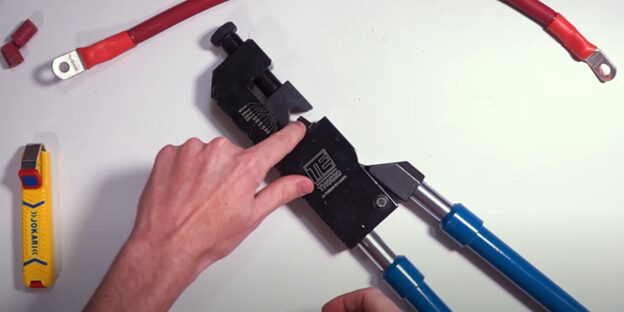
- Hydraulic or Manual Crimping Tool: This is used to apply the necessary force to crimp the lug onto the cable. Hydraulic crimpers are preferred for larger wire sizes like 2/0.
- Die Set: A crimping die that corresponds to the 2/0 cable size. The die should be matched to both the wire gauge and the lug.
- Heat Shrink Tubing: Provides insulation and protection for the connection.
- Heat Gun: Used to shrink the heat shrink tubing after crimping.
Step-by-Step Instructions
- Select the Appropriate Lug
First, ensure that the lug you are using is the correct size and type for the application. Lugs are made to fit specific wire gauges, and for this task, you’ll need a lug sized for 2/0 wire. Most lugs will have a corresponding label or marking indicating the wire size they are compatible with.
The lug should also be appropriate for the material of the DLO cable. Copper lugs are commonly used with copper cables, and aluminum lugs are used with aluminum cables. The lug design should also match the environment where it will be used (e.g., tinned copper lugs for corrosion resistance).
- Prepare the DLO Cable
Use a cable stripping tool to carefully strip the insulation from the end of the DLO cable. Strip approximately 1 to 1.5 inches of insulation, depending on the length of the barrel of the lug. Be careful not to nick or cut the conductor strands during this process, as this can weaken the electrical connection and reduce the cable’s current-carrying capacity.
After stripping the insulation, inspect the cable end to ensure that all the strands are intact and none have been cut or damaged. If any strands are damaged, trim the cable and strip the insulation again to ensure a clean, undamaged wire.
- Insert the Cable into the Lug
Insert the stripped end of the DLO cable into the barrel of the lug. Ensure that all strands are inserted and that the wire fills the lug barrel entirely. The conductor should be visible through the inspection hole in the lug (if present), which confirms that the cable is fully seated.
At this stage, check the fit of the cable inside the lug. It should be snug, but not so tight that the strands are compressed unevenly.
- Select the Correct Crimping Die
Hydraulic crimpers typically come with a range of die sets that correspond to different cable sizes. For a 2/0 lug, select the die that is specifically marked for 2/0 cable. The die will have markings indicating the wire size, which helps ensure a proper crimp.
Insert the correct die into the crimping tool. Make sure both sides of the die are secure and properly aligned.
- Crimp the Lug
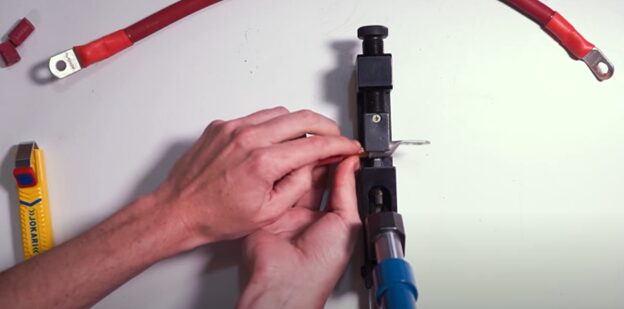
Position the lug and cable inside the crimping tool, ensuring that the barrel of the lug is centered between the crimping dies. Apply pressure slowly, using the hydraulic tool or manual crimper to compress the lug onto the cable.
Perform multiple crimps if necessary, depending on the length of the lug barrel. Start near the closed end of the barrel and work your way toward the open end. This ensures even compression and a secure connection. For large lugs, two or more crimps may be necessary.
After crimping, inspect the lug to ensure that it is securely attached and that there are no gaps between the lug and the cable. The crimp should be firm, with no movement or looseness in the connection.
- Apply Heat Shrink Tubing
Slide a piece of heat shrink tubing over the connection to provide insulation and protection. Make sure the tubing is long enough to cover both the lug and the cable insulation.
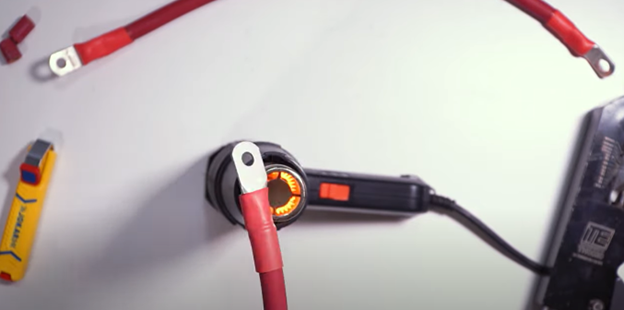
Use a heat gun to shrink the tubing until it forms a tight seal around the connection. This step helps to protect the connection from moisture, corrosion, and abrasion, ensuring long-term reliability.
- Inspect the Crimp
Finally, visually inspect the crimp to ensure it is properly compressed and that the cable is securely held in place by the lug. If the crimp is loose or uneven, it may need to be redone to ensure a reliable electrical connection.
Conclusion
Crimping a 2/0 lug onto DLO cable is a critical task in ensuring safe and effective electrical connections. By following these steps and using the appropriate tools and materials, you can create a reliable crimp that ensures proper electrical conductivity and mechanical strength. Proper crimping ensures the longevity of the connection and reduces the risk of electrical failures, which is especially important in high-power applications.
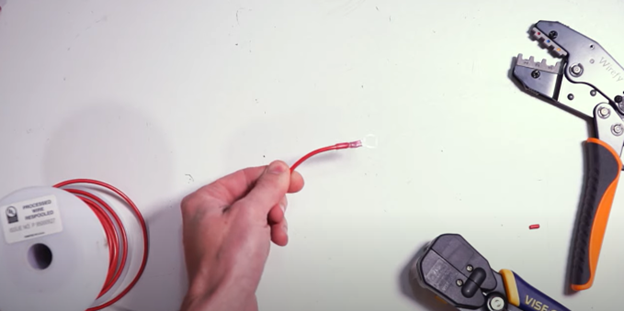
Hand Crimping 22-Gauge Wire with a Ring Terminal: A Comprehensive Guide
Crimping is an essential skill in electrical work, and mastering it ensures the strength, durability, and safety of electrical connections. One common task in this area is crimping 22-gauge wire with a ring terminal. While the gauge is relatively thin, the process can be precise and reliable if done correctly. This guide will walk you through the steps, tools, techniques, and considerations when hand-crimping 22-gauge wire with a ring terminal.
Understanding 22-Gauge Wire and Ring Terminals
Before diving into the process, it’s important to understand the components you’re working with:
- 22-Gauge Wire: This is a relatively thin wire, typically used in low-power applications, such as electronics, small appliances, and telecommunications. Because of its thinness, extra care is needed to avoid damaging the wire during crimping.
- Ring Terminal: A ring terminal is a type of electrical connector that creates a secure and lasting connection between a wire and a post or screw. The “ring” at the end allows it to be fastened to a terminal post, providing a secure connection. These terminals come in various sizes, and selecting the right one for 22-gauge wire is crucial for both performance and safety.
Tools Required
- Wire Strippers: These are used to remove the insulation from the wire without damaging the copper strands inside. You’ll need a stripper that can handle small gauge wires like 22 AWG.
- Crimping Tool: A hand-crimping tool specifically designed for small gauge wires and the appropriate terminal size. There are various types of crimping tools, such as ratcheting and non-ratcheting, but the key is to ensure that it has a die suitable for 22-gauge wire and ring terminals.
- Ring Terminals: Make sure you have ring terminals that are rated for 22-gauge wire. These terminals are usually color-coded to indicate the wire size they can accommodate. For 22 AWG, the color is often red, but always check the manufacturer’s specifications.
Steps for Hand Crimping
- Preparing the Wire
Start by cutting the wire to the desired length. After cutting, use the wire strippers to remove about ¼ inch of insulation from the end of the wire. Be cautious not to nick the copper strands inside, as this can weaken the connection. Hold the wire in the stripper tool and gently pull away the insulation. If you see fraying or cutting of the copper strands, adjust your technique or use a different gauge setting on the stripper.
- Selecting the Right Terminal
Choose a ring terminal designed for 22-gauge hook up wire. Check the packaging or markings on the terminal for compatibility with 22 AWG. The terminal’s barrel size should match the wire diameter, ensuring a snug fit. Also, confirm that the ring size fits the screw or post you’ll be connecting to.
- Inserting the Wire into the Terminal
Once you’ve stripped the insulation, insert the bare wire into the barrel of the ring terminal. The copper wire should fit snugly, with no strands sticking out or left outside the terminal. Push the wire in until the insulation is flush with the barrel’s end but not inside it. This helps ensure a strong mechanical and electrical connection while protecting the wire from excessive movement that could lead to failure.
- Crimping the Terminal
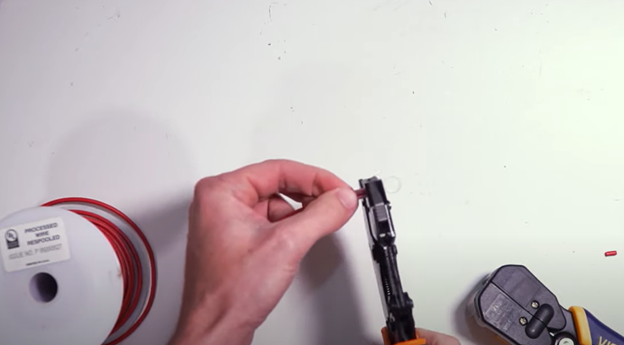
Position the ring terminal into the jaws of the crimping tool. Most crimpers will have color-coded dies corresponding to the terminal’s color, so use the correct one for your terminal size. Apply firm pressure on the tool’s handles until the crimper fully closes and completes the crimp.
The goal is to create a firm, mechanical bond between the wire and the terminal without deforming the ring or cutting into the wire. If your crimping tool has a ratcheting mechanism, it will ensure that the correct amount of pressure is applied before the tool releases.
- Inspecting the Crimp
After crimping, inspect the connection. Look for a secure bond with no visible gaps between the terminal and wire. Give a gentle tug on the wire to ensure it’s tightly crimped. If the wire moves or the connection feels loose, you’ll need to start over with a new terminal, as improper crimping can lead to failure during operation.
Best Practices for Hand Crimping 22-Gauge Wire
- Use the Right Tools: One of the most common issues in crimping is using the wrong tool for the job. Make sure your crimping tool and wire stripper are designed for small gauge wires like 22 AWG. This prevents damage to the wire and ensures a strong connection.
- Proper Sizing: Using the wrong size ring terminal for the wire gauge can lead to a weak crimp or a connection that doesn’t hold. Always double-check the terminal’s specifications before crimping.
- Test Your Connections: After crimping, always test the connection. A simple pull test can prevent future issues, as a weak connection may loosen over time and cause electrical problems.
- Avoid Over-Crimping: Excessive pressure can crush the wire or terminal, leading to a poor connection. This is especially important with small gauge wires like 22 AWG, where over-crimping can easily sever the wire.
Conclusion
Hand crimping 22-gauge wire with a ring terminal may seem like a small task, but it requires precision and care. By selecting the right tools, using proper technique, and adhering to best practices, you can create strong, reliable connections that ensure the integrity of your electrical projects. Mastering this skill not only improves your work quality but also enhances safety in any application where these connections are used.

