Aug 20, 2024
This is How to Hook Up a Hot Tub with Romex Cable (Indoors) & THHN Wire (Outdoors)
Connecting a hot tub to a 50-amp breaker is a substantial task that requires knowledge of electrical systems, adherence to safety standards, and a good understanding of local electrical codes. Below is a comprehensive, detailed guide on how to approach this project step-by-step.
Before you proceed, it’s important to note that electrical work is inherently dangerous and must comply with local building codes and the National Electrical Code (NEC). Improper installation can lead to fire, electrocution, or serious injury. Therefore, it is always recommended to hire a licensed electrician to handle this task. However, if you are experienced with electrical work and feel confident in your ability, the following is a detailed guide to wiring a hot tub using Romex 6/3 cable for the indoor run and THHN 6-gauge wire for the outdoor portion.
Overview of the Project
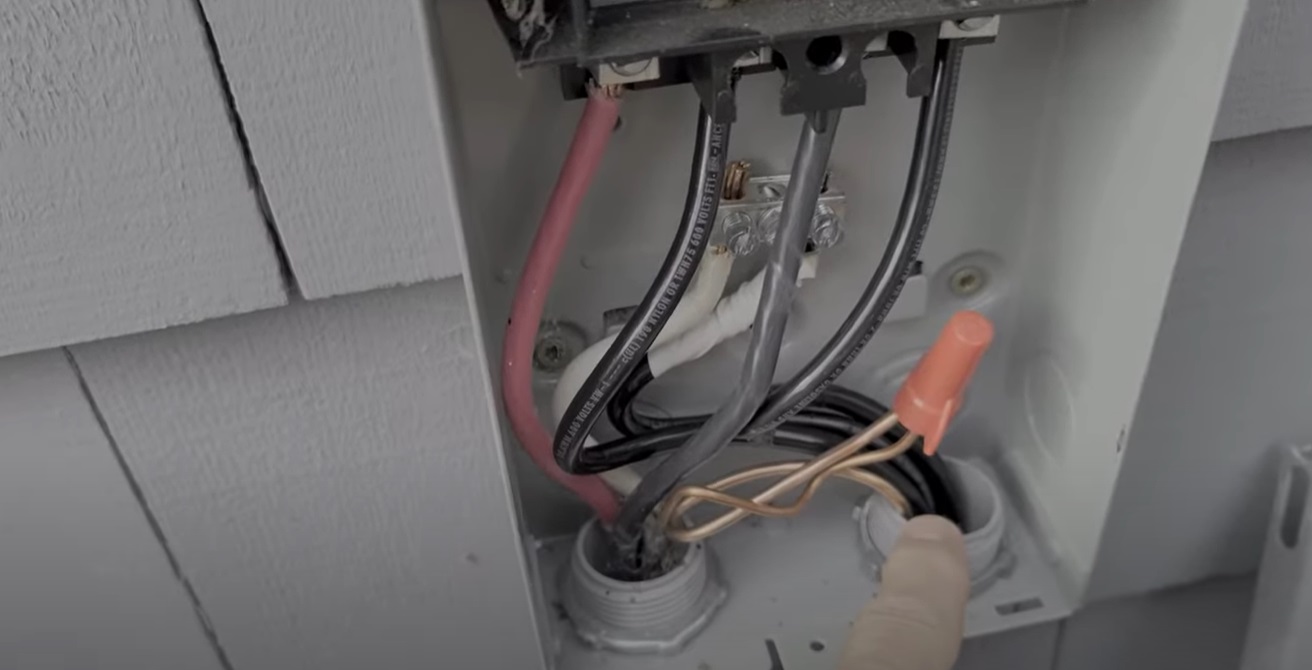
The project involves running electrical wiring from your main electrical panel to a hot tub, connecting it to a dedicated 50-amp double-pole breaker. The indoor portion of the wiring will be done using 6-gauge Romex wire, while the outdoor portion will utilize individual THHN 6-gauge wires inside a protective conduit. The wires will connect to a Ground Fault Circuit Interrupter (GFCI) disconnect panel, which is a safety requirement for hot tubs. From the GFCI disconnect, the wires will be connected to the hot tub’s control panel.
0:00 – Intro
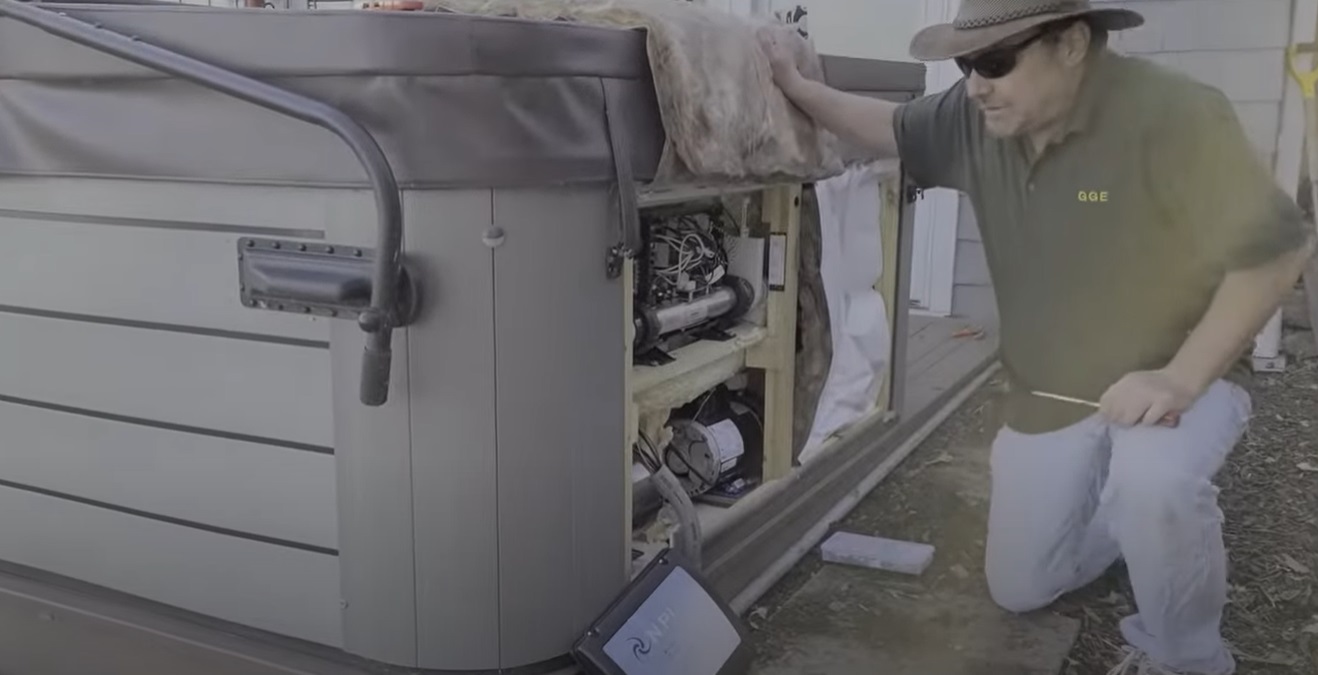
0:30 – View of the Hot Tub connection
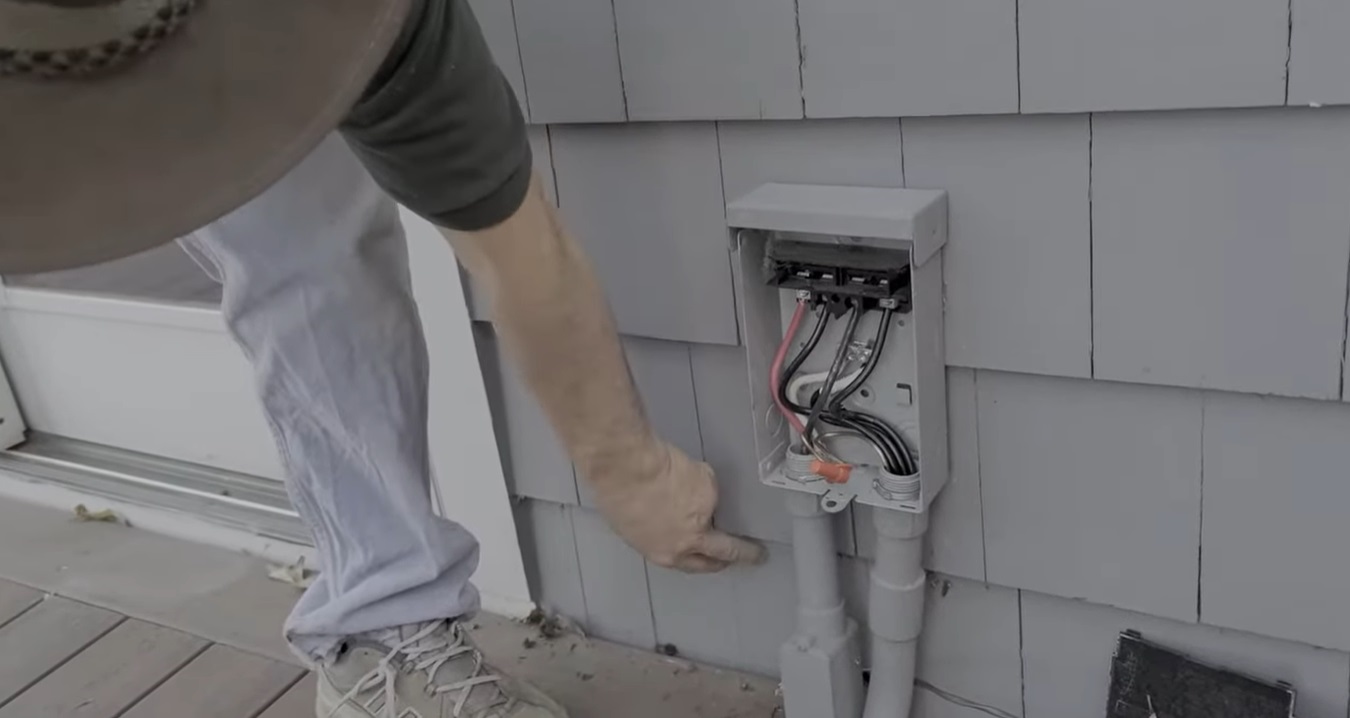
0:50 – View of Disconnect
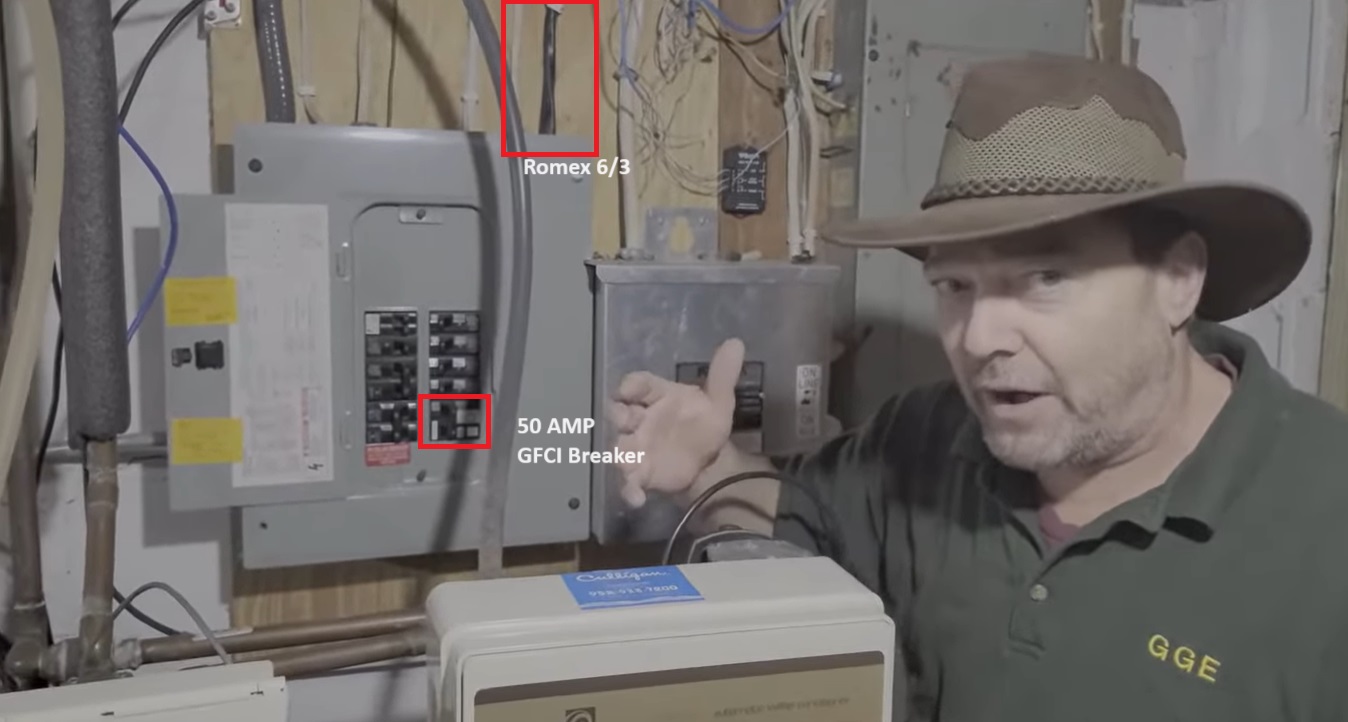
1:54 – Romex 6/3 Indoor run
2:13 – Electrical Panel View
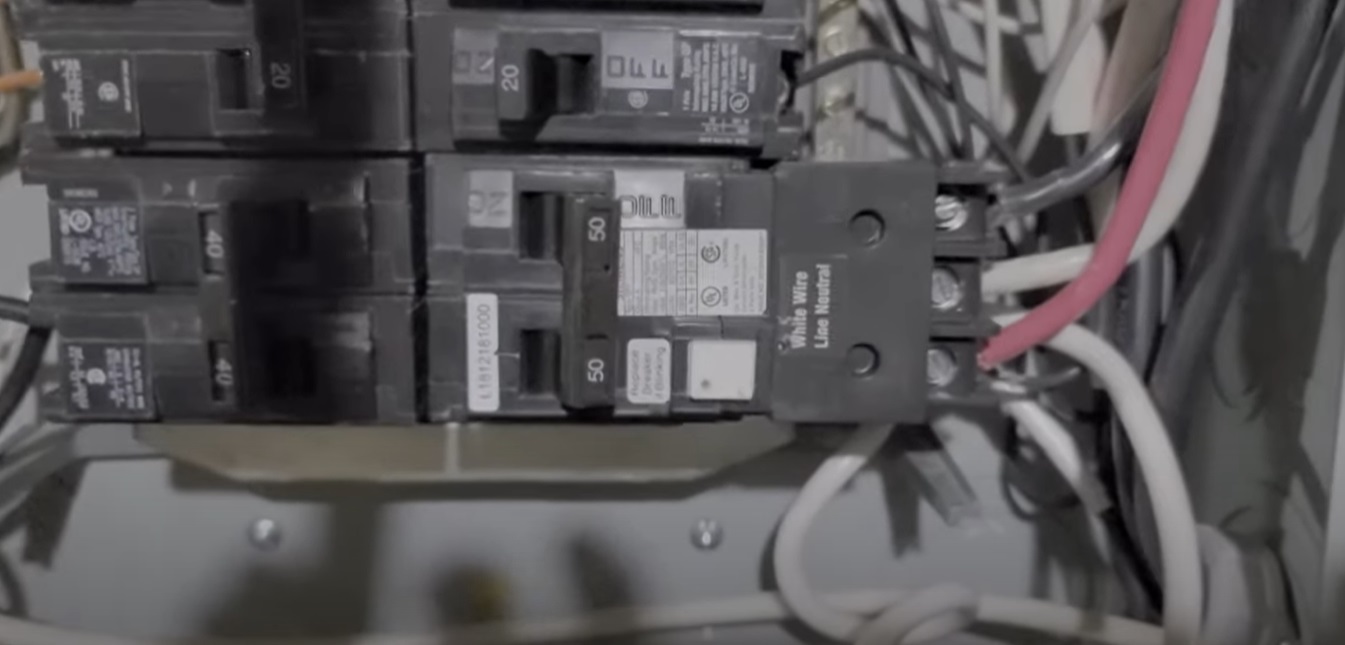
2:28 – 50 AMP Breaker Close View
Materials Required
- 50-amp double-pole breaker
- Romex 6-gauge wire (for indoor use)
- THHN 6-gauge wire (for outdoor use)
- Typically four wires are required: black (hot), red (hot), white (neutral), and green (ground).
- PVC conduit (for outdoor protection)
- GFCI disconnect panel (to meet safety codes)
- PVC fittings and clamps (for securing the conduit)
- Wire connectors
- Hot tub control panel (usually pre-installed in the hot tub)
- Conduit straps and clamps
- Electrical tape and wire nuts
- Drill and hole saw (for drilling through walls if necessary)
- Shovel (for trenching the outdoor conduit run)
Step 1: Planning the Installation
Locating the Hot Tub
First, determine the exact location of your hot tub and ensure it complies with local codes regarding clearances from buildings and electrical panels. The location should allow easy access for wiring, with enough space for maintenance.
- Clearances: Hot tubs must be located at least 5 feet from the electrical disconnect to prevent accidental water exposure to the disconnect panel. However, the disconnect should be within sight of the hot tub for safety.
Determine Wire Runs
Plan the path for your electrical wiring, keeping in mind that you will be using Romex wire indoors and transitioning to THHN wires once the wiring exits the house.
- Indoor Route: Choose a route that runs from your main electrical panel through the walls to the point where the wiring will exit the building. Avoid tight bends, sharp edges, and excessive lengths.
- Outdoor Route: Plan the outdoor conduit run to ensure it is protected from physical damage. The conduit must be buried at the proper depth, typically 18-24 inches underground.
Step 2: Install the 50-Amp Breaker
Turn Off Power
Before you begin working inside the main electrical panel, shut off power to the panel. This is crucial for your safety. Ensure that the breaker for the main electrical panel is in the off position, or shut off power from the utility source if necessary.
Install the Breaker
- Locate an Available Slot: Open the panel cover and find an available slot for the 50-amp double-pole breaker. Ensure the panel can support a 50-amp breaker based on its current load.
- Install the Breaker: Snap the 50-amp breaker into place. This breaker will occupy two adjacent slots because it is a double-pole breaker.
Prepare the Romex Wire
- Cut the Romex Wire: Measure and cut the required length of Romex 6-gauge wire to run from the breaker panel to the point where it will exit the building. Always add some extra length to allow for connections and adjustments.
- Strip the Romex: Use a wire stripper to remove about ¾ to 1 inch of insulation from the ends of the wires.
Connect to the Panel
- Attach Hot Wires: Connect the black and red (hot) wires to the breaker terminals. Make sure the screws are tightened securely.
- Connect Neutral and Ground: The white (neutral) wire connects to the neutral bus bar, and the bare copper or green ground wire connects to the grounding bus bar. Ensure these connections are secure and tidy.
Step 3: Run the Indoor Romex Wire
Route the Romex Wire
- Drill Holes: If necessary, drill holes through studs, joists, or walls to allow the Romex wire to be routed cleanly from the electrical panel to the exit point of the house.
- Secure the Wire: Use wire staples or clamps to secure the Romex wire to the framing. The wire should be snug but not so tight that it damages the insulation.
Transition to Outdoor Wiring
Once you reach the point where the wiring will exit the house, drill a hole large enough for the conduit to pass through. This will allow you to transition from indoor Romex wiring to outdoor THHN wiring.
Step 4: Outdoor Wiring with THHN Wires
Install PVC Conduit
- Plan the Conduit Route: Lay out the route for the PVC conduit from the exit point of the house to the GFCI disconnect and then to the hot tub. The conduit must be buried at least 18-24 inches deep (check local codes for exact depth requirements).
- Dig the Trench: Use a shovel or trenching tool to dig a trench along the planned conduit route. The trench should be deep enough to protect the conduit from damage.
- Assemble the Conduit: Cut the PVC conduit to length, using PVC glue to connect sections as needed. Ensure that there are no sharp bends that could make pulling the wires difficult. Use 90-degree elbows for smooth transitions between vertical and horizontal sections.
- Pull THHN Wires: Pull individual 6-gauge THHN wires through the conduit. Typically, you will need four wires:
- Black wire (hot 1)
- Red wire (hot 2)
- White wire (neutral)
- Green wire (ground)
Use wire lubricant if necessary to help the wires slide through the conduit without damage.
- Secure the Conduit: Use conduit straps and clamps to secure the conduit to walls or other surfaces along the route. The conduit should be firmly in place with no slack.
Step 5: Install the GFCI Disconnect Panel
Mount the GFCI Disconnect
The GFCI disconnect panel should be mounted on an exterior wall at least 5 feet from the hot tub but within sight of it.
- Secure the Panel: Use screws or anchors to mount the panel on the wall or a post. Ensure the panel is level and securely attached.
- Connect the Wires: Inside the disconnect panel, connect the THHN wires to the appropriate terminals:
- Black and Red (Hot Wires): Connect to the “Line” terminals.
- White (Neutral): Connect to the neutral terminal.
- Green (Ground): Connect to the ground terminal.
Make sure all connections are secure and that the panel cover is properly installed.
Step 6: Connect the Hot Tub
Wire the Hot Tub Control Panel
Inside the hot tub’s control panel, you will find terminals labeled for connection to the incoming electrical supply. The exact layout may vary by manufacturer, so consult your hot tub’s installation manual.
- Connect Hot Wires: Connect the black and red THHN wires to the Line 1 (L1) and Line 2 (L2) terminals inside the hot tub’s control panel.
- Connect Neutral: Attach the white neutral wire to the designated neutral terminal.
- Connect Ground: Attach the green ground wire to the grounding terminal.
Step 7: Final Checks and Testing
Inspect the Installation
Before you turn the power on, double-check all your work:
- Ensure that all connections are tight and secure.
- Verify that the conduit is securely fastened along its entire length.
- Make sure the wiring inside the disconnect panel and hot tub is correct and matches the manufacturer’s specifications.
- Ensure all covers are securely in place on the electrical panel, disconnect panel, and hot tub control panel.
Turn On the Power
- Restore Power: Turn on the power at the main electrical panel and then switch on the 50-amp breaker that supplies the hot tub.
- Test the GFCI Disconnect: Press the test button on the GFCI disconnect to ensure it trips and cuts off power. If the GFCI functions correctly, reset it.
- Test the Hot Tub: Turn on the hot tub and ensure that it powers up correctly. Follow the manufacturer’s instructions for setting up and testing the hot tub’s functions (such as jets, heater, and lights).
Conclusion
Successfully wiring a hot tub requires careful attention to detail, proper planning, and adherence to safety protocols. Using Romex 6/3 wire for the indoor portion and THHN 6-gauge wire for the outdoor portion inside a protective conduit ensures a safe and code-compliant installation. The critical elements of the installation involve correctly sizing and installing the breaker, running and protecting the wiring, and ensuring that GFCI protection is in place to safeguard against electrical shocks.
This guide provides a general overview, but you should always consult the specific installation instructions for your hot tub, follow local electrical codes, and seek professional help if you have any doubts or questions. Safety should be your top priority when dealing with high-voltage electrical installations.

