
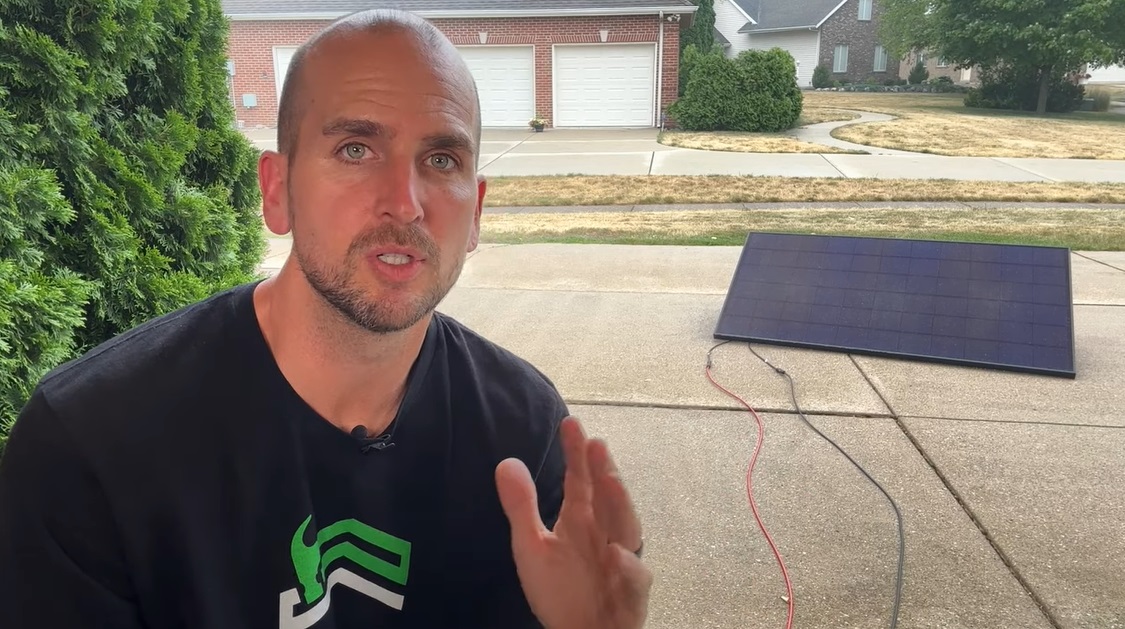
Sep 6, 2024
This is How to Add MC4 Connectors to Solar Wire (DIY Solar)
MC4 connectors are commonly used in solar panel systems to connect the panels to inverters, charge controllers, and other components. They are designed for use with solar wires, such as 10 AWG, which is a common size for residential solar installations. Here’s a step-by-step guide on how to properly attach MC4 connectors (both male and female) to 10 AWG solar wire, followed by instructions on how to release them using a release tool.
0:35 – Tools needed
1:00 – Stripping solar cable insulation
2:00 – Crimping wire to terminal
3:30 – Assemble MC4 connector onto wire
4:50 – Repeat crimp for male end
5:20 – Release tool to disassemble
How to Attach MC4 Connectors to 10 AWG Solar Wire
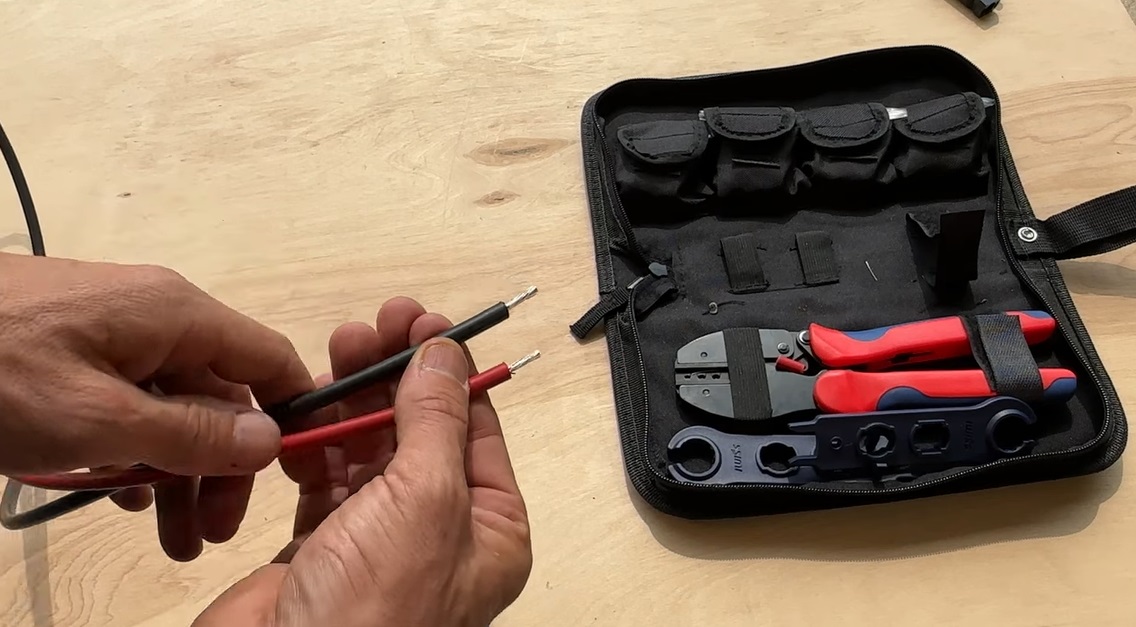
Tools and Materials Needed:
- MC4 Connectors (Male and Female)
- 10 AWG Solar Wire
- Wire Stripper
- Crimping Tool (specific for MC4 connectors)
- Multimeter (optional, for testing)
- MC4 Release Tool (for disassembly)
- Heat Shrink Tubing (optional, for extra protection)
Step 1: Preparation
1. Understand the MC4 Connector Parts
- The male connector has a pin inside.
- The female connector has a socket.
- Each connector has several parts:
- Connector Housing (Male or Female)
- Metal Crimp Terminal (Pin for male, socket for female)
- Cable Clamp Nut (This holds the wire securely)
- Sealing Gasket (Ensures waterproofing)
2. Prepare the Wire
- Start by cutting your 10 AWG solar wire to the desired length.
- Strip the insulation from the end of the wire:
- Use a wire stripper and remove about 6-8 mm (about 1/4 inch) of insulation.
- Be careful not to cut the wire strands underneath.
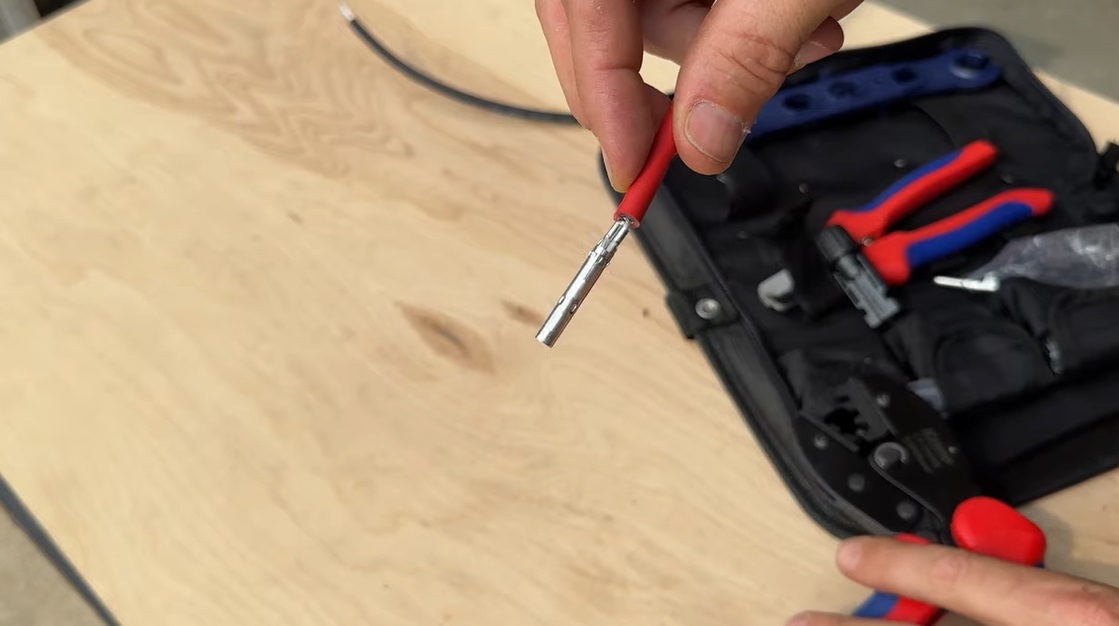
Step 2: Crimping the Metal Terminal
1. Insert Wire into the Metal Terminal
- After stripping the wire, insert the exposed strands into the metal crimp terminal (pin for male connectors, socket for female connectors).
- Ensure the wire strands are neatly packed into the terminal with no fraying.
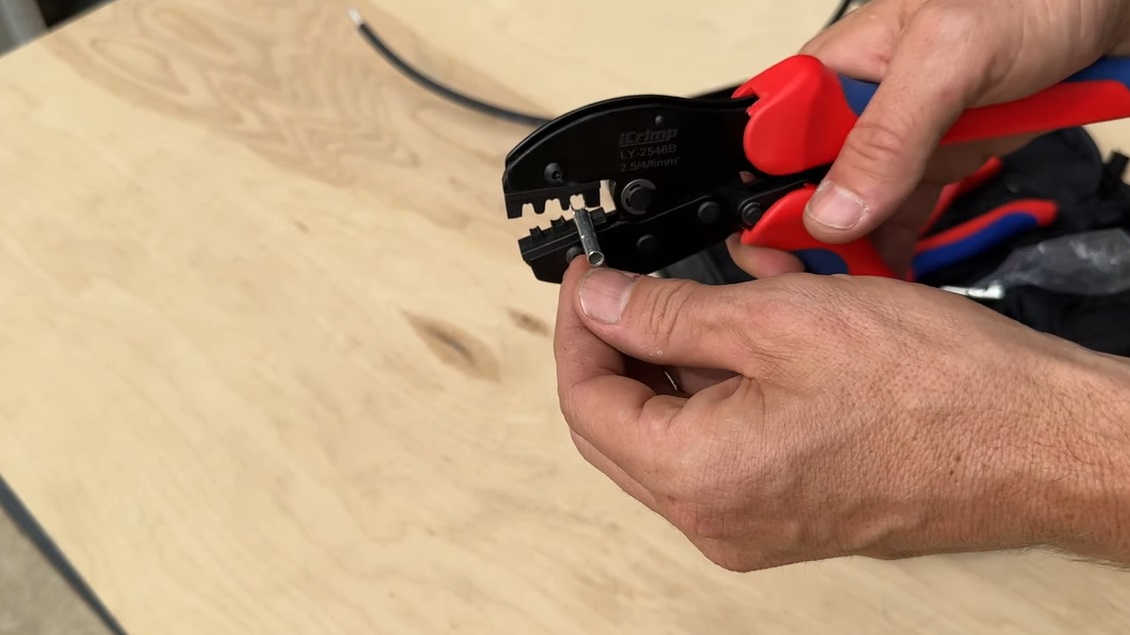
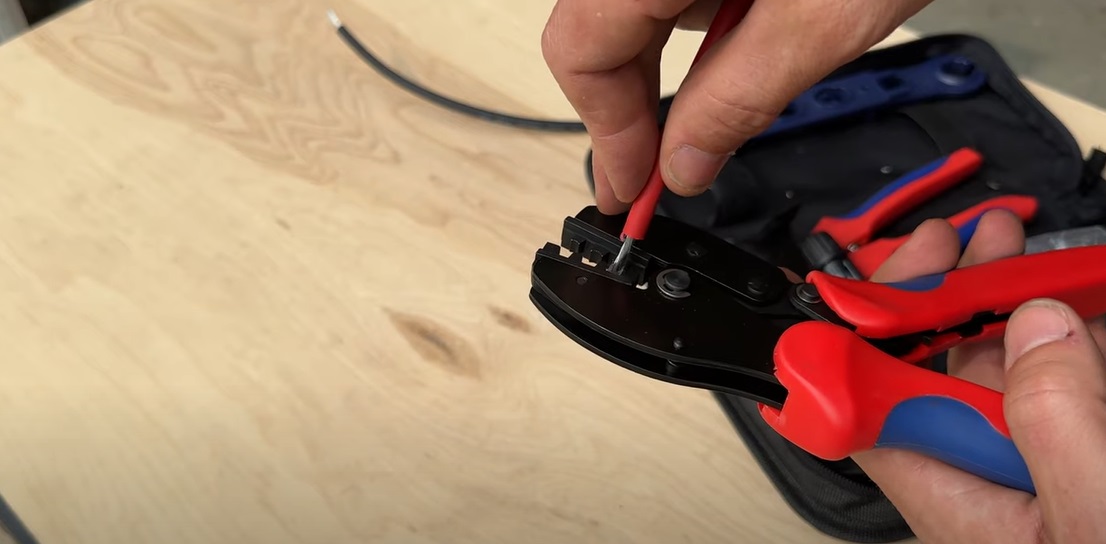
2. Crimp the Terminal
- Using a crimping tool specific for MC4 connectors, place the terminal into the tool.
- Ensure the terminal is seated properly in the crimping tool.
- Squeeze the crimping tool until the terminal is securely crimped onto the wire.
- Double-check the crimp to make sure the wire is firmly attached without any loose strands.
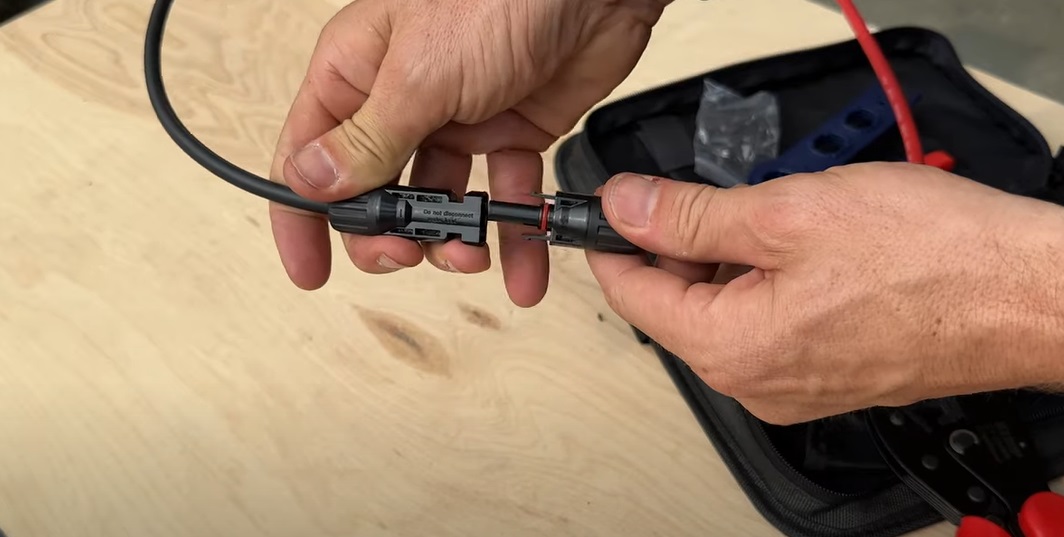
Step 3: Assemble the MC4 Connector
1. Insert the Crimped Terminal into the Connector Housing
- Slide the crimped terminal (pin or socket) into the connector housing.
- For the male connector, insert the male pin into the male housing.
- For the female connector, insert the socket terminal into the female housing.
- Push the terminal until you hear a “click.” This ensures it is locked in place by the internal locking mechanism.

2. Seal the Connector
- Slide the sealing gasket over the end of the wire if it’s not already part of the connector.
- Thread the cable clamp nut onto the back of the connector housing.
- Hand-tighten it to secure the wire and ensure a waterproof connection.
Step 4: Test the Connection
Before using the MC4 connectors, it’s a good idea to test the connection to ensure it was done correctly.
- Use a multimeter to test for continuity:
- Connect one end of the multimeter probe to the bare end of the wire and the other to the MC4 terminal.
- A good connection will show continuity, indicating that electricity can flow through the wire and connector.
- Inspect the assembly:
- Check for proper seating of the crimped terminal.
- Ensure the cable clamp nut is secure and the sealing gasket is properly placed for waterproofing.
Step 5: Attaching the Opposite Connector
Once you’ve attached the male connector to one end of the wire, repeat the process for the female connector on the opposite end.
- Female MC4 connector:
- Insert the stripped 10 AWG wire into the socket terminal.
- Crimp the socket terminal using the MC4 crimping tool.
- Slide the crimped socket terminal into the female housing until it clicks.
- Tighten the cable clamp nut to secure the wire and ensure waterproofing.
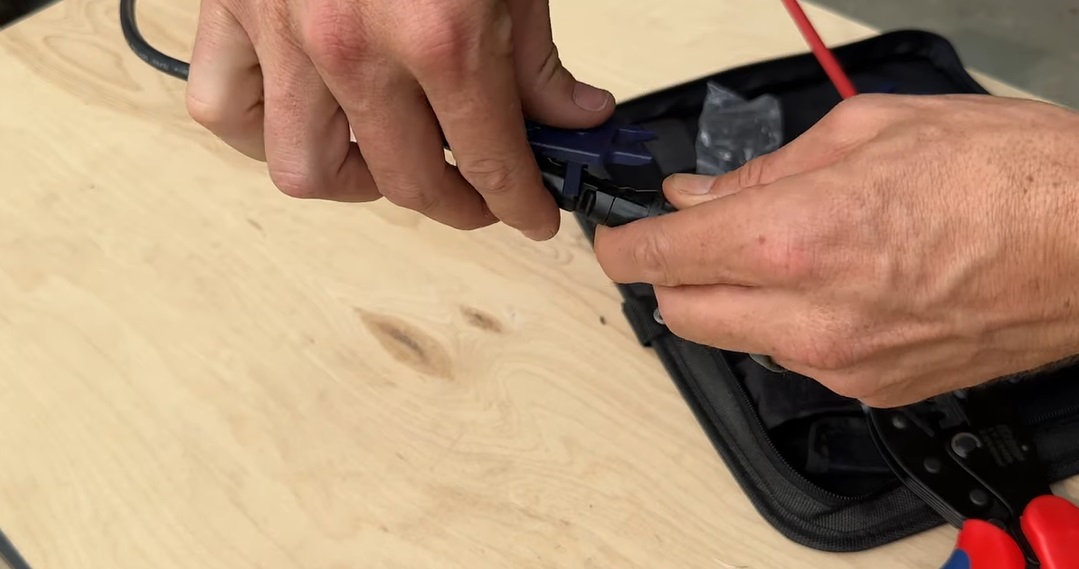
How to Disconnect MC4 Connectors Using a Release Tool
MC4 connectors are designed to be secure and weatherproof, which makes them difficult to disconnect without the proper tools. You’ll need a MC4 release tool to safely disengage them without damaging the connector or wire.
1. Identify the Locking Tabs
- Both male and female MC4 connectors have locking tabs on the side of the connector housing.
- These tabs click into place when the connectors are joined, ensuring a secure connection.
2. Insert the MC4 Release Tool
- Take the release tool, which looks like a small pair of plastic or metal “keys” with two prongs.
- Align the prongs of the release tool with the grooves on either side of the MC4 connector housing.
3. Disengage the Locking Mechanism
- Insert the release tool into the side grooves of the MC4 connector.
- The prongs will press down on the locking tabs, releasing the lock.
- Once the locking tabs are disengaged, pull the connectors apart with a firm, steady pull.
4. Inspect the Connectors
- After disconnecting, inspect the male and female connectors for damage or wear.
- If the connectors are still in good condition, you can reassemble or store them for later use.
Common Mistakes and Tips
- Ensure Proper Crimping:
- A poor crimp can result in loose connections or high resistance, potentially leading to power loss or overheating.
- Always double-check that the terminal is securely crimped to the wire.
- Avoid Over-stripping the Wire:
- If you strip too much insulation, the bare wire will be exposed outside the connector, which can lead to electrical shorts or water ingress.
- Strip only the necessary length of insulation, typically around 6-8 mm.
- Waterproofing is Critical:
- The sealing gasket and clamp nut are designed to provide waterproofing. Ensure they are properly installed to protect against moisture, which could cause corrosion or short circuits.
- Use the Correct Tools:
- Using the wrong crimping tool or release tool can damage the connectors. Ensure you’re using tools specifically designed for MC4 connectors.
- Test Before Installation:
- After crimping and assembling the connectors, always test for continuity to verify the electrical connection.
Additional Information
- MC4 connectors are designed for outdoor use and can withstand UV radiation, moisture, and temperature changes. However, proper installation and assembly are crucial for maintaining long-term reliability in harsh environments.
- When working with solar power systems, always observe safety precautions:
- Wear proper PPE (personal protective equipment).
- Be aware of the potential for high voltage in larger solar systems.
- Disconnect power from the system before working with live wires or connectors.
Conclusion
By following the steps outlined above, you can confidently attach both male and female MC4 connectors to 10 AWG solar wire and disconnect them safely using the MC4 release tool. These connectors play a vital role in solar power systems, providing secure, reliable, and weatherproof electrical connections between solar panels and other components. Proper installation ensures optimal system performance and longevity.


