
Sep 2, 2024
How to Prepare Copper MC Cable (Cutting, Terminating & Support)
Here’s a comprehensive guide on how to cut, remove the aluminum sheath, terminate an MC (Metal-Clad) cable, and install it with proper support. This guide is designed for electricians and other professionals working with MC cables, ensuring compliance with the National Electrical Code (NEC) and best practices for safety and durability.
0:40 – Cutting MC Cable
1:27 – Removing sheath
3:14 – Termination
4:55 – Cable support
6:15 – Installation demonstration
1. Introduction to MC Cable
What is MC Cable?
Metal-Clad (MC) cable is a type of electrical cable that has an aluminum or steel protective sheath, making it suitable for various applications, including industrial, commercial, and residential settings. MC cables are popular because they offer robust protection against physical damage, are flame-retardant, and can be used in both dry and wet locations.
Common Uses of MC Cable
- Commercial Buildings: Used in walls, ceilings, and conduits.
- Industrial Settings: Installed in areas requiring enhanced protection against damage.
- Residential Construction: Ideal for wiring in basements, garages, and attics.
Tools and Materials Needed
- MC Cable Cutter (or standard cable cutter)
- Cable Strippers
- Needle-nose Pliers
- Side-cutting Pliers
- Electrical Tape
- Anti-short Bushings (Redheads)
- Screwdriver (Flathead or Phillips)
- MC Cable Connectors
- Cable Supports (Straps, Clamps, etc.)
- Conduit Bender (if needed)
2. Cutting and Removing the Aluminum Sheath
Step 1: Measure and Mark
- Measure the Required Length:
- Determine the length of MC cable needed for your installation. Measure and mark the cable using a marker or tape at the point where you intend to cut.
- Mark the Sheath:
- Mark where you will cut the aluminum sheath, allowing extra length (usually about 6 inches) for making connections in junction boxes or devices.
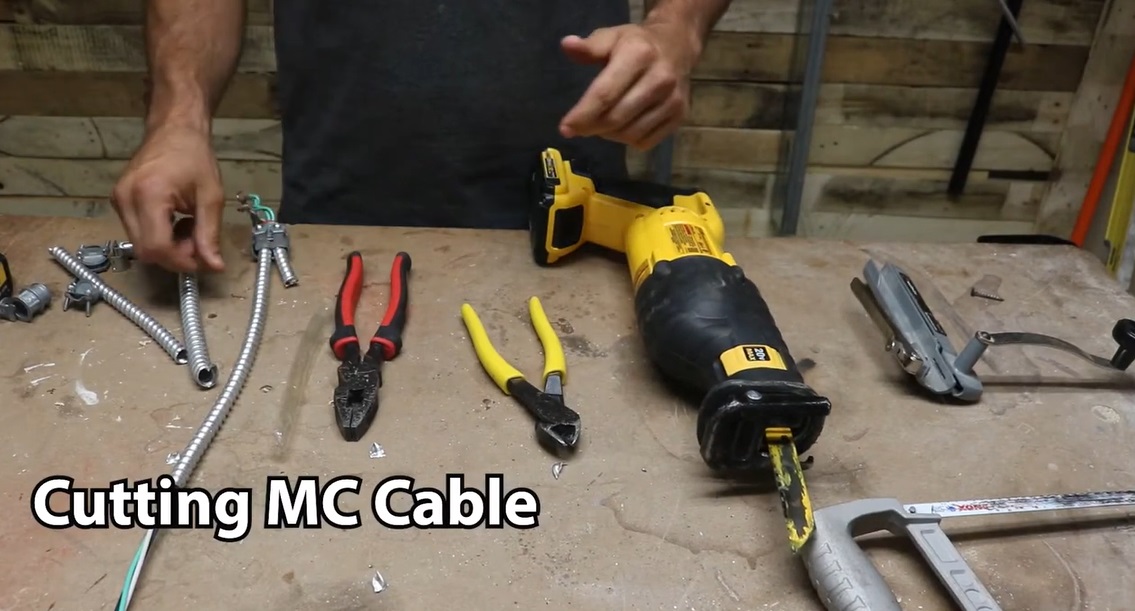
Step 2: Cutting the MC Cable
- Position the MC Cable Cutter:
- Place the MC cable cutter around the cable at the marked spot. If using a standard cable cutter, ensure the cutting edge is aligned with the mark.
- Make the Cut:
- Rotate the cutter around the cable, applying consistent pressure until the sheath and internal wires are cut through. For standard cable cutters, use a sawing motion while carefully rotating the cable.
- Check the Cut:
- Ensure that the cut is clean and even, without damaging the internal conductors. If the cut is not clean, trim off any burrs or jagged edges with side-cutting pliers.
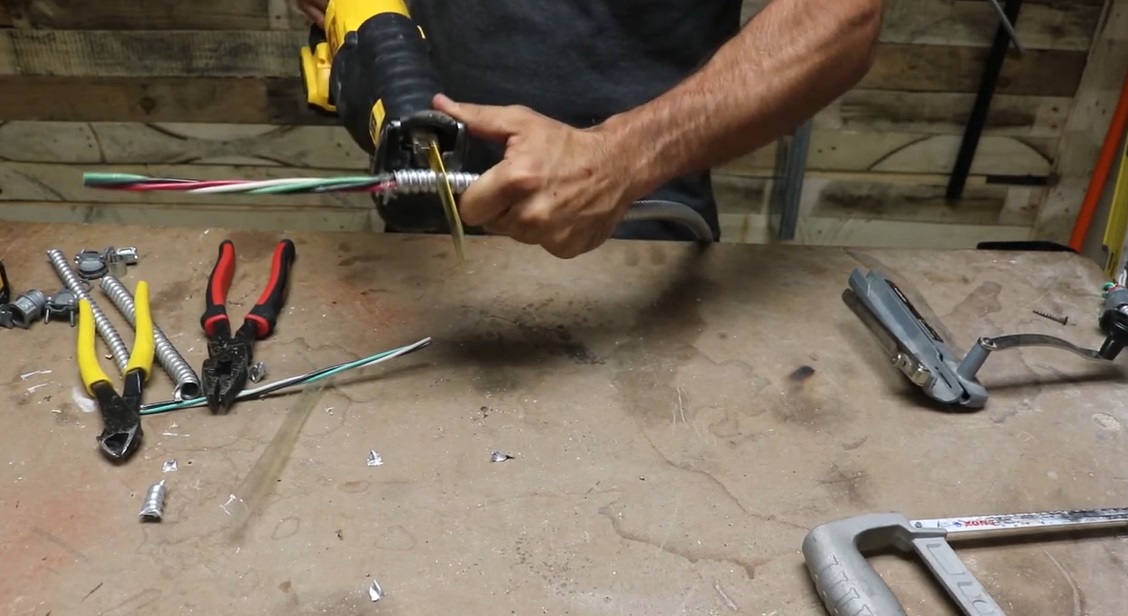
Step 3: Removing the Aluminum Sheath
- Score the Sheath (if necessary):
- If the sheath is difficult to remove, score it lightly with a utility knife. Do not cut too deeply to avoid damaging the conductors.
- Remove the Sheath:
- Carefully bend and twist the cable where you made the cut to loosen the sheath. Once loosened, you can slide it off to expose the conductors.
- Inspect the Conductors:
- After removing the sheath, inspect the conductors for any nicks or damage. If damaged, cut back the cable and start over.
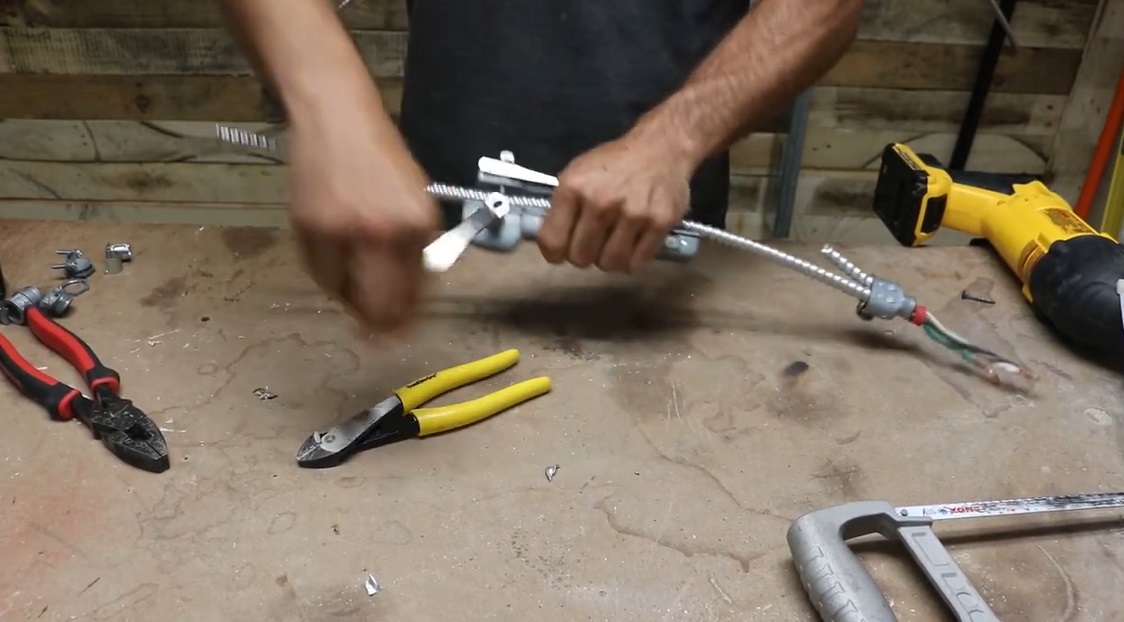
Step 4: Apply an Anti-short Bushing
- Select the Correct Size:
- Choose an anti-short bushing (commonly called a “redhead”) that fits snugly inside the cut end of the aluminum sheath. These bushings protect the conductors from sharp edges.
- Install the Bushing:
- Insert the anti-short bushing into the end of the sheath, ensuring it covers the sharp edges completely. This step is critical to prevent insulation damage and potential electrical faults.
3. Terminating the MC Cable
Step 1: Strip the Conductors
- Select the Right Tool:
- Use a cable stripper designed for the wire gauge of the conductors in the MC cable. Most MC cables contain copper conductors, but always verify the material and gauge.
- Strip the Insulation:
- Remove about 3/4 inch to 1 inch of insulation from the end of each conductor. Be careful not to nick or cut into the copper strands, as this can weaken the wire and cause electrical issues.
Step 2: Prepare for Termination
- Arrange the Conductors:
- Position the conductors neatly, ready for insertion into the device or junction box. Ensure the conductors are straight and free of twists or kinks.
- Apply Wire Nuts or Connectors:
- Depending on your application, either twist the conductors together using wire nuts or insert them into an MC cable connector. Make sure connections are secure and conductors are fully inserted.
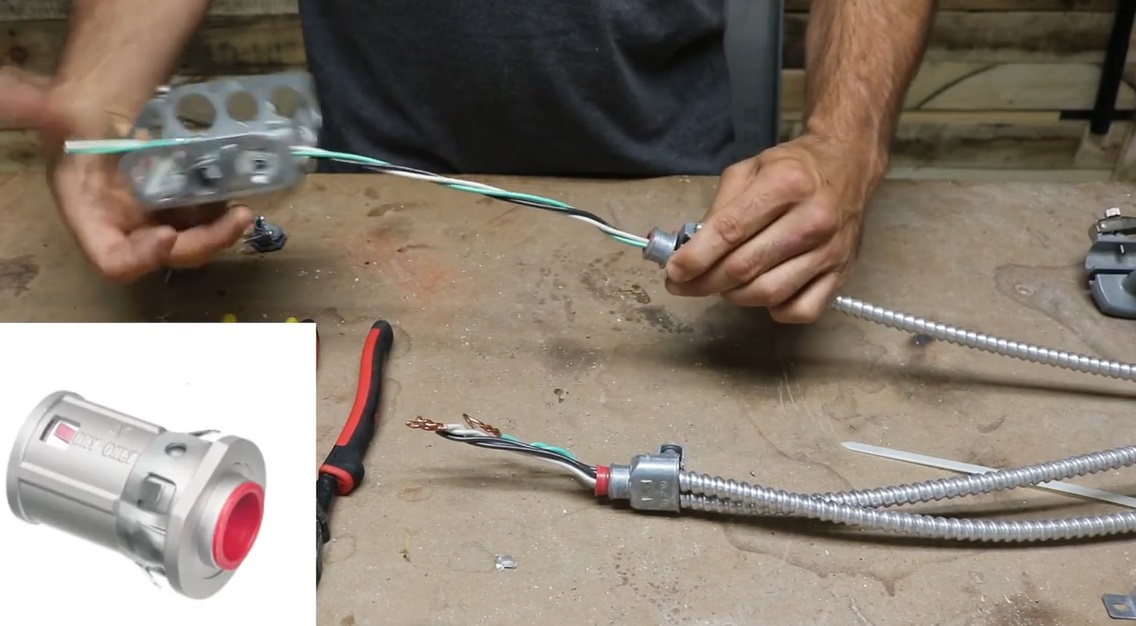
Step 3: Attach the MC Cable Connector
- Select the Connector:
- Choose an MC cable connector that fits the diameter of your cable. The connector should securely grip the aluminum sheath without crushing it.
- Attach the Connector:
- Slide the connector onto the end of the MC cable, ensuring it grips the sheath firmly. Tighten the screws or clamp to secure the connector to the sheath.
- Connect to the Device or Box:
- Insert the connector into the knockout hole of the junction box or device. Secure it in place using the provided locknut or screws.
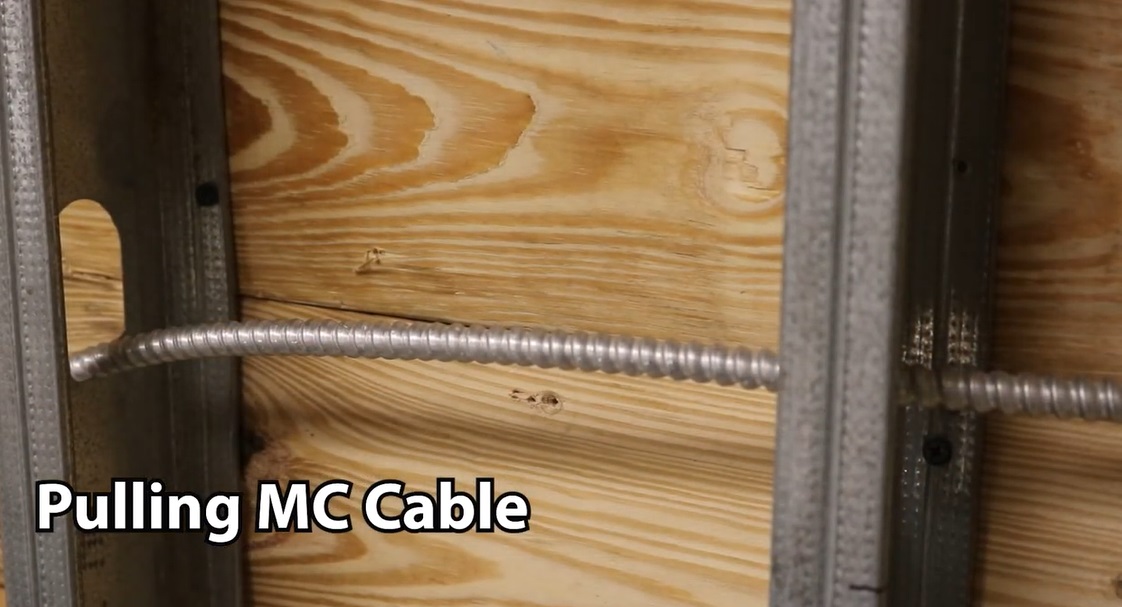
4. Installing the MC Cable with Support
Step 1: Plan the Installation Path
- Determine the Route:
- Plan the route of the MC cable from the power source to the destination. Ensure the path is clear of obstacles and sharp edges that could damage the cable.
- Check Code Requirements:
- Verify the NEC and local building codes for the proper installation of MC cables, including support spacing, bend radius, and protection in hazardous areas.
Step 2: Secure the MC Cable
- Install Cable Supports:
- Support the MC cable at intervals specified by the NEC, typically every 6 feet for horizontal runs and within 12 inches of each termination point. Use appropriate cable supports, such as straps, clamps, or hangers.
- Bend the Cable (if necessary):
- If the cable route requires bends, use a conduit bender or carefully hand-bend the cable to the desired angle. Avoid sharp bends that exceed the minimum bend radius.
- Attach the Cable to Supports:
- Secure the MC cable to the supports using screws or nails, ensuring the cable is held firmly in place without compressing the sheath. Check that the cable is not loose or sagging.
Step 3: Protect the Cable (if necessary)
- Install Conduit or Guard Strips:
- If the MC cable is exposed to potential damage, install conduit or guard strips over the cable to provide additional protection. This is especially important in areas where the cable might be struck by tools, vehicles, or other objects.
- Install Fire-Resistant Sleeves:
- In fire-rated assemblies, install fire-resistant sleeves or insulation around the MC cable to maintain the integrity of the fire barrier.
Step 4: Perform a Final Inspection
- Check Connections:
- Inspect all terminations to ensure they are tight and secure. Loose connections can lead to overheating or arcing.
- Verify Support Spacing:
- Confirm that the MC cable is properly supported along its entire length, with no sections exceeding the maximum allowed spacing between supports.
- Test the Installation:
- If applicable, test the circuit to ensure that the wiring is correct and the MC cable is functioning as expected. Use a voltage tester or multimeter to verify.
5. Conclusion
Installing MC cable involves several crucial steps, including cutting, removing the aluminum sheath, terminating the conductors, and properly securing the cable in place. Following these steps ensures that your installation is safe, reliable, and compliant with the NEC and local building codes.
Always prioritize safety when working with electrical components. Use appropriate personal protective equipment (PPE), double-check your work, and consult the latest NEC standards or a licensed electrician if you have any doubts or questions. Proper installation of MC cable not only protects the electrical system but also helps prevent potential hazards like short circuits, fires, and equipment damage.
This guide should cover all aspects of MC cable installation. Remember that experience and practice will improve your efficiency and skill in handling these tasks.


