
Sep 12, 2024
7 Steps to Install a Generator Hook-Up With SOOW Portable Cord
When installing a generator hookup, particularly using SOOW portable cords, you are setting up a crucial system that provides temporary, flexible power distribution for various electrical needs. SOOW (Service Oil-Resistant Oil-Resistant Water-Resistant) cords are a popular choice for such installations due to their ruggedness, flexibility, and suitability for outdoor or industrial environments. This guide will walk you through the process of installing a generator hookup using SOOW cable, with a focus on safety, proper materials, and a step-by-step approach to ensure success.
Table of Contents
- Understanding Generator Hookups
- Why Use SOOW Cables?
- Materials Required
- Tools Required
- Safety Precautions
- Installation Process
- 6.1 Assessing Your Generator Requirements
- 6.2 Sizing the SOOW Cable and Generator
- 6.3 Installing the Transfer Switch
- 6.4 Running the SOOW Cable from Generator to Transfer Switch
- 6.5 Wiring the Generator to the Transfer Switch
- 6.6 Grounding Considerations
- 6.7 Testing the Installation
- Maintaining Your Generator Hookup System
- Common Mistakes to Avoid
- Conclusion
1. Understanding Generator Hookups
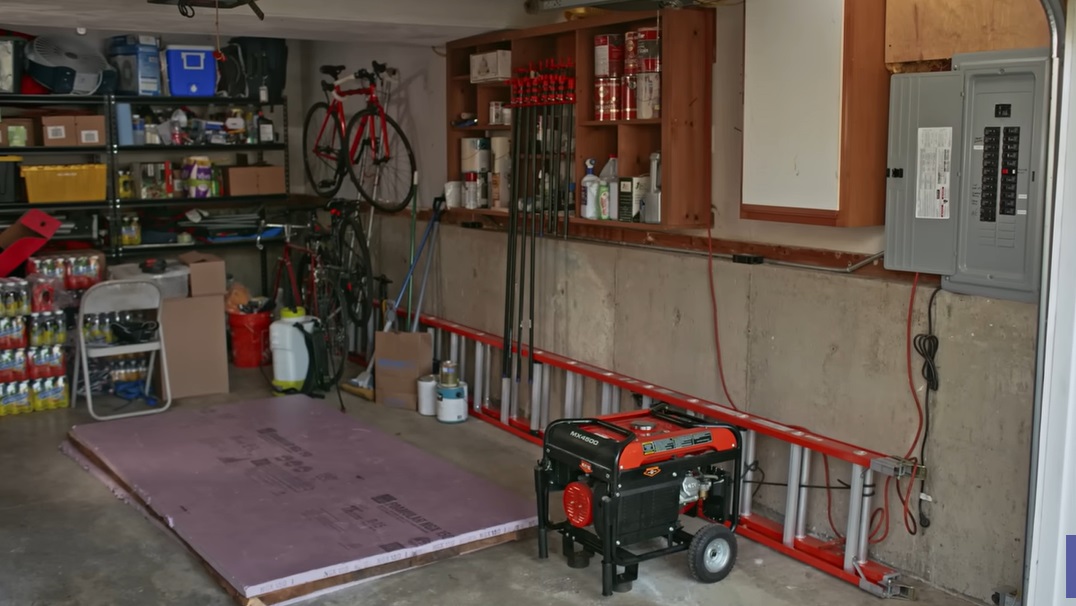
A generator hookup system allows you to connect a portable or standby generator to your home or business electrical panel, providing power during an outage. This can be done either manually using extension cords or, for a more professional and permanent setup, through a transfer switch connected to your electrical panel.
For a safe, code-compliant installation, the generator setup typically involves:
- Generator: The source of power.
- Transfer Switch: The intermediary device that allows you to safely switch from utility power to generator power.
- Power Inlet Box: For external generator connections.
- SOOW Cables: Flexible and durable cables that connect the generator to the transfer switch or inlet box.
2. Why Use SOOW Cables?
SOOW cables are an excellent choice for generator hookups due to their flexibility, durability, and resistance to weathering. SOOW stands for:
- Service: General utility cord.
- Oil-resistant insulation: Suitable for environments where the cable might be exposed to oil or other substances.
- Oil-resistant jacket: Enhances durability.
- Water-resistant: Can withstand exposure to moisture and even submersion, making it ideal for outdoor use.
In addition, SOOW cables are rated for 600 volts and can handle temperatures ranging from -40°C to 90°C, making them highly reliable for generator hookups that may be used in extreme environments.
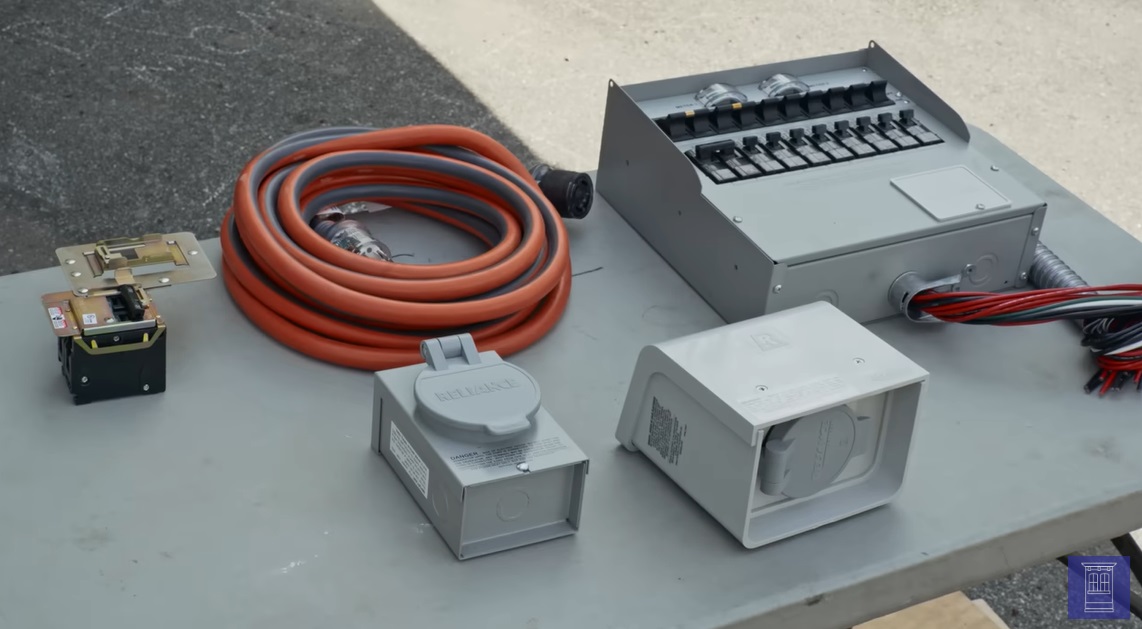
3. Materials Required
Before starting the installation, make sure you have the following materials:
- Generator (sized according to your electrical needs)
- SOOW Portable Cord (length and gauge sized according to generator output and distance)
- Transfer Switch (manual or automatic depending on your setup)
- Power Inlet Box (for an external connection)
- Circuit Breakers (appropriately sized for your generator and electrical panel)
- Wire connectors and terminals
- Electrical tape and zip ties (for securing the wires)
- Grounding rods and wires (if needed for grounding)
4. Tools Required
For the installation, you’ll need the following tools:
- Wire strippers: For removing insulation from wires.
- Cable cutters: For cutting SOOW cord to the required lengths.
- Screwdrivers: For securing electrical connections.
- Drill: To make holes for mounting the power inlet box and routing cables.
- Multimeter: To test voltage and continuity.
- Crimping tool: For attaching lugs and connectors to wires.
- Safety gear: Gloves, safety goggles, and a voltage tester to ensure safety throughout the installation.
5. Safety Precautions
Electricity is dangerous. Always follow these precautions:
- Turn off power: Before working on any electrical system, shut off power at the main breaker.
- Follow local codes: Ensure your installation complies with local electrical codes. If you’re unfamiliar with these codes, it’s always best to consult or hire a licensed electrician.
- Proper PPE: Wear appropriate personal protective equipment (PPE) such as insulated gloves and safety goggles.
- Grounding: Ensure that your generator is properly grounded to avoid any electrocution hazards.
6. Installation Process
6.1 Assessing Your Generator Requirements
Determine how much power your home or facility will require during an outage. You need to assess which circuits or appliances are critical and will be powered by the generator.
Example load list:
- Refrigerator: 600W
- Water Heater: 4500W
- Lights: 300W
- HVAC system: 3500W
The total load will guide the size of the generator you need.
6.2 Sizing the SOOW Cable and Generator
The size (gauge) of the SOOW cable depends on the amperage and distance between the generator and the transfer switch. Use a voltage drop calculator to ensure the cable size is sufficient to prevent power loss.
- Common Wire Gauges:
- 10 AWG: Up to 30 amps
- 8 AWG: Up to 40 amps
- 6 AWG: Up to 50 amps
For most residential generators, an 8 or 10-gauge SOOW cable will suffice, but larger installations may require heavier wire.
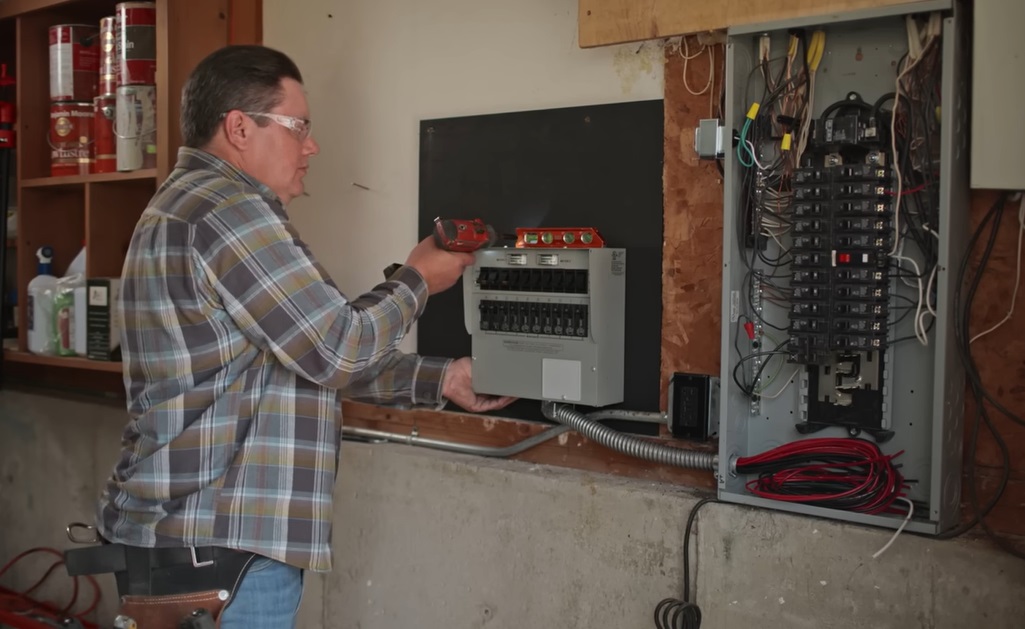
6.3 Installing the Transfer Switch
- Select Location: Mount the transfer switch near your main electrical panel. Ensure it’s easily accessible and rated for your generator’s capacity.
- Turn off power: Switch off power at the main panel.
- Wiring the Transfer Switch: Run wires from the transfer switch to the circuits in your breaker panel that will be powered by the generator. Follow the manufacturer’s instructions for connecting the individual wires to the correct breakers.
- Label circuits: Mark the circuits that are connected to the transfer switch, so you know which ones will be powered during an outage.
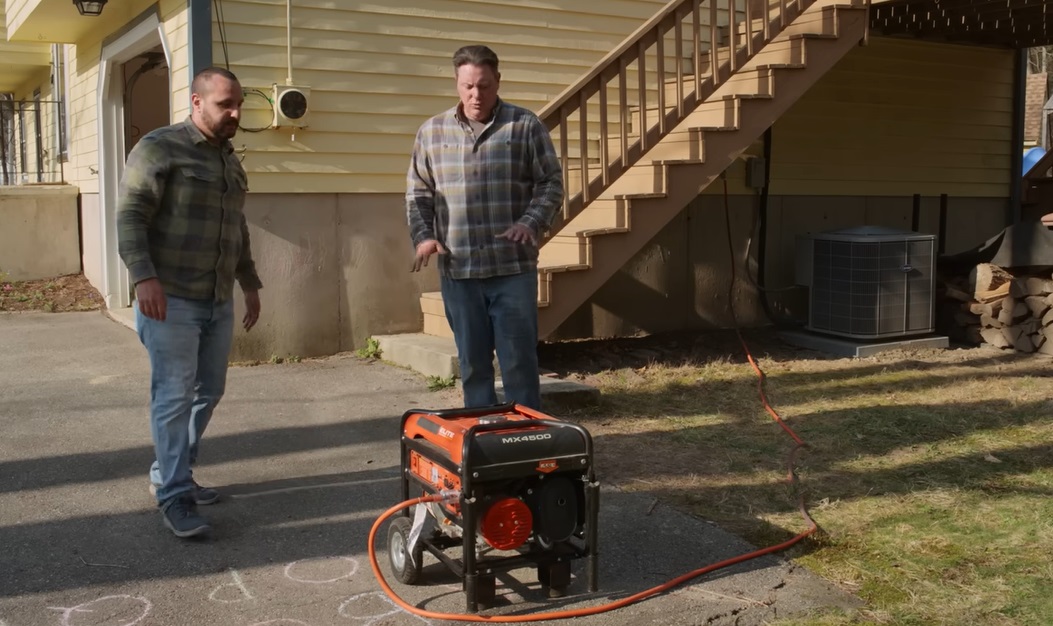
6.4 Running the SOOW Cable from Generator to Transfer Switch
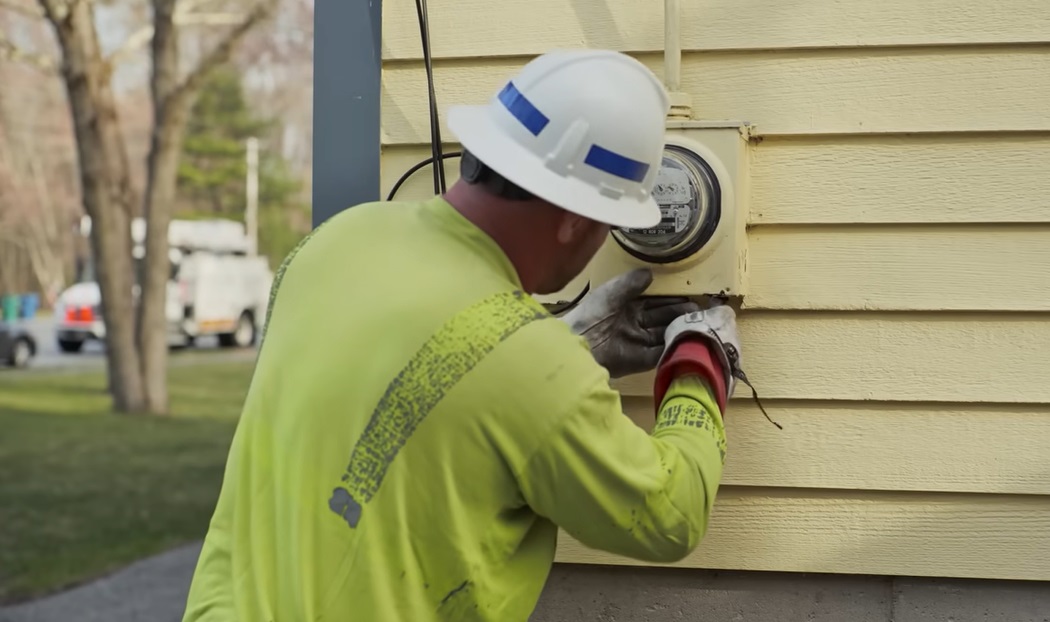
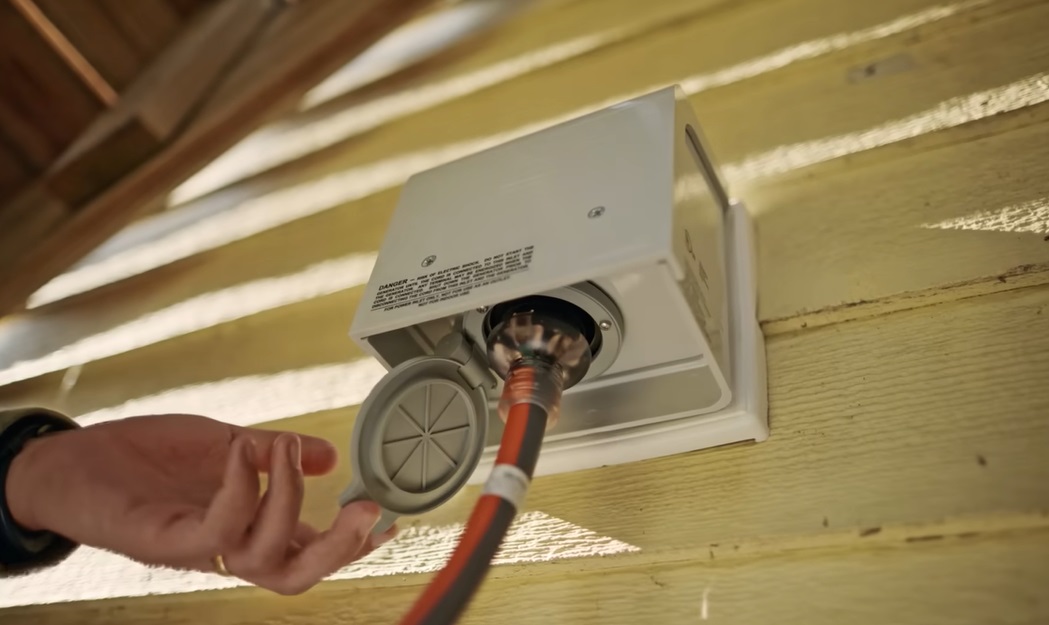
- Install the Power Inlet Box: Mount the power inlet box on the exterior of your house. This is where you’ll plug in the SOOW cable from the generator.
- Route the SOOW Cord: Measure and cut your SOOW cable to the appropriate length. The cord should be long enough to reach from the generator to the power inlet box without tension.
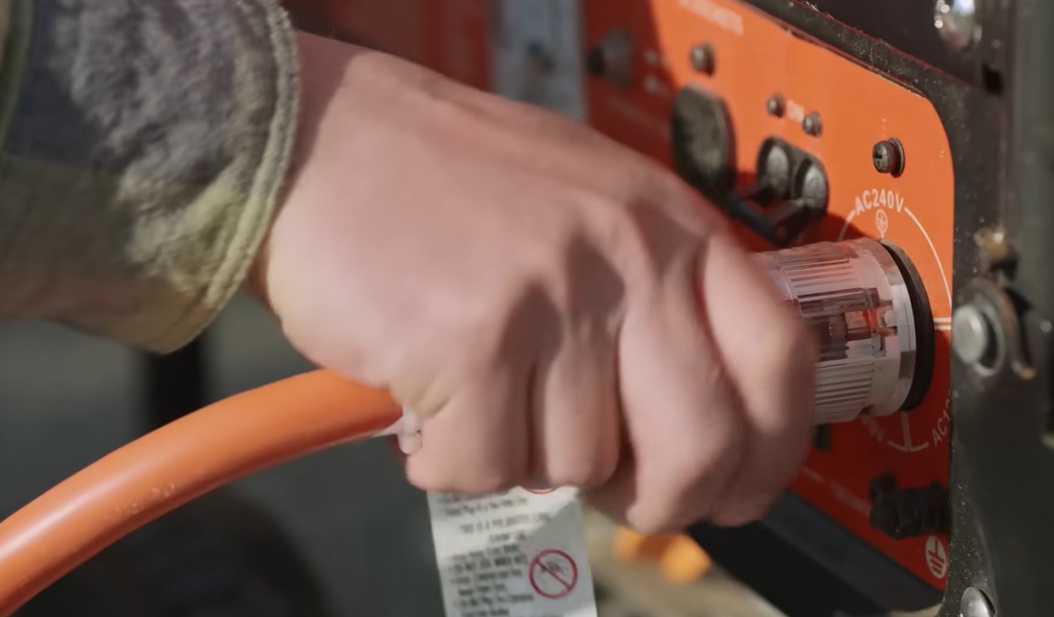
- Connect the SOOW Cable to the Generator: Strip the ends of the SOOW cable and attach the appropriate connectors or lugs. Typically, SOOW cords have four conductors: black (hot), red (hot), white (neutral), and green (ground). Secure the connections to the generator’s output terminals.
- Connect the SOOW Cable to the Power Inlet Box: Strip the other end of the SOOW cable and connect the conductors to the power inlet box according to the manufacturer’s wiring diagram.
6.5 Wiring the Generator to the Transfer Switch
Once the SOOW cord is connected to the power inlet box, run the appropriate wiring from the inlet box to the transfer switch. Ensure all connections are properly secured and insulated.
- Connect the hot, neutral, and ground wires to the appropriate terminals in the transfer switch.
- Install appropriate breakers: Install breakers for the generator in the transfer switch as per your local codes and generator specifications.
6.6 Grounding Considerations
Grounding is critical for safety. Ensure that your generator is properly grounded according to both the generator’s manual and local electrical codes.
- Grounding rod: If your generator is not grounded through your house’s electrical system, drive a grounding rod into the earth near the generator and connect it using a copper wire.
6.7 Testing the Installation
- Test continuity: Before turning anything on, use a multimeter to test for continuity and ensure all connections are secure.
- Power up the generator: Start the generator and flip the transfer switch. Use a multimeter to verify voltage at the power inlet box and transfer switch.
- Check individual circuits: Switch on each circuit in the transfer switch one by one, ensuring they receive power from the generator.
7. Maintaining Your Generator Hookup System
- Regular Testing: Test the system periodically to ensure everything is functioning as expected.
- Inspect SOOW Cord: Look for any signs of wear, fraying, or damage on the SOOW cord. Replace it if necessary.
- Backup Fuel: Keep fuel for your generator stored safely and rotated to prevent it from going stale.
8. Common Mistakes to Avoid
- Undersizing the generator: Make sure your generator can handle the full load of the circuits you plan to power.
- Using the wrong gauge wire: Avoid voltage drop and overheating by using the correct wire gauge.
- Ignoring grounding: Proper grounding is essential for safety and avoiding damage to your generator or electrical system.

9. Conclusion
Installing a generator hookup using SOOW portable cord ensures a flexible and durable setup for temporary or emergency power. This process involves understanding your power requirements, carefully selecting materials, and following proper safety protocols to ensure a safe and efficient system. If you’re ever unsure, consult a licensed electrician to help guide the process and ensure your installation complies with local regulations. With proper installation, testing, and maintenance, your generator hookup will provide reliable power whenever it’s needed.


