Sep 4, 2024
5 Things to Consider When Wiring a Car Audio System
Car audio wiring can significantly impact the performance, reliability, and safety of your car’s sound system. Proper electrical wiring ensures that your audio components function optimally, delivering high-quality sound without interference, power loss, or risk of damage. Here are some detailed dos and don’ts to consider when wiring a car audio system.
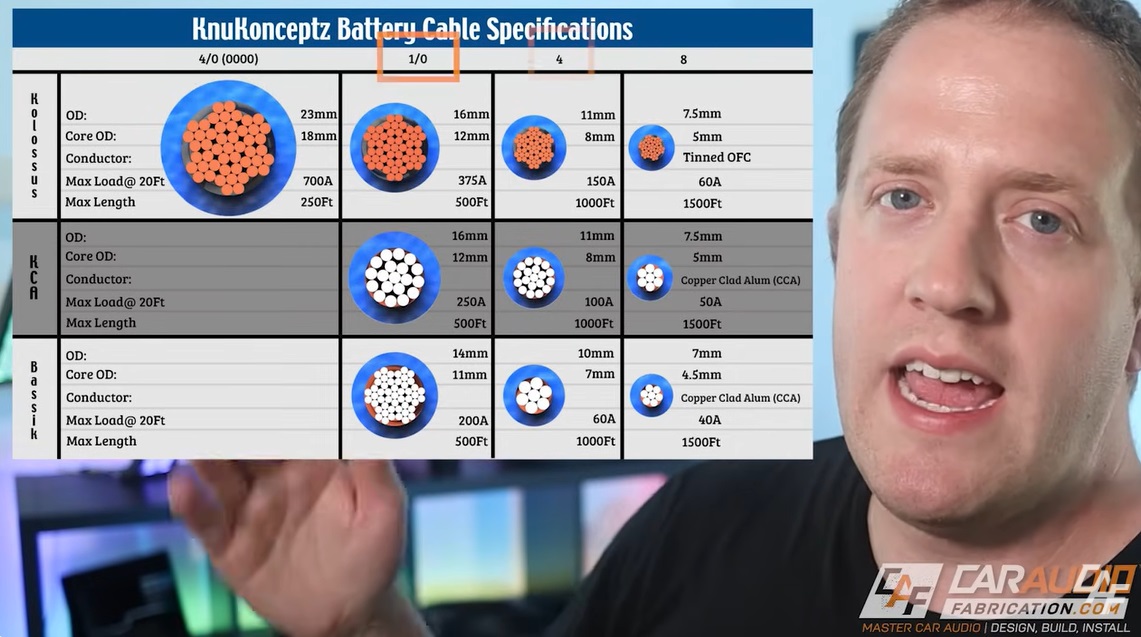
0:35 – Gauge Size (AWG)
1:15 – CCA vs OFC Cables
2:13 – Copper vs Aluminum voltage drop
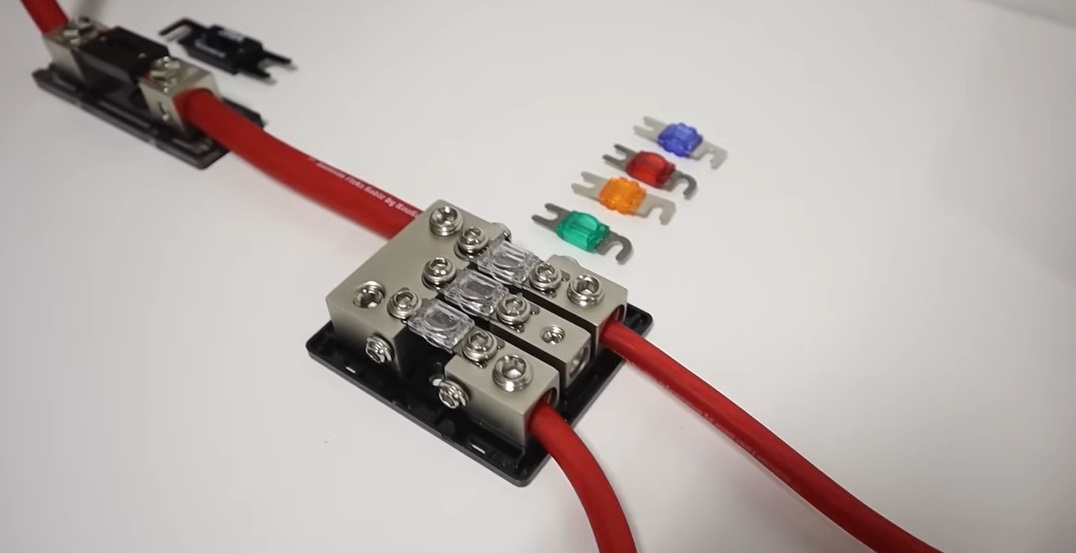
4:22 – How to properly infuse
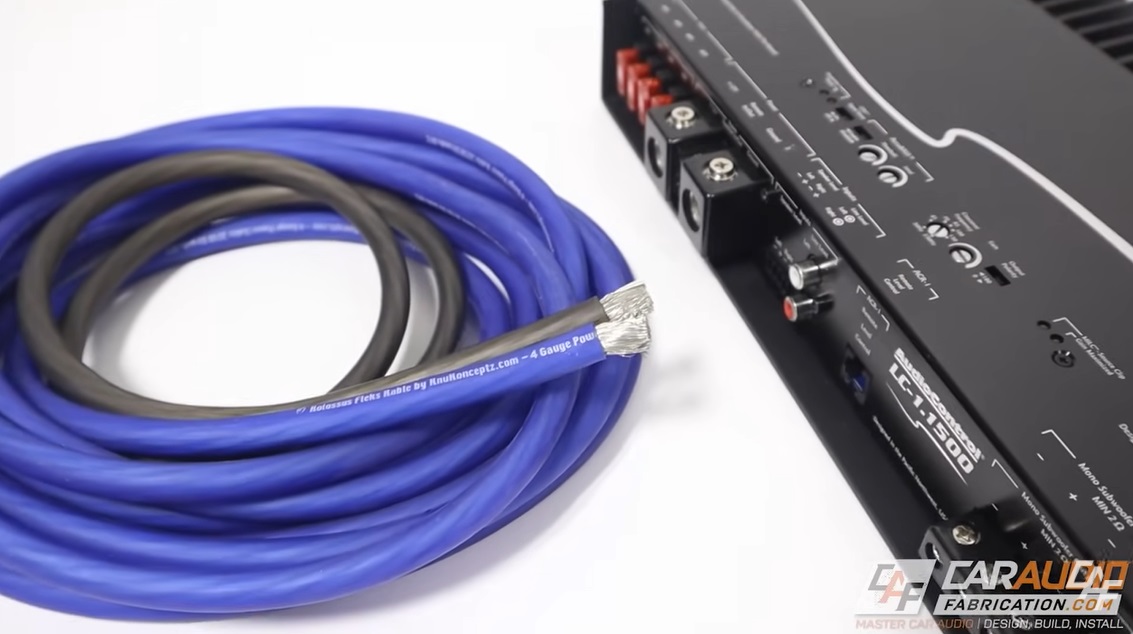
4:40 – Don’t use THHN wire (use flexible cables)
5:06 – Car audio wire insulation has high/low temperature ranges
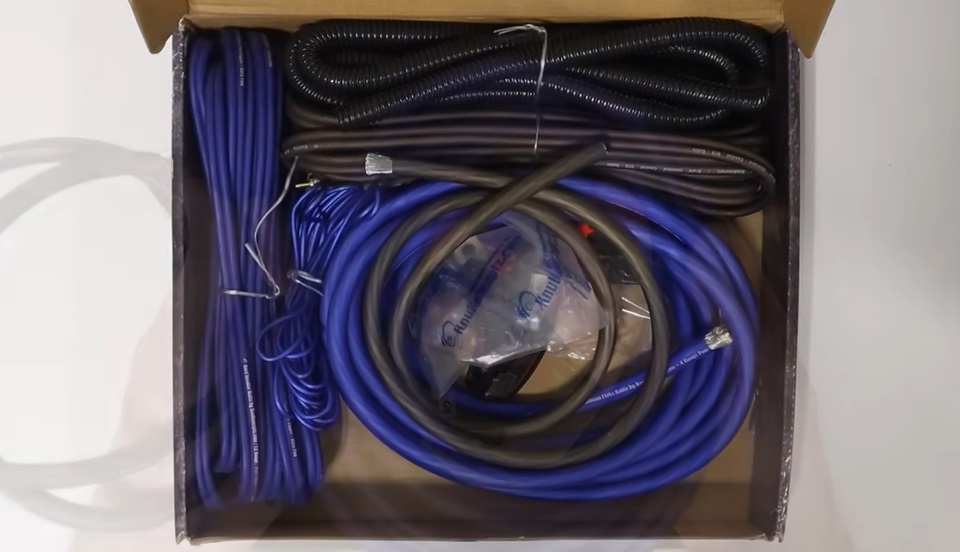
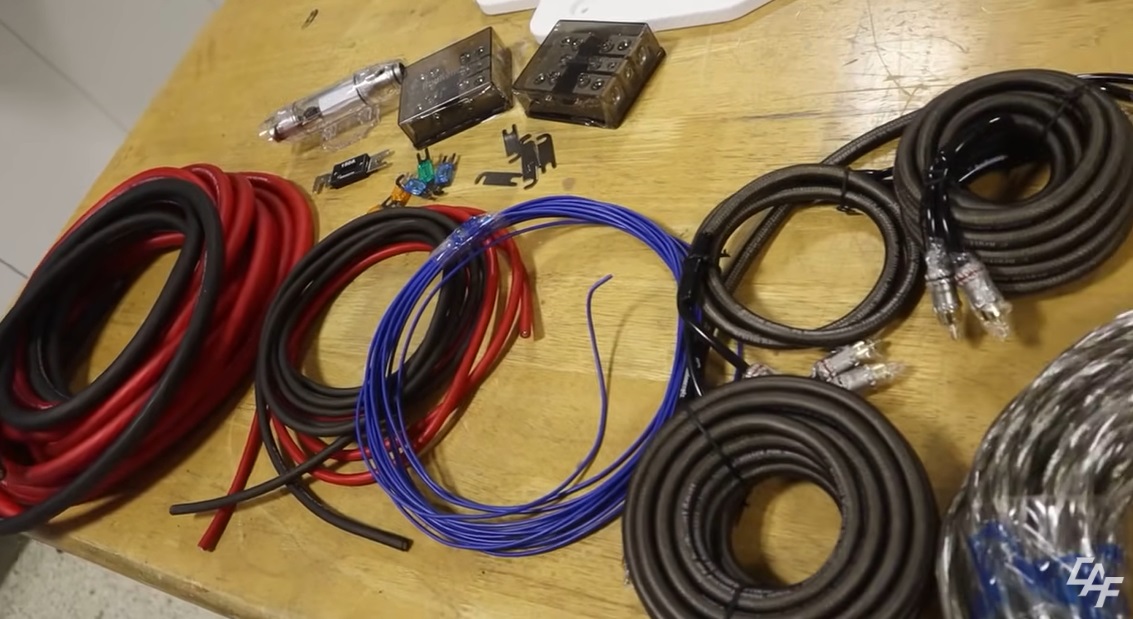
5:19 – Car amplifier wiring kit
6:25 – Correct wiring installation guide (Don’t cut corners)
7:30 – Be careful of appearance!
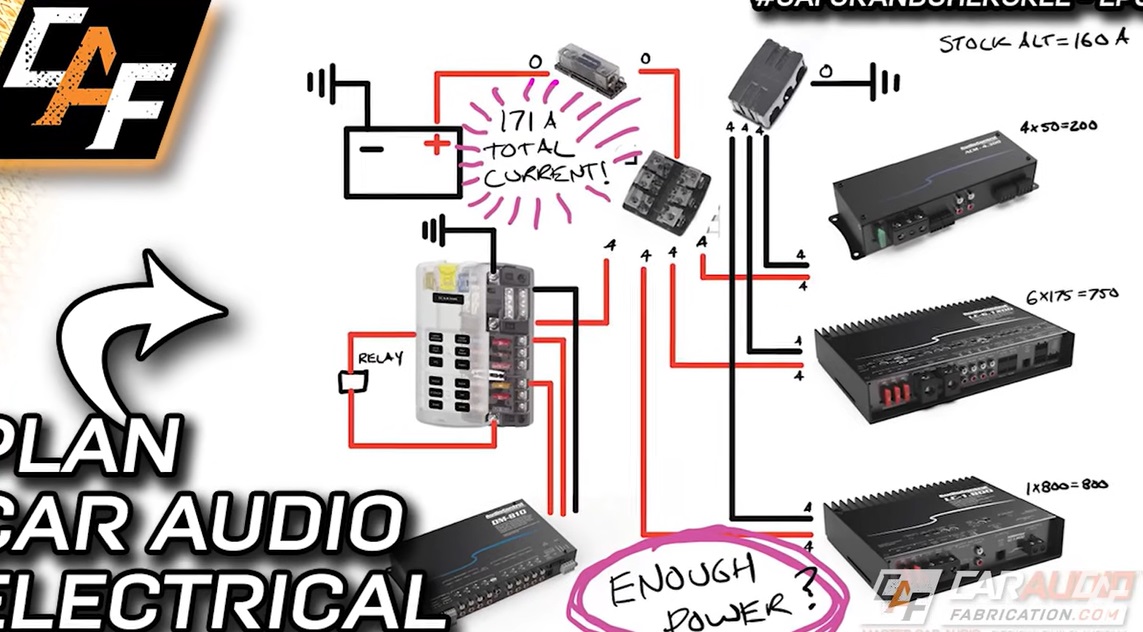
8:45 – Create a drawing of the wiring layout
Do’s for Car Audio Wiring
1. Plan Your Wiring Layout
- Do: Plan the entire wiring layout before starting. Sketch a diagram showing where each component will be installed and how they will be connected. This will help you organize the wires efficiently and avoid mistakes.
- Reason: A well-planned layout ensures a clean installation, minimizes the risk of errors, and makes troubleshooting easier if problems arise later.
2. Use Quality Components
- Do: Invest in high-quality wires, connectors, and components. Use oxygen-free copper (OFC) wires for power, ground, and speaker connections.
- Reason: High-quality materials ensure better conductivity, reduce signal loss, and provide longer-lasting performance. OFC wires, in particular, have lower resistance and better durability than cheaper alternatives like copper-clad aluminum (CCA).
3. Properly Size Your Wires
- Do: Use the correct wire gauge for power, ground, and speaker connections. The wire gauge should match the current demands of your audio components.
- Reason: Using the correct gauge prevents voltage drops, overheating, and potential damage to your equipment. For example, a high-power amplifier may require 4 AWG or larger power and ground wires.
4. Fuse Your Power Wires
- Do: Install fuses close to the battery for each power wire running to your amplifiers or other components.
- Reason: Fuses protect against short circuits, which can cause fires or damage to your car and audio equipment. The fuse should be rated slightly higher than the current draw of the connected device.
5. Use Proper Grounding Techniques
- Do: Ground your components to a clean, bare metal part of the car’s chassis, ideally close to the component.
- Reason: Proper grounding reduces the risk of noise and interference in the audio system and ensures reliable operation. Poor grounding can result in ground loops, causing annoying hums or engine noise through the speakers.
6. Keep Power and Signal Wires Separate
- Do: Run power wires and signal (RCA) cables on opposite sides of the vehicle.
- Reason: Keeping these wires separate minimizes the risk of electromagnetic interference, which can introduce noise into the audio signal.
7. Secure Wires Properly
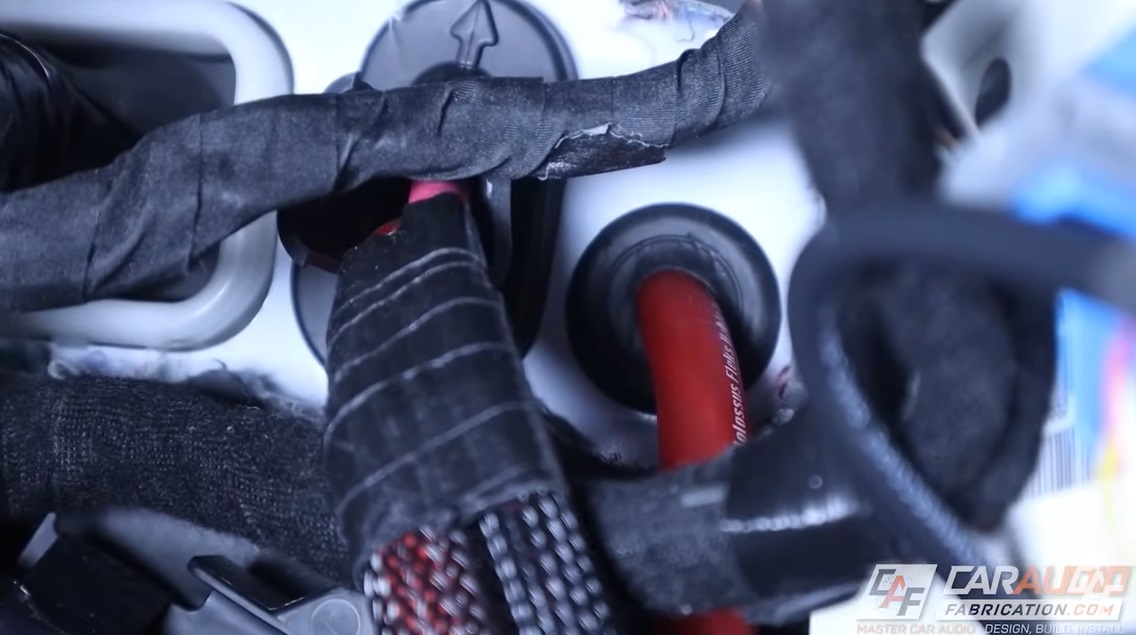
- Do: Use zip ties, wire loom, and grommets to secure and protect your wiring.
- Reason: Properly secured wires prevent them from moving around, getting damaged, or causing noise. Grommets protect wires from sharp edges when passing through metal panels.
8. Label Your Wires
- Do: Label each wire during installation to identify its purpose (e.g., power, ground, speaker, etc.).
- Reason: Labeling simplifies troubleshooting and future upgrades or repairs. It helps you quickly identify which wire serves which function without having to trace the entire path.
9. Solder Connections
- Do: Solder connections whenever possible, especially for speaker wires and RCA connections.
- Reason: Soldering provides a strong, reliable connection that resists corrosion and ensures good conductivity. It’s more secure than crimp connectors, which can loosen over time.
10. Use Heat Shrink Tubing
- Do: Use heat shrink tubing to insulate soldered connections.
- Reason: Heat shrink provides a neat, professional finish and adds an extra layer of protection against short circuits and moisture.
11. Test the System Before Final Assembly
- Do: Test the entire audio system after wiring but before final assembly.
- Reason: Testing allows you to identify and fix any wiring issues before securing components and panels, saving time and effort in the long run.
12. Follow Manufacturer Recommendations
- Do: Follow the installation instructions and recommendations provided by the audio component manufacturers.
- Reason: Adhering to manufacturer guidelines ensures that you’re using the correct wiring techniques and settings for optimal performance and warranty protection.
Don’ts for Car Audio Wiring
1. Don’t Use Undersized Wires
- Don’t: Avoid using wires that are too small for the current demands of your audio components.
- Reason: Undersized wires can cause voltage drops, overheating, and even fire hazards. This can lead to poor performance and potentially damage your equipment.
2. Don’t Overload Circuits
- Don’t: Avoid tapping into existing circuits that are already heavily loaded, like those for the headlights or ignition.
- Reason: Overloading a circuit can cause it to fail, blow fuses, or even damage your vehicle’s electrical system. Always use dedicated power lines with appropriate fuses for audio components.
3. Don’t Skimp on Grounding
- Don’t: Never underestimate the importance of a proper ground connection. Don’t ground multiple components to different points on the chassis without consideration.
- Reason: Inconsistent grounding can lead to ground loops and noise in the audio system. A poor ground connection can cause components to malfunction or produce unwanted noise.
4. Don’t Route Wires Carelessly
- Don’t: Don’t run wires near sharp edges, hot surfaces, or moving parts like seat tracks or pedals.
- Reason: Careless routing can result in wire damage, short circuits, and potential safety hazards. Damaged wires can cause fires, system failures, or erratic behavior.
5. Don’t Use T-Taps or Scotch Locks
- Don’t: Avoid using T-taps or Scotch locks to splice wires.
- Reason: These connectors can cause weak or unreliable connections that may loosen over time, leading to intermittent problems or complete failure. Soldering or using high-quality crimp connectors is a more reliable method.
6. Don’t Ignore Speaker Impedance
- Don’t: Don’t connect speakers with an impedance that is too low for your amplifier.
- Reason: Mismatched impedance can cause your amplifier to overheat, go into protection mode, or even fail. Always match the speaker impedance with the amplifier’s recommended range.
7. Don’t Bundle Power and Signal Wires
- Don’t: Avoid bundling power and signal wires together, even if they are in separate looms.
- Reason: Bundling these wires together increases the risk of interference, which can introduce noise into the audio system. Keep power and signal wires separated to maintain clean sound quality.
8. Don’t Neglect Voltage Drops
- Don’t: Don’t ignore the potential for voltage drops, especially in long power runs or with high-current components.
- Reason: Voltage drops can cause your audio components to underperform or even shut down. Use appropriately sized wires and avoid excessive lengths to minimize voltage drops.
9. Don’t Overlook System Ventilation
- Don’t: Avoid installing amplifiers and other components in areas with poor ventilation.
- Reason: Lack of ventilation can cause components to overheat, leading to thermal shutdowns or permanent damage. Ensure proper airflow around all components to maintain safe operating temperatures.
10. Don’t Assume All Fuses Are Equal
- Don’t: Don’t use any fuse you have lying around. Always match the fuse rating to the current draw of the connected component.
- Reason: Incorrect fuse ratings can fail to protect your system properly. A fuse that’s too high won’t blow when it should, while one that’s too low will blow too often, causing unnecessary disruptions.
11. Don’t Overlook Connector Quality
- Don’t: Don’t use cheap or poor-quality connectors for any part of the wiring.
- Reason: Low-quality connectors can lead to poor conductivity, corrosion, and eventual connection failure. Invest in high-quality connectors to ensure reliable performance and longevity.
12. Don’t Forget to Check for Shorts
- Don’t: Don’t skip checking for shorts before powering up the system.
- Reason: Shorts can damage components, blow fuses, or even cause a fire. Always check for shorts in the wiring with a multimeter before applying power to ensure safety.
Conclusion
Wiring a car audio system requires attention to detail, proper planning, and adherence to best practices. By following the dos and avoiding the don’ts outlined above, you can ensure a safe, reliable, and high-performance audio system that will provide years of enjoyment.
From using the correct wire gauge and quality components to ensuring proper grounding and avoiding shortcuts like T-taps, each step in the wiring process is crucial. Proper installation not only enhances the sound quality but also prevents potential hazards and system failures. So, take the time to do it right the first time, and you’ll be rewarded with a robust and impressive car audio experience.

