
Oct 15, 2024
Buy Welding Cable Leads Online with Lugs (Long Barrel)
At WesBell Electronics, we’re dedicated to providing high-quality products and expert advice to ensure your projects are done efficiently, safely, and professionally. Among the many tools and cables we offer, welding cable and Diesel Locomotive Cable (DLO) are integral in industries that demand heavy-duty power transmission. These cables play crucial roles in welding applications, power supply systems, and more, and connecting them properly using lugs and hydraulic crimping tools is a vital part of ensuring their effectiveness and safety.
In this comprehensive guide, we’ll walk you through the step-by-step process of crimping welding and DLO cable lugs using a hydraulic crimping tool. We’ll also explain how to apply heat shrink tubing for added protection and durability. Whether you’re an experienced technician or new to the field, this guide will help you achieve professional results every time.
What Are Welding Cable and DLO Cable?
Before diving into the crimping process, it’s important to understand the basic characteristics of welding cable and DLO cable.
Welding Cable
Welding cable is designed for flexibility and durability in tough environments. Made of fine copper strands, it allows for high current capacity in a flexible jacket, making it suitable for use in industrial welding and power supply. The jacket is usually made from synthetic rubber (EPDM) or similar materials that are resistant to oil, flame, and abrasion. The flexibility of welding cable makes it easy to work with, but it also means that choosing the right lug and crimping method is crucial to maintain a secure and reliable connection.
DLO Cable
Diesel Locomotive Cable, or DLO, is designed for even heavier applications, often found in railroads, mining operations, and other industries where high voltage is required. DLO cables are constructed with tinned copper for corrosion resistance and typically feature a thicker, rugged insulation that protects the conductors in harsh environments. DLO cables are not as flexible as welding cables but are ideal for long-term, high-stress electrical applications.

Why Crimping Is Important
Crimping is the process of joining two pieces of metal by deforming one or both to hold the other. In electrical work, crimping ensures a solid, mechanically sound, and electrically efficient connection between a cable and its terminal (lug). Proper crimping prevents overheating, electrical resistance, and failures, which can lead to significant safety risks or operational downtime.
Tools and Materials Required
Before starting the crimping process, ensure you have all the necessary tools and materials ready:
- Welding cable or DLO cable (depending on your application)
- Cable lugs that match the cable size
- Hydraulic crimping tool with the appropriate die set
- Wire cutters or cable cutting tool
- Wire strippers
- Heat shrink tubing for insulation and protection
- Heat gun for shrinking the tubing
Step-by-Step Guide to Crimping Welding and DLO Cables
1. Measure and Cut the Cable
The first step is to measure and cut the cable to the desired length. Use a high-quality cable cutter designed for heavy-duty cables to ensure a clean cut. This prevents any fraying or unevenness that could affect the integrity of the connection.
1.1 Tip: When working with welding or DLO cable, ensure the cut is square and smooth. A clean cut makes it easier to strip the insulation and insert the cable into the lug.
2. Strip the Cable Insulation
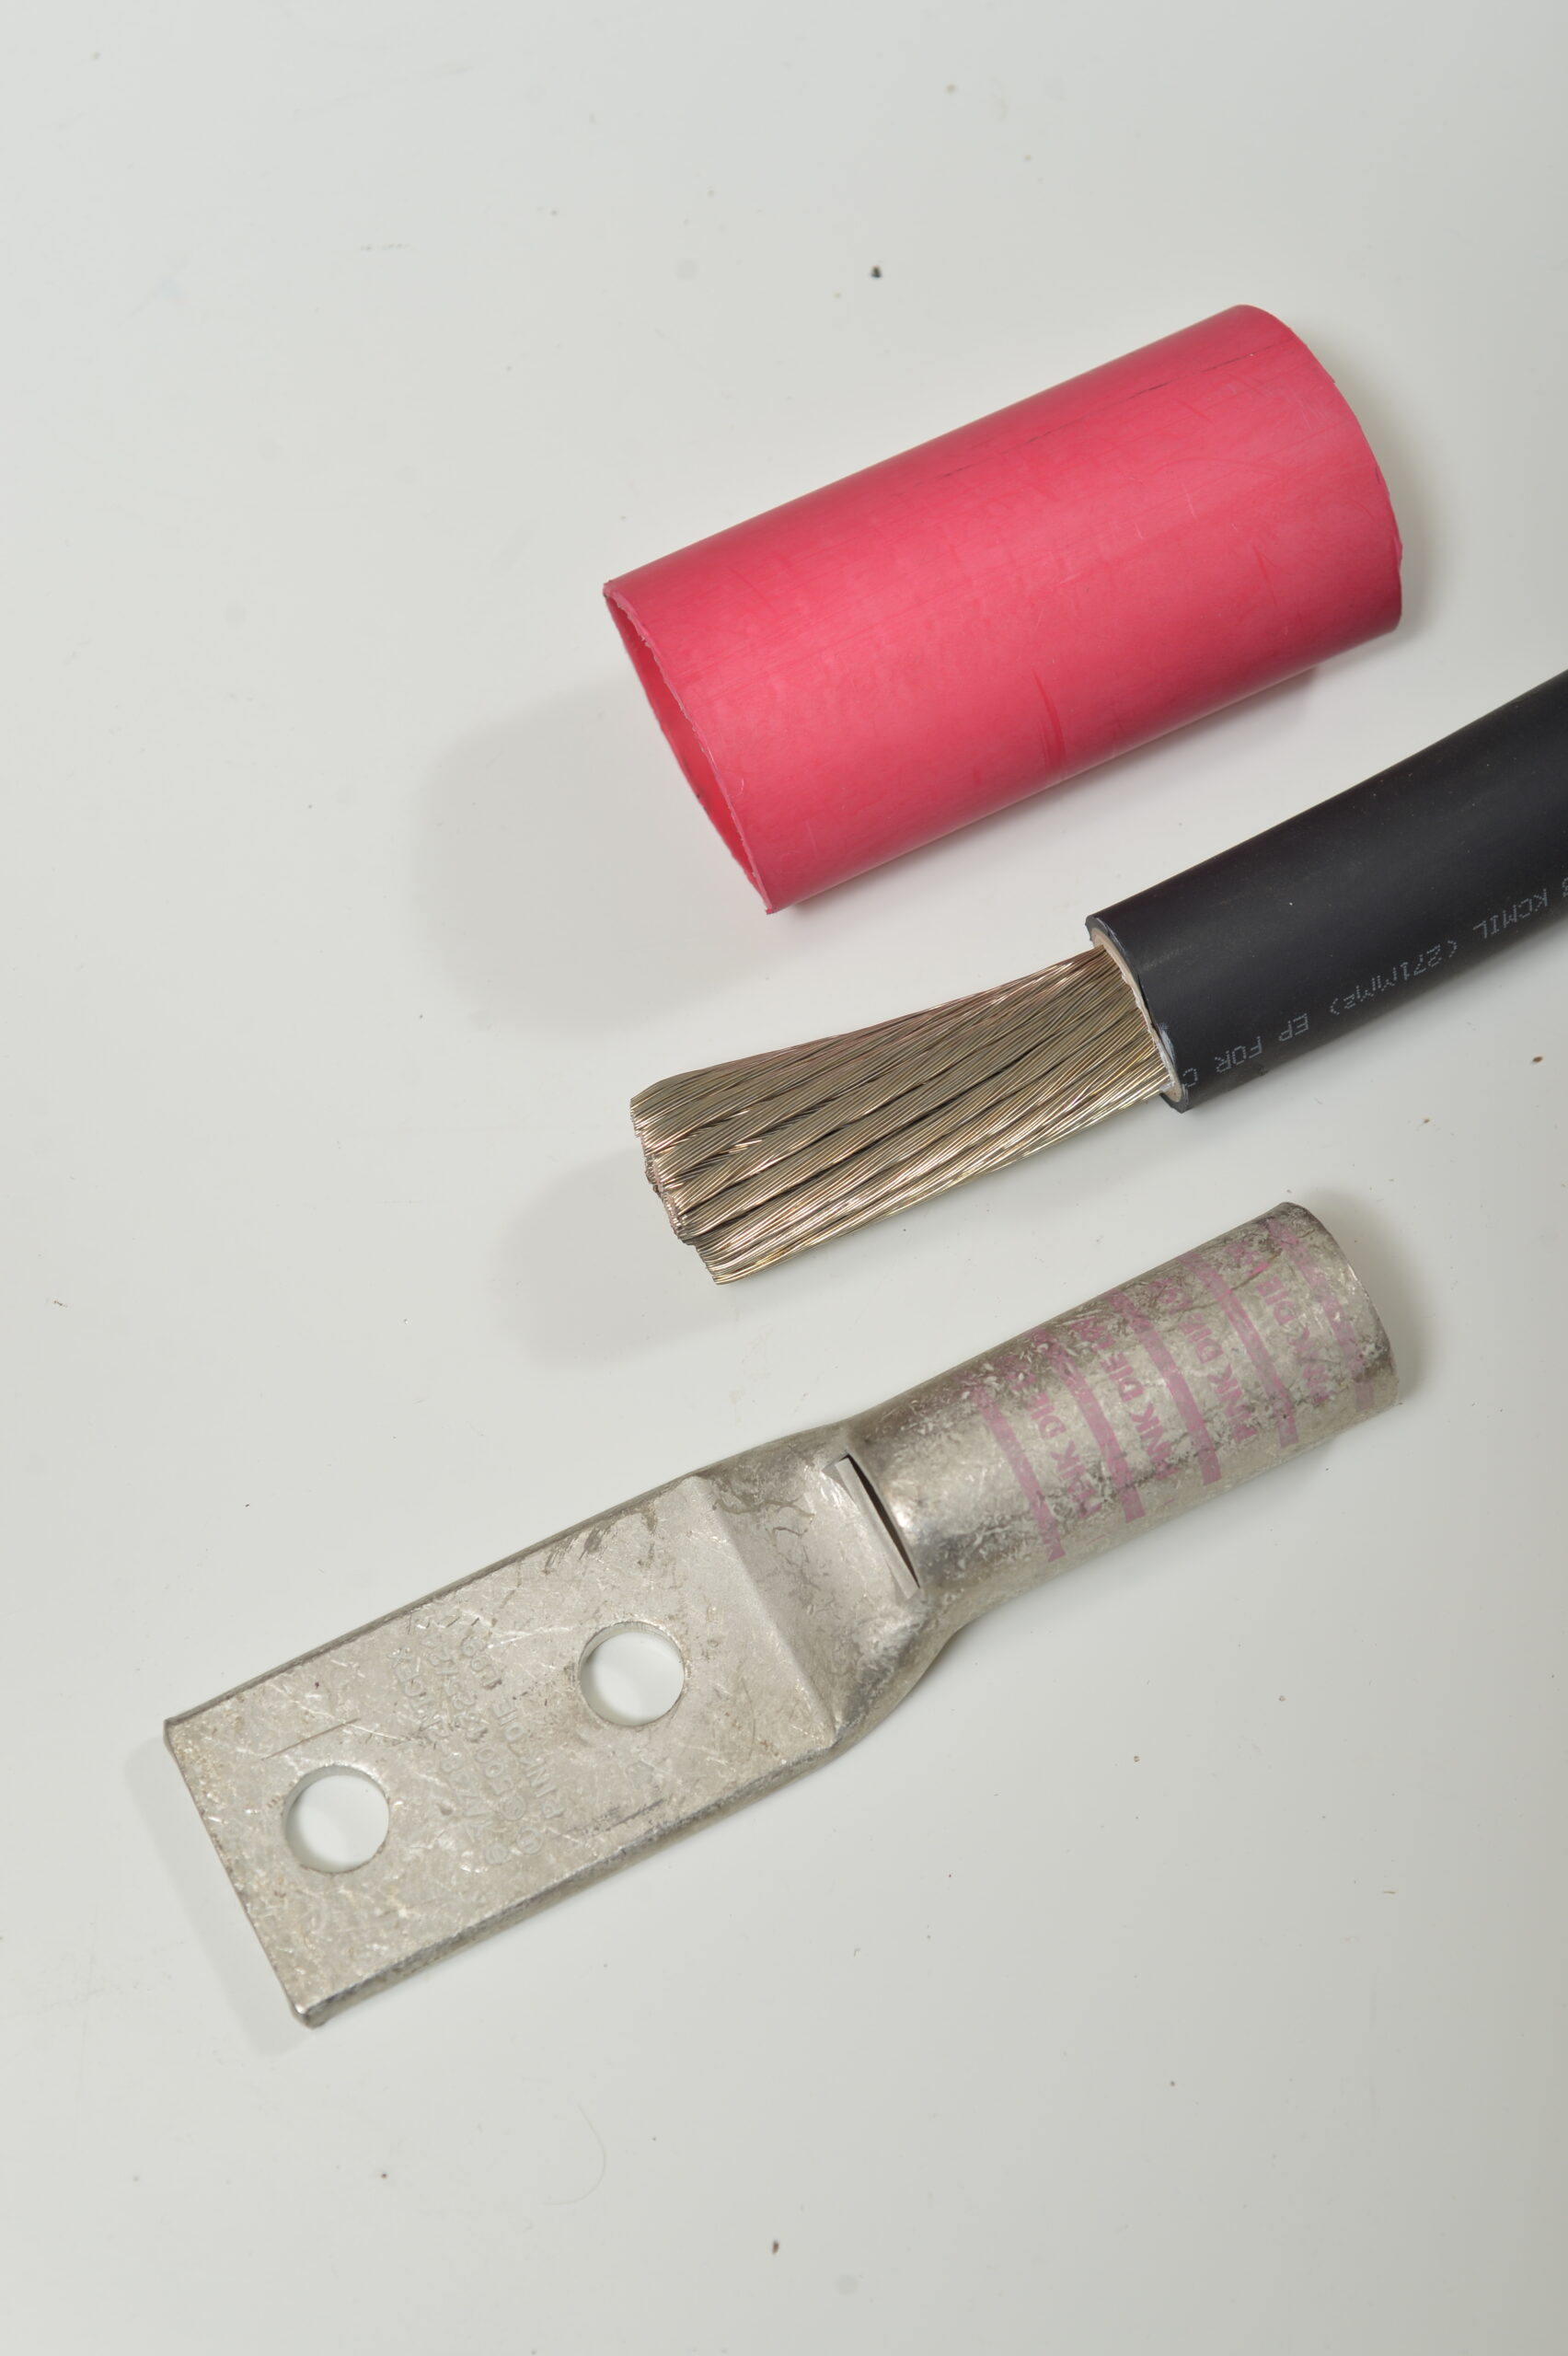
After cutting the cable to the appropriate length, strip off the insulation to expose the copper conductors. Make sure to strip only the required length, typically matching the depth of the lug’s barrel.
2.1 For Welding Cable: Since welding cable is highly flexible, use a sharp wire stripper or utility knife to carefully score the insulation, then peel it off without damaging the fine copper strands underneath.
2.2 For DLO Cable: Stripping DLO cable can be more challenging due to its thicker insulation. Use a heavy-duty wire stripper or utility knife and ensure you don’t nick the tinned copper strands.
2.3 Tip: When stripping the cable, leave enough insulation at the end to ensure that only the required portion of copper is exposed. Exposing too much conductor can leave the connection vulnerable to short circuits, while too little can result in poor crimping.
3. Choose the Right Lug
Choosing the correct lug is vital for ensuring a secure connection. The lug size must match both the cable gauge and the application. Cable lugs come in various sizes and materials, typically copper or tinned copper, and feature barrels that accommodate the stranded wires of the cable.
3.1 For Welding Cable: Since welding cables are typically more flexible, select a lug with a slightly larger barrel to accommodate the fine-stranded conductors.
3.2 For DLO Cable: Given the thicker insulation and heavier-duty nature of DLO cables, the lug needs to accommodate the cable size exactly, and it should feature corrosion-resistant material like tinned copper to handle harsh environments.
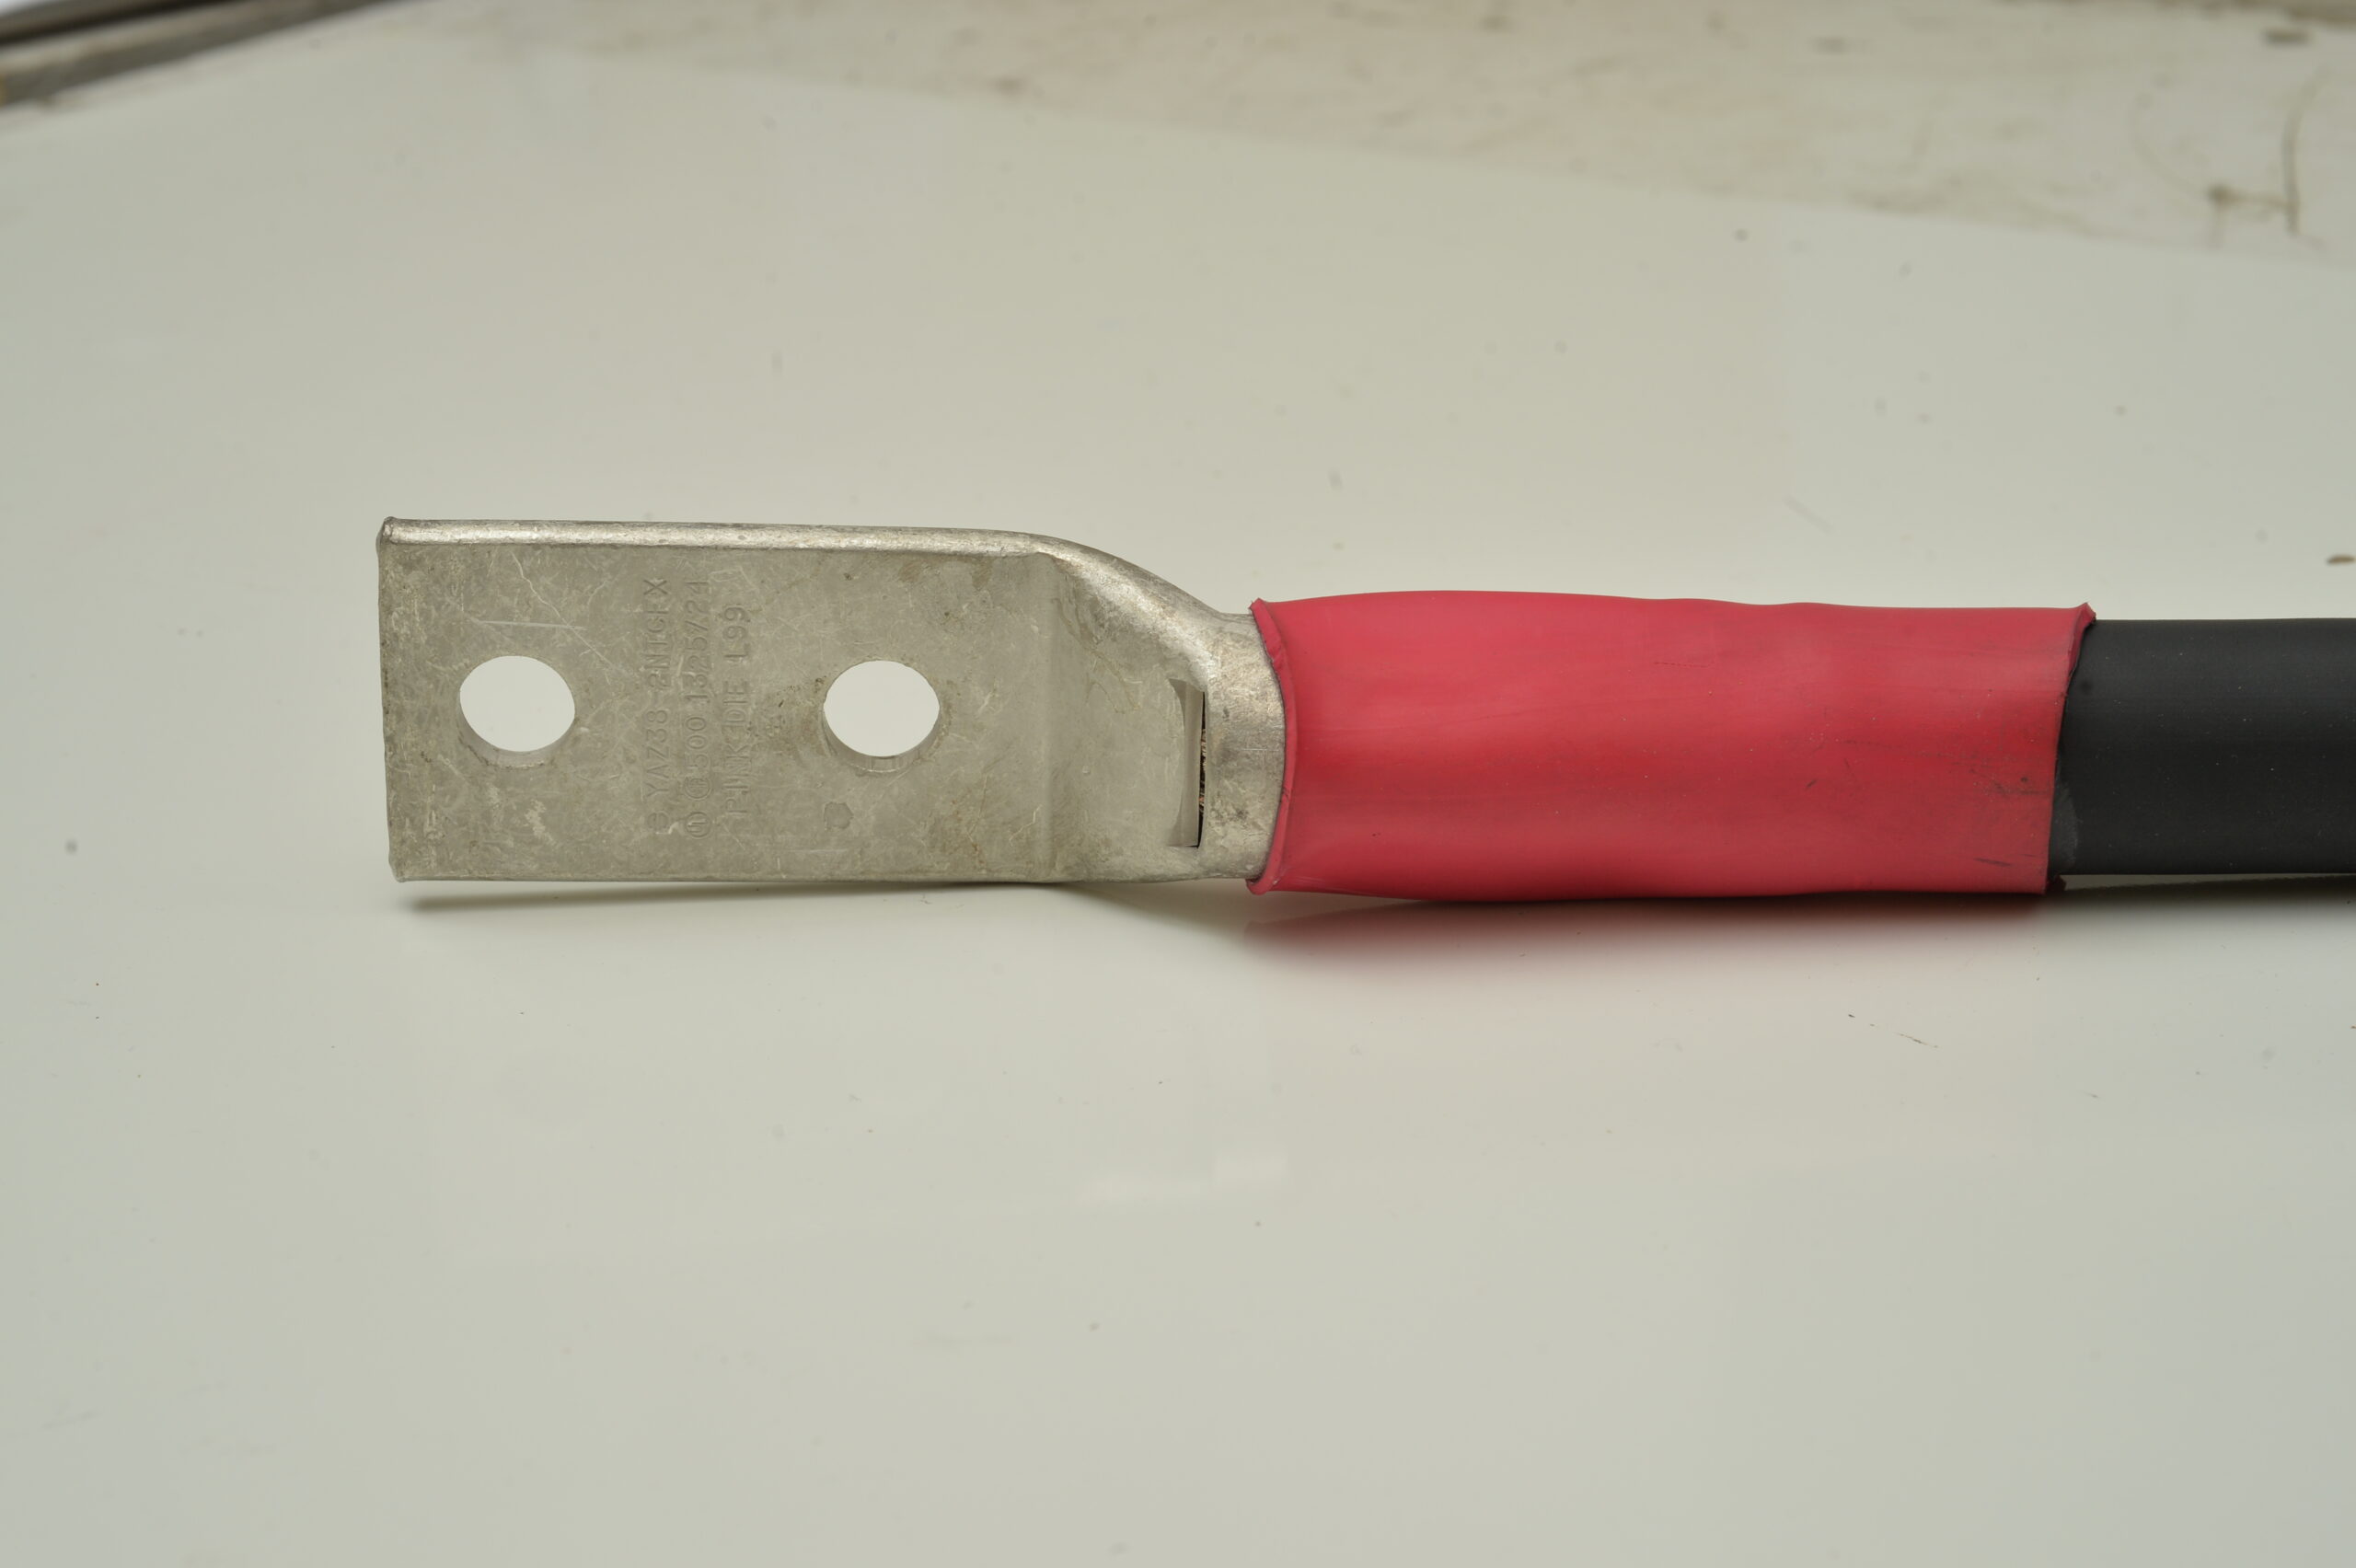
4. Insert the Cable Into the Lug
Once the lug is selected, insert the stripped end of the cable into the lug’s barrel. Make sure all the copper strands are seated within the lug to ensure maximum conductivity.
4.1 Tip: If you’re working with welding cable, ensure no stray strands are left outside the lug. Stray strands can weaken the connection and create points of failure during operation.
5. Select the Correct Die Set for the Crimping Tool
Hydraulic crimping tools come with interchangeable dies that correspond to different lug and cable sizes. Each die is labeled with a specific size that matches the cable and lug specifications.
5.1 Tip: Always use the correct die for the cable size you’re working with. Using the wrong die can result in an improperly crimped connection, which can cause electrical failures.
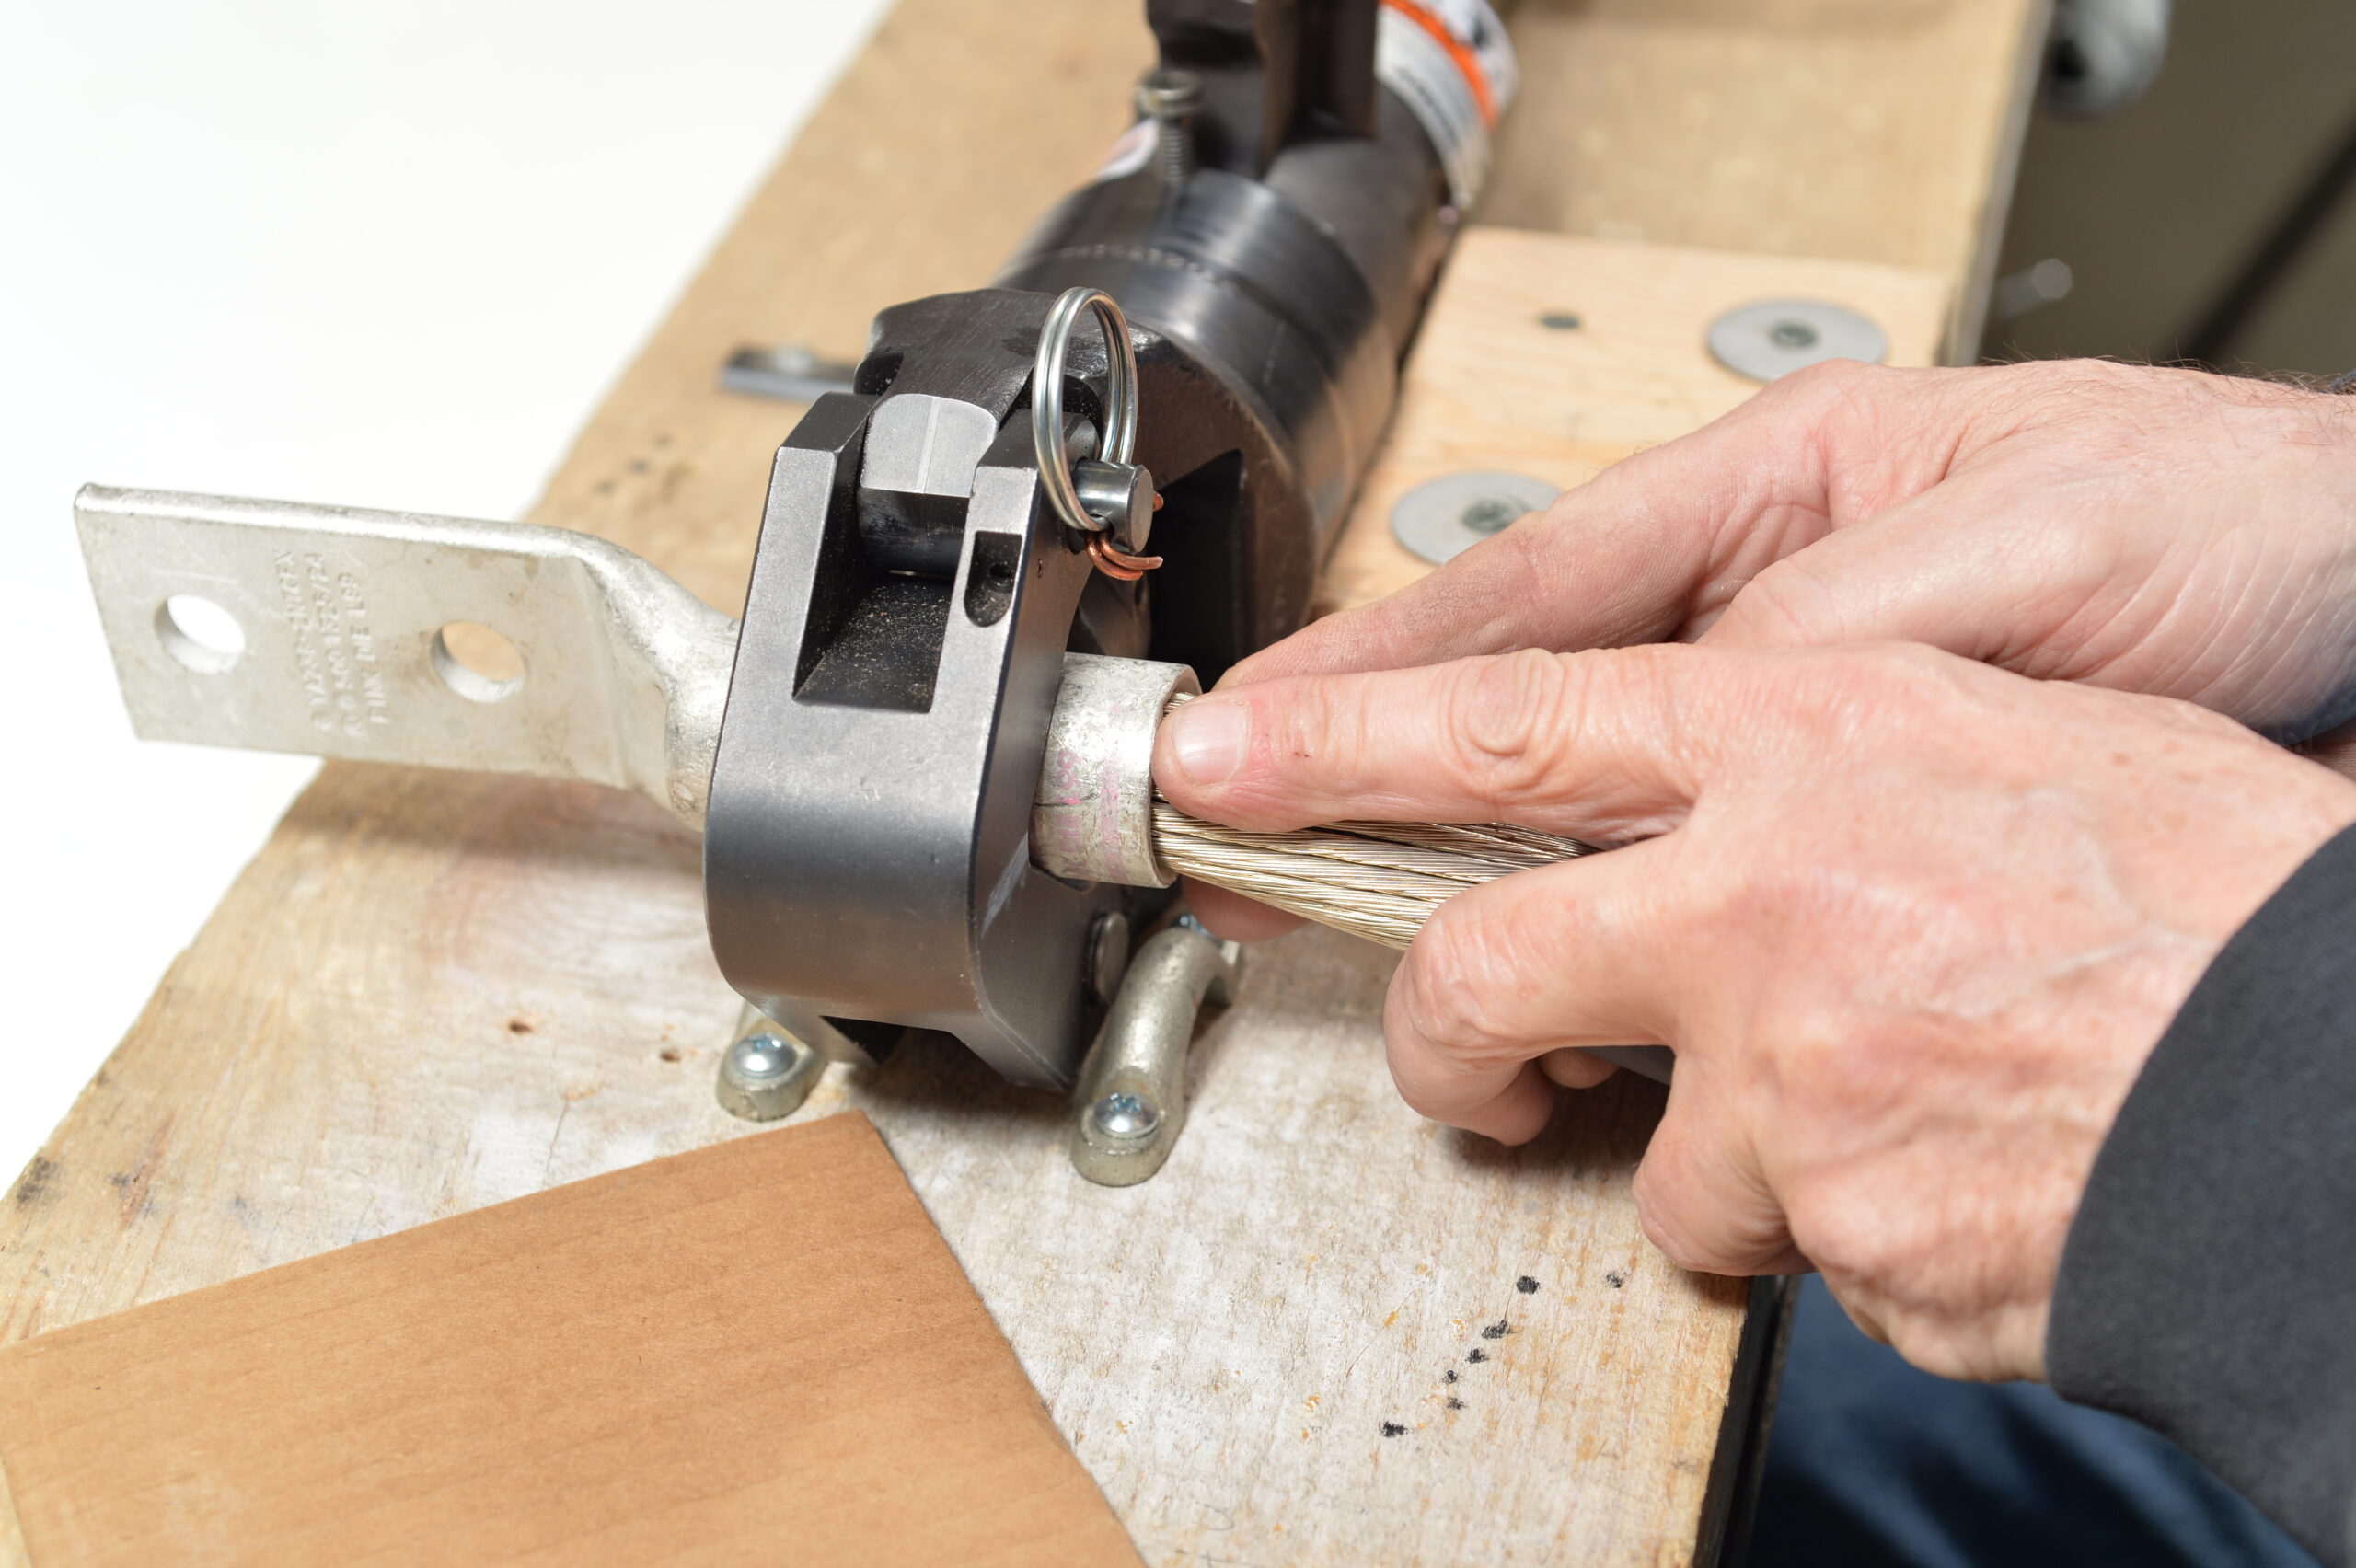
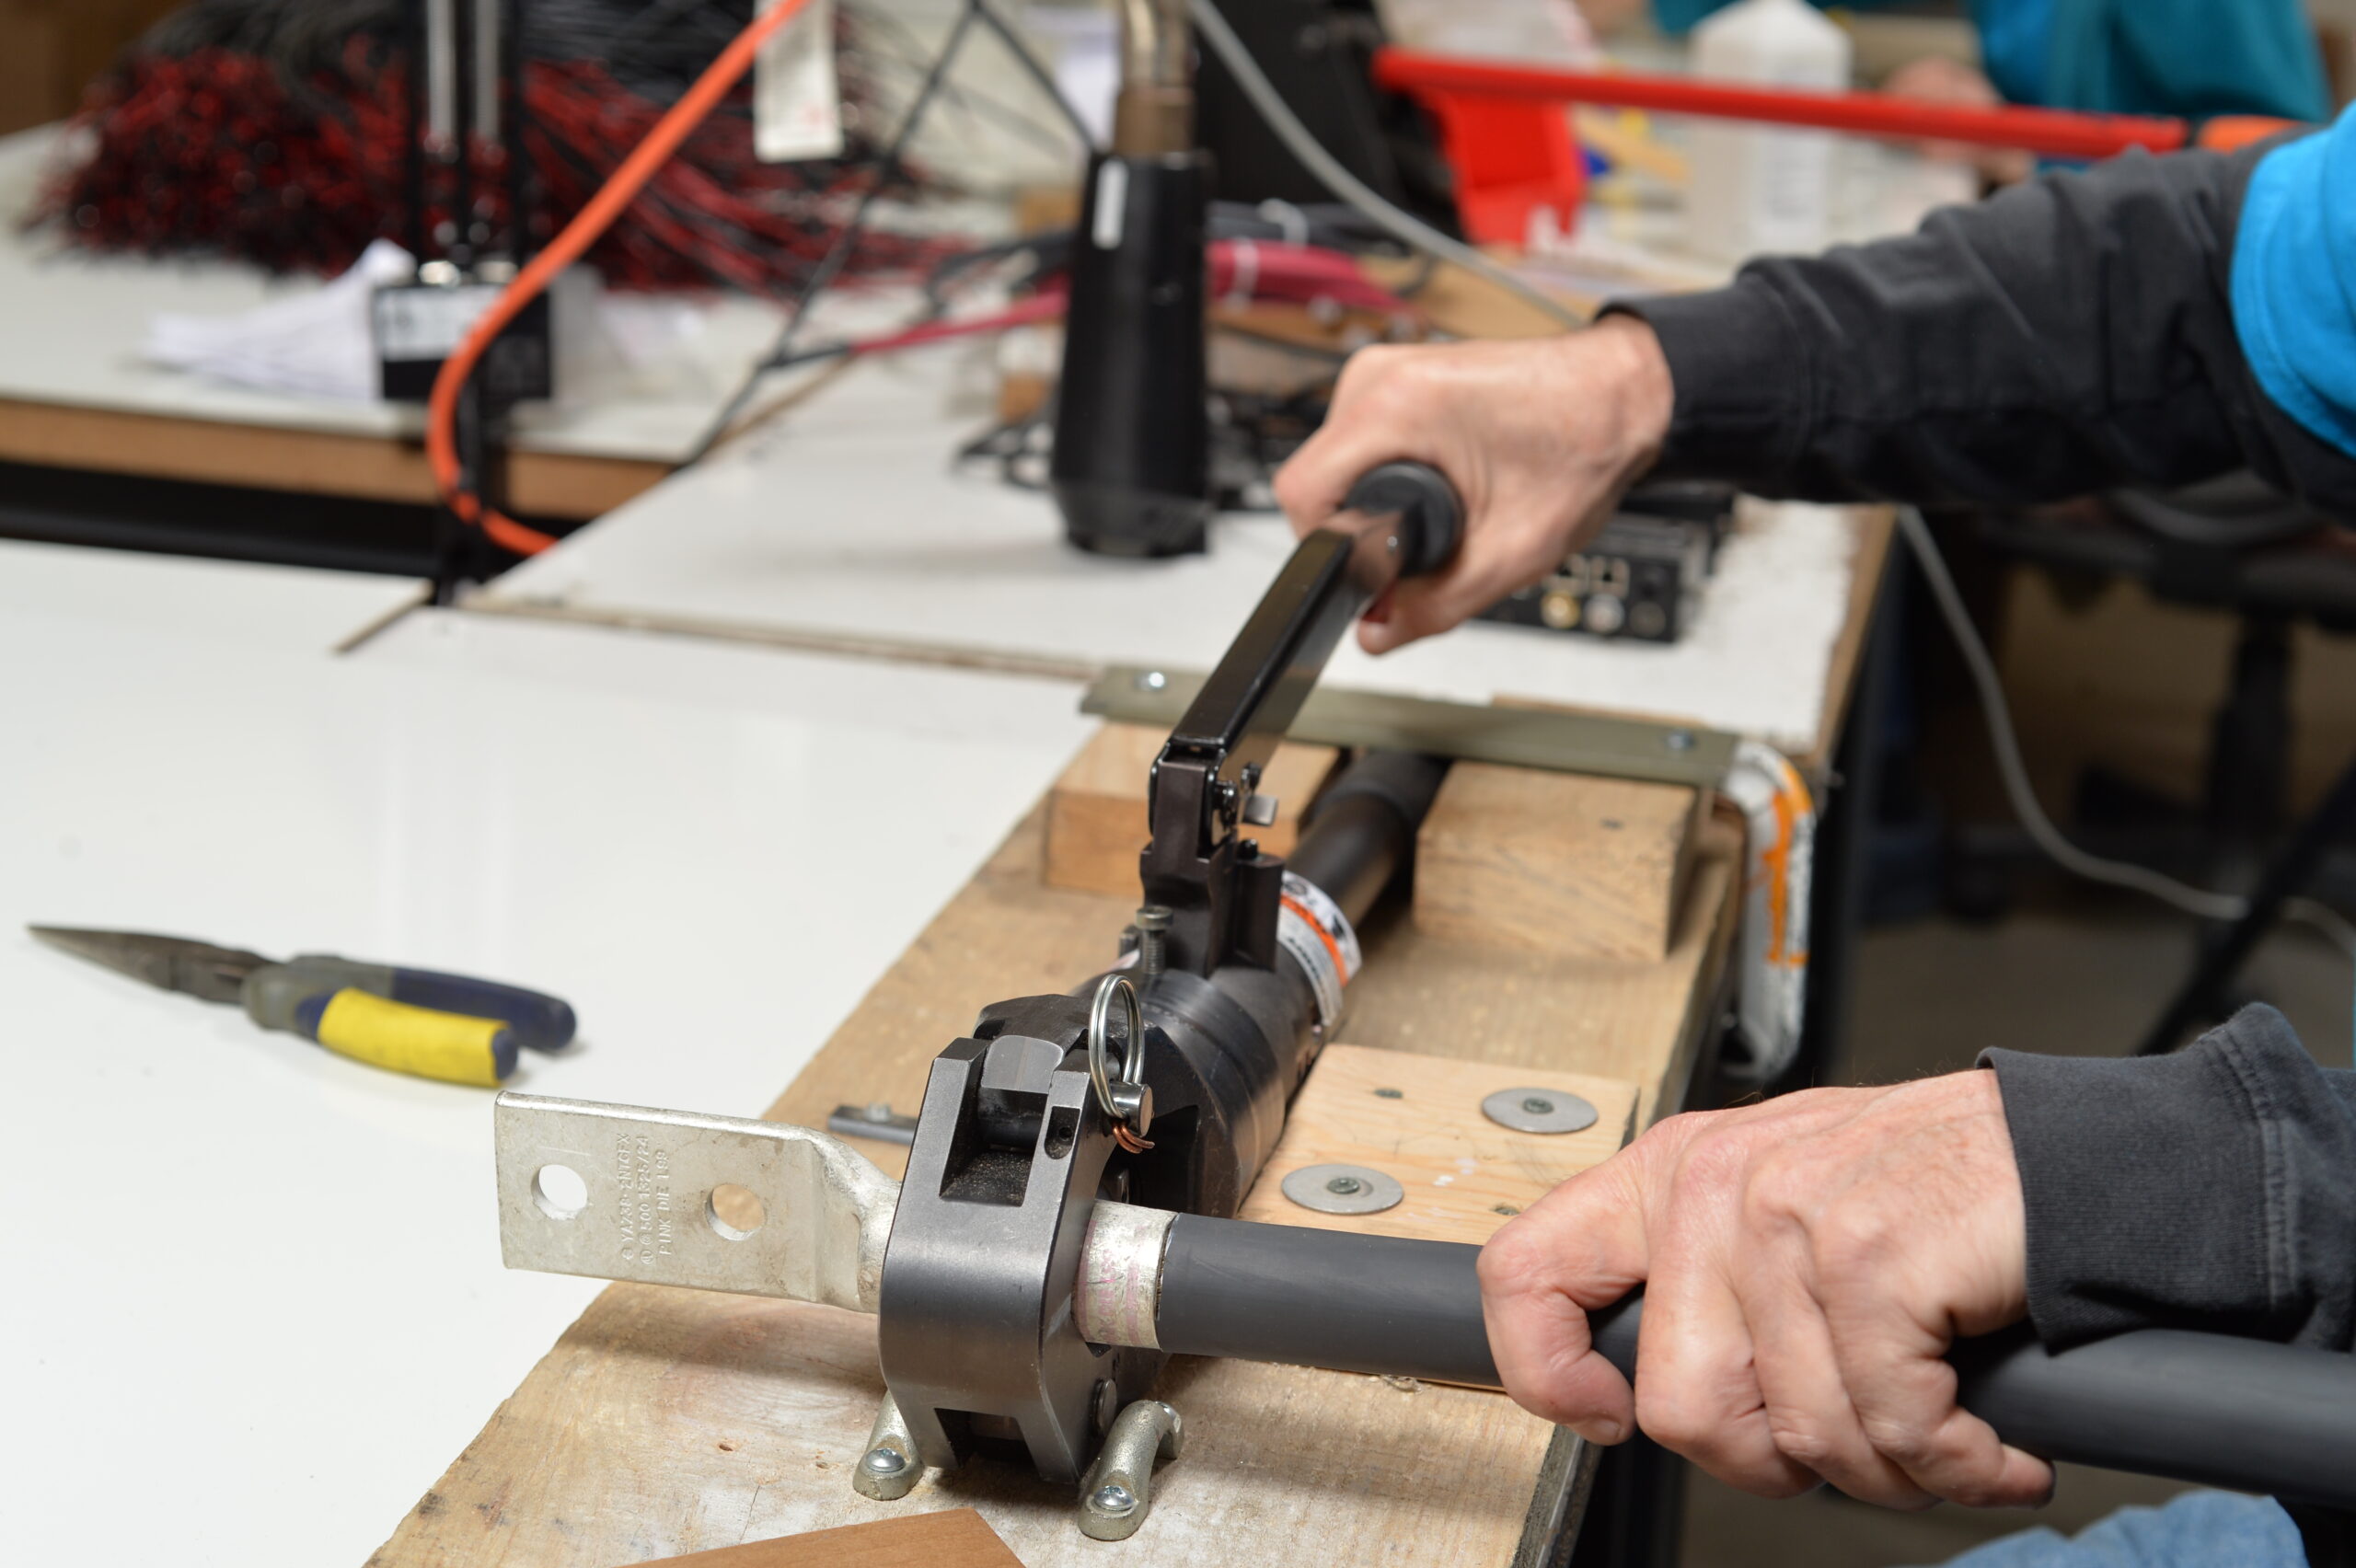
6. Crimp the Lug Using a Hydraulic Crimping Tool
Now that the cable is inserted into the lug and the correct die is chosen, it’s time to crimp. Follow these steps:
6.1 Position the Lug: Insert the lug with the cable into the crimping tool. Make sure the barrel is aligned correctly between the dies. The lug should sit squarely in the dies to ensure an even and reliable crimp.
6.2 Activate the Hydraulic Crimper: Once everything is positioned, operate the hydraulic crimper by pumping the handle. The dies will compress the lug barrel onto the copper conductors, ensuring a tight connection. The pressure applied by the hydraulic crimping tool should be sufficient to deform the lug and lock the copper strands securely inside.
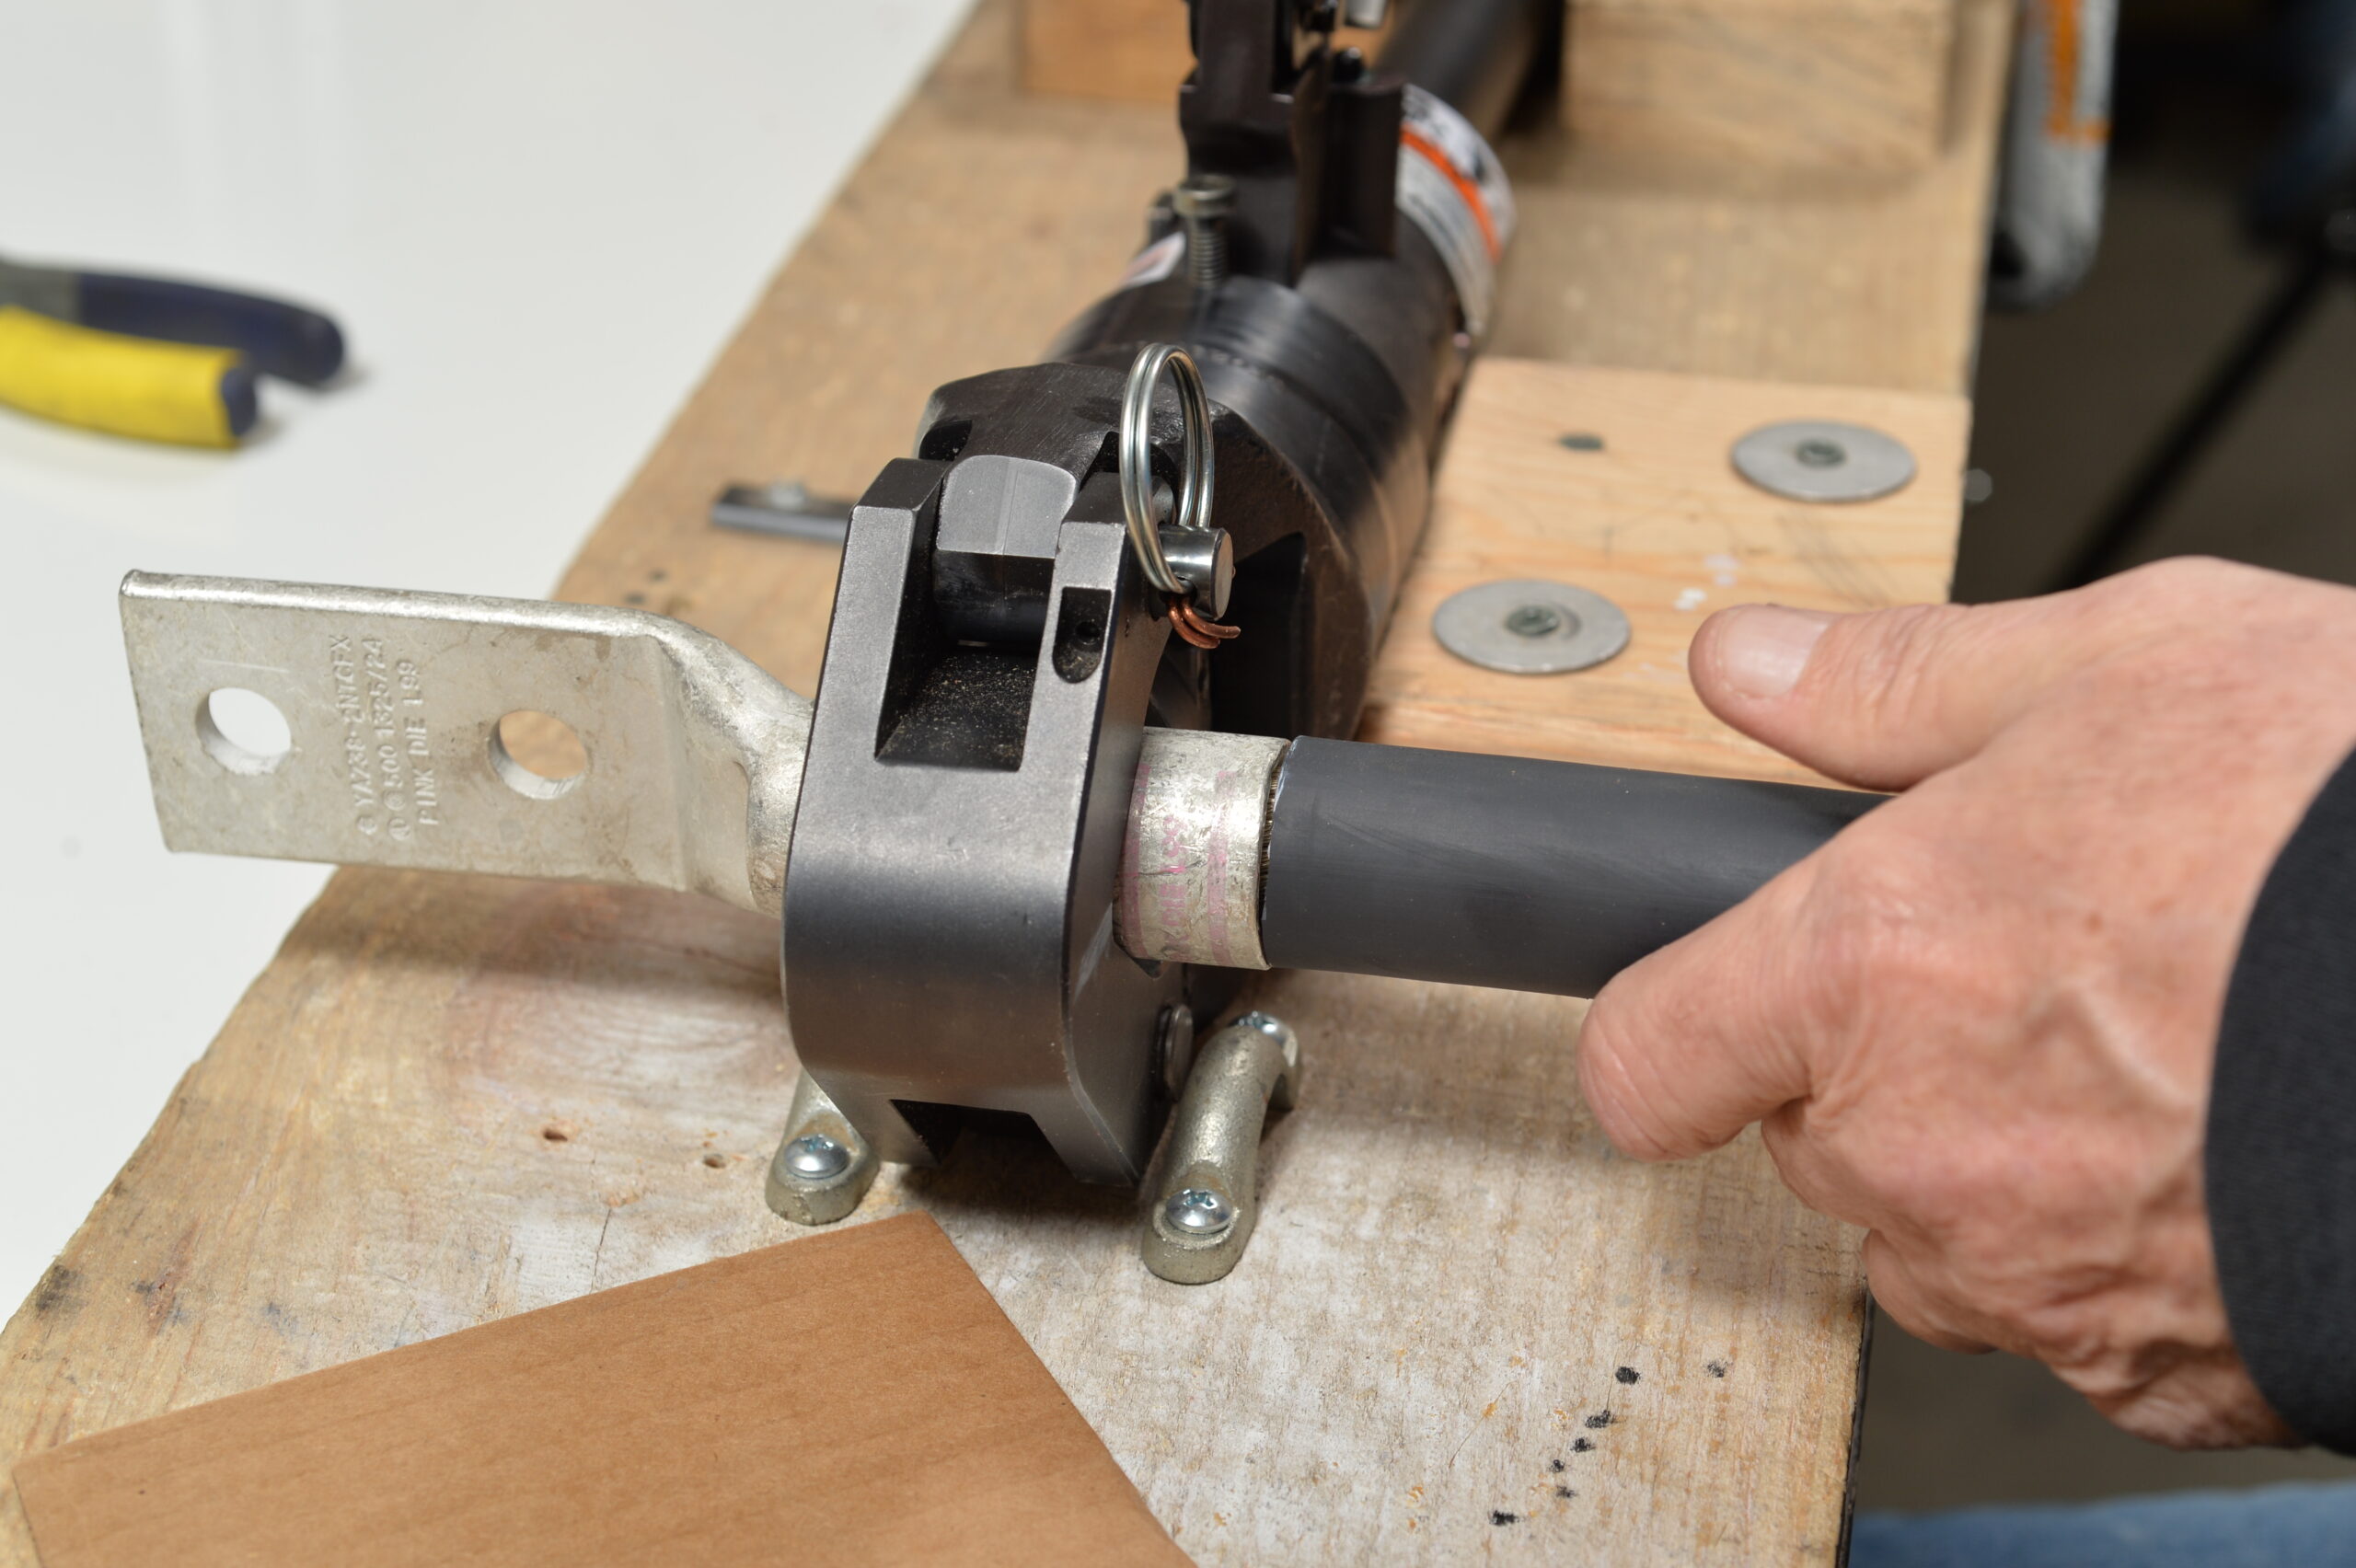
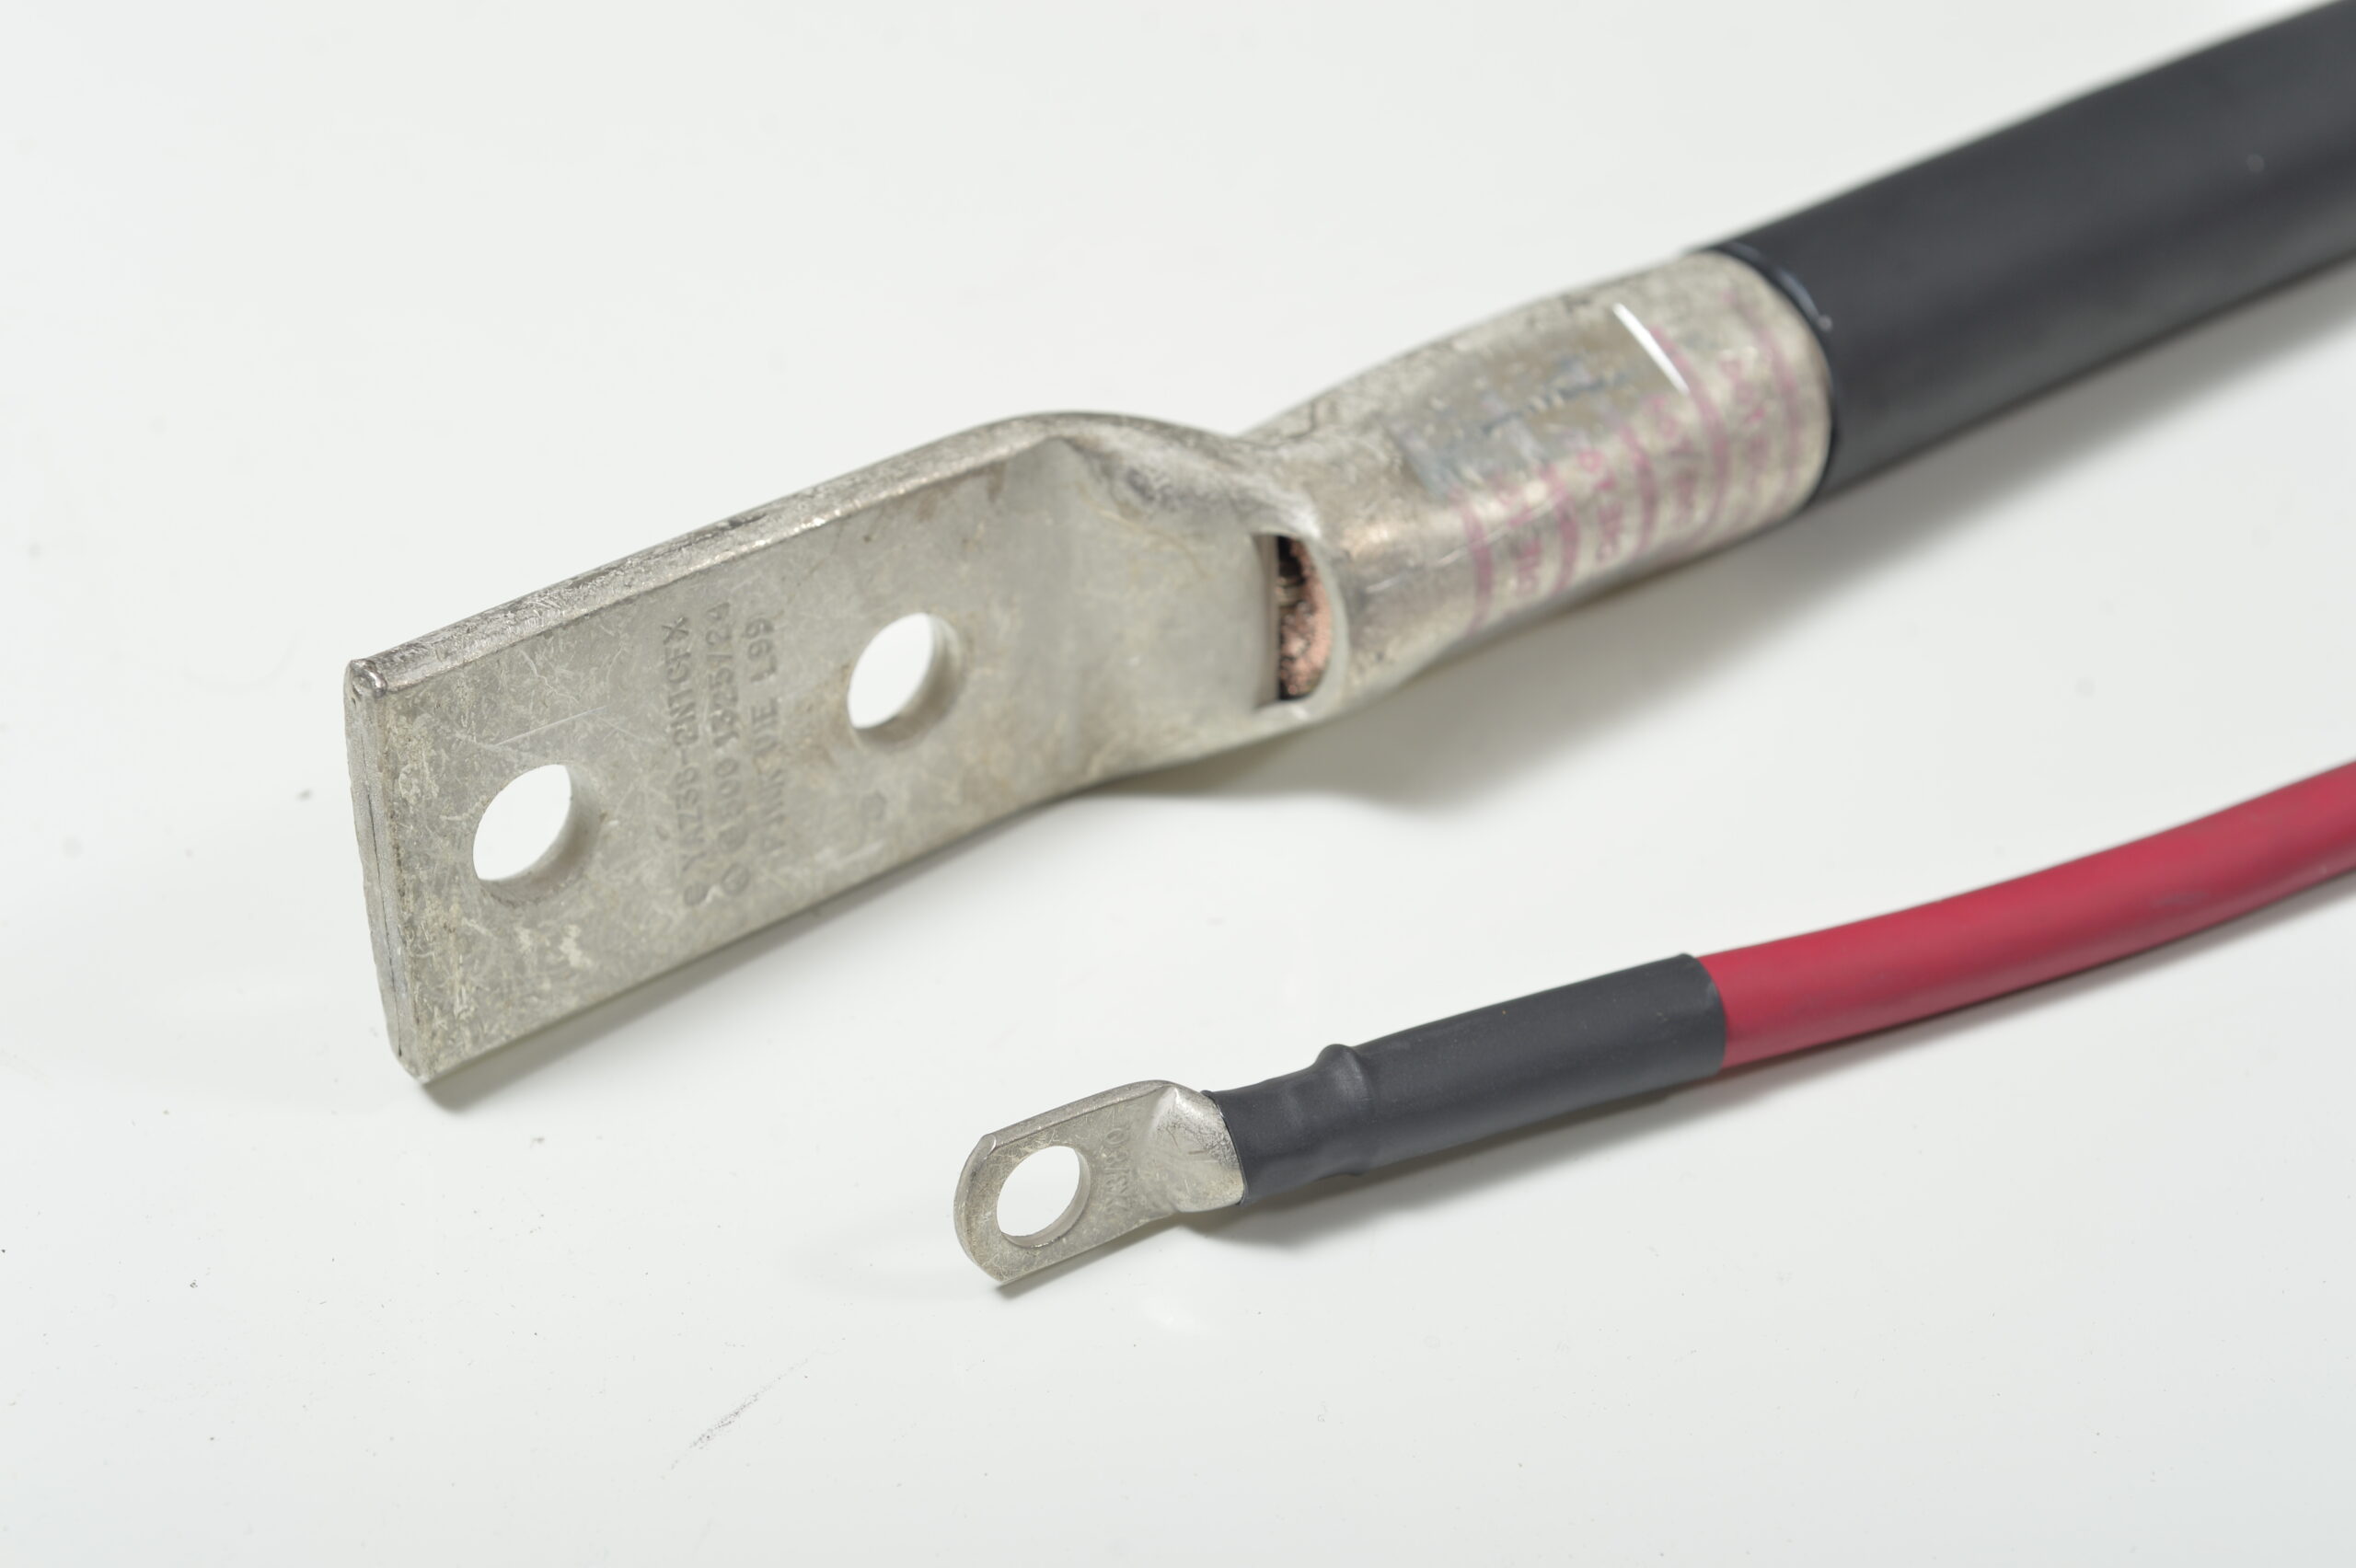
6.3 Inspect the Crimp: After crimping, visually inspect the connection to ensure it’s uniform and complete. The lug should show clear indentations from the die, and there should be no visible gaps between the lug and the cable. If the crimp looks incomplete, repeat the process, ensuring the die is seated properly.
7. Add Heat Shrink Tubing
Once the lug is securely crimped onto the cable, it’s time to add heat shrink tubing to protect the connection from environmental factors like moisture, abrasion, and electrical short circuits. Heat shrink tubing also provides additional insulation and strain relief for the connection.
7.1 Choose the Right Size Heat Shrink Tubing: The tubing should be large enough to fit over the lug barrel before shrinking, but small enough to create a tight seal when heated.
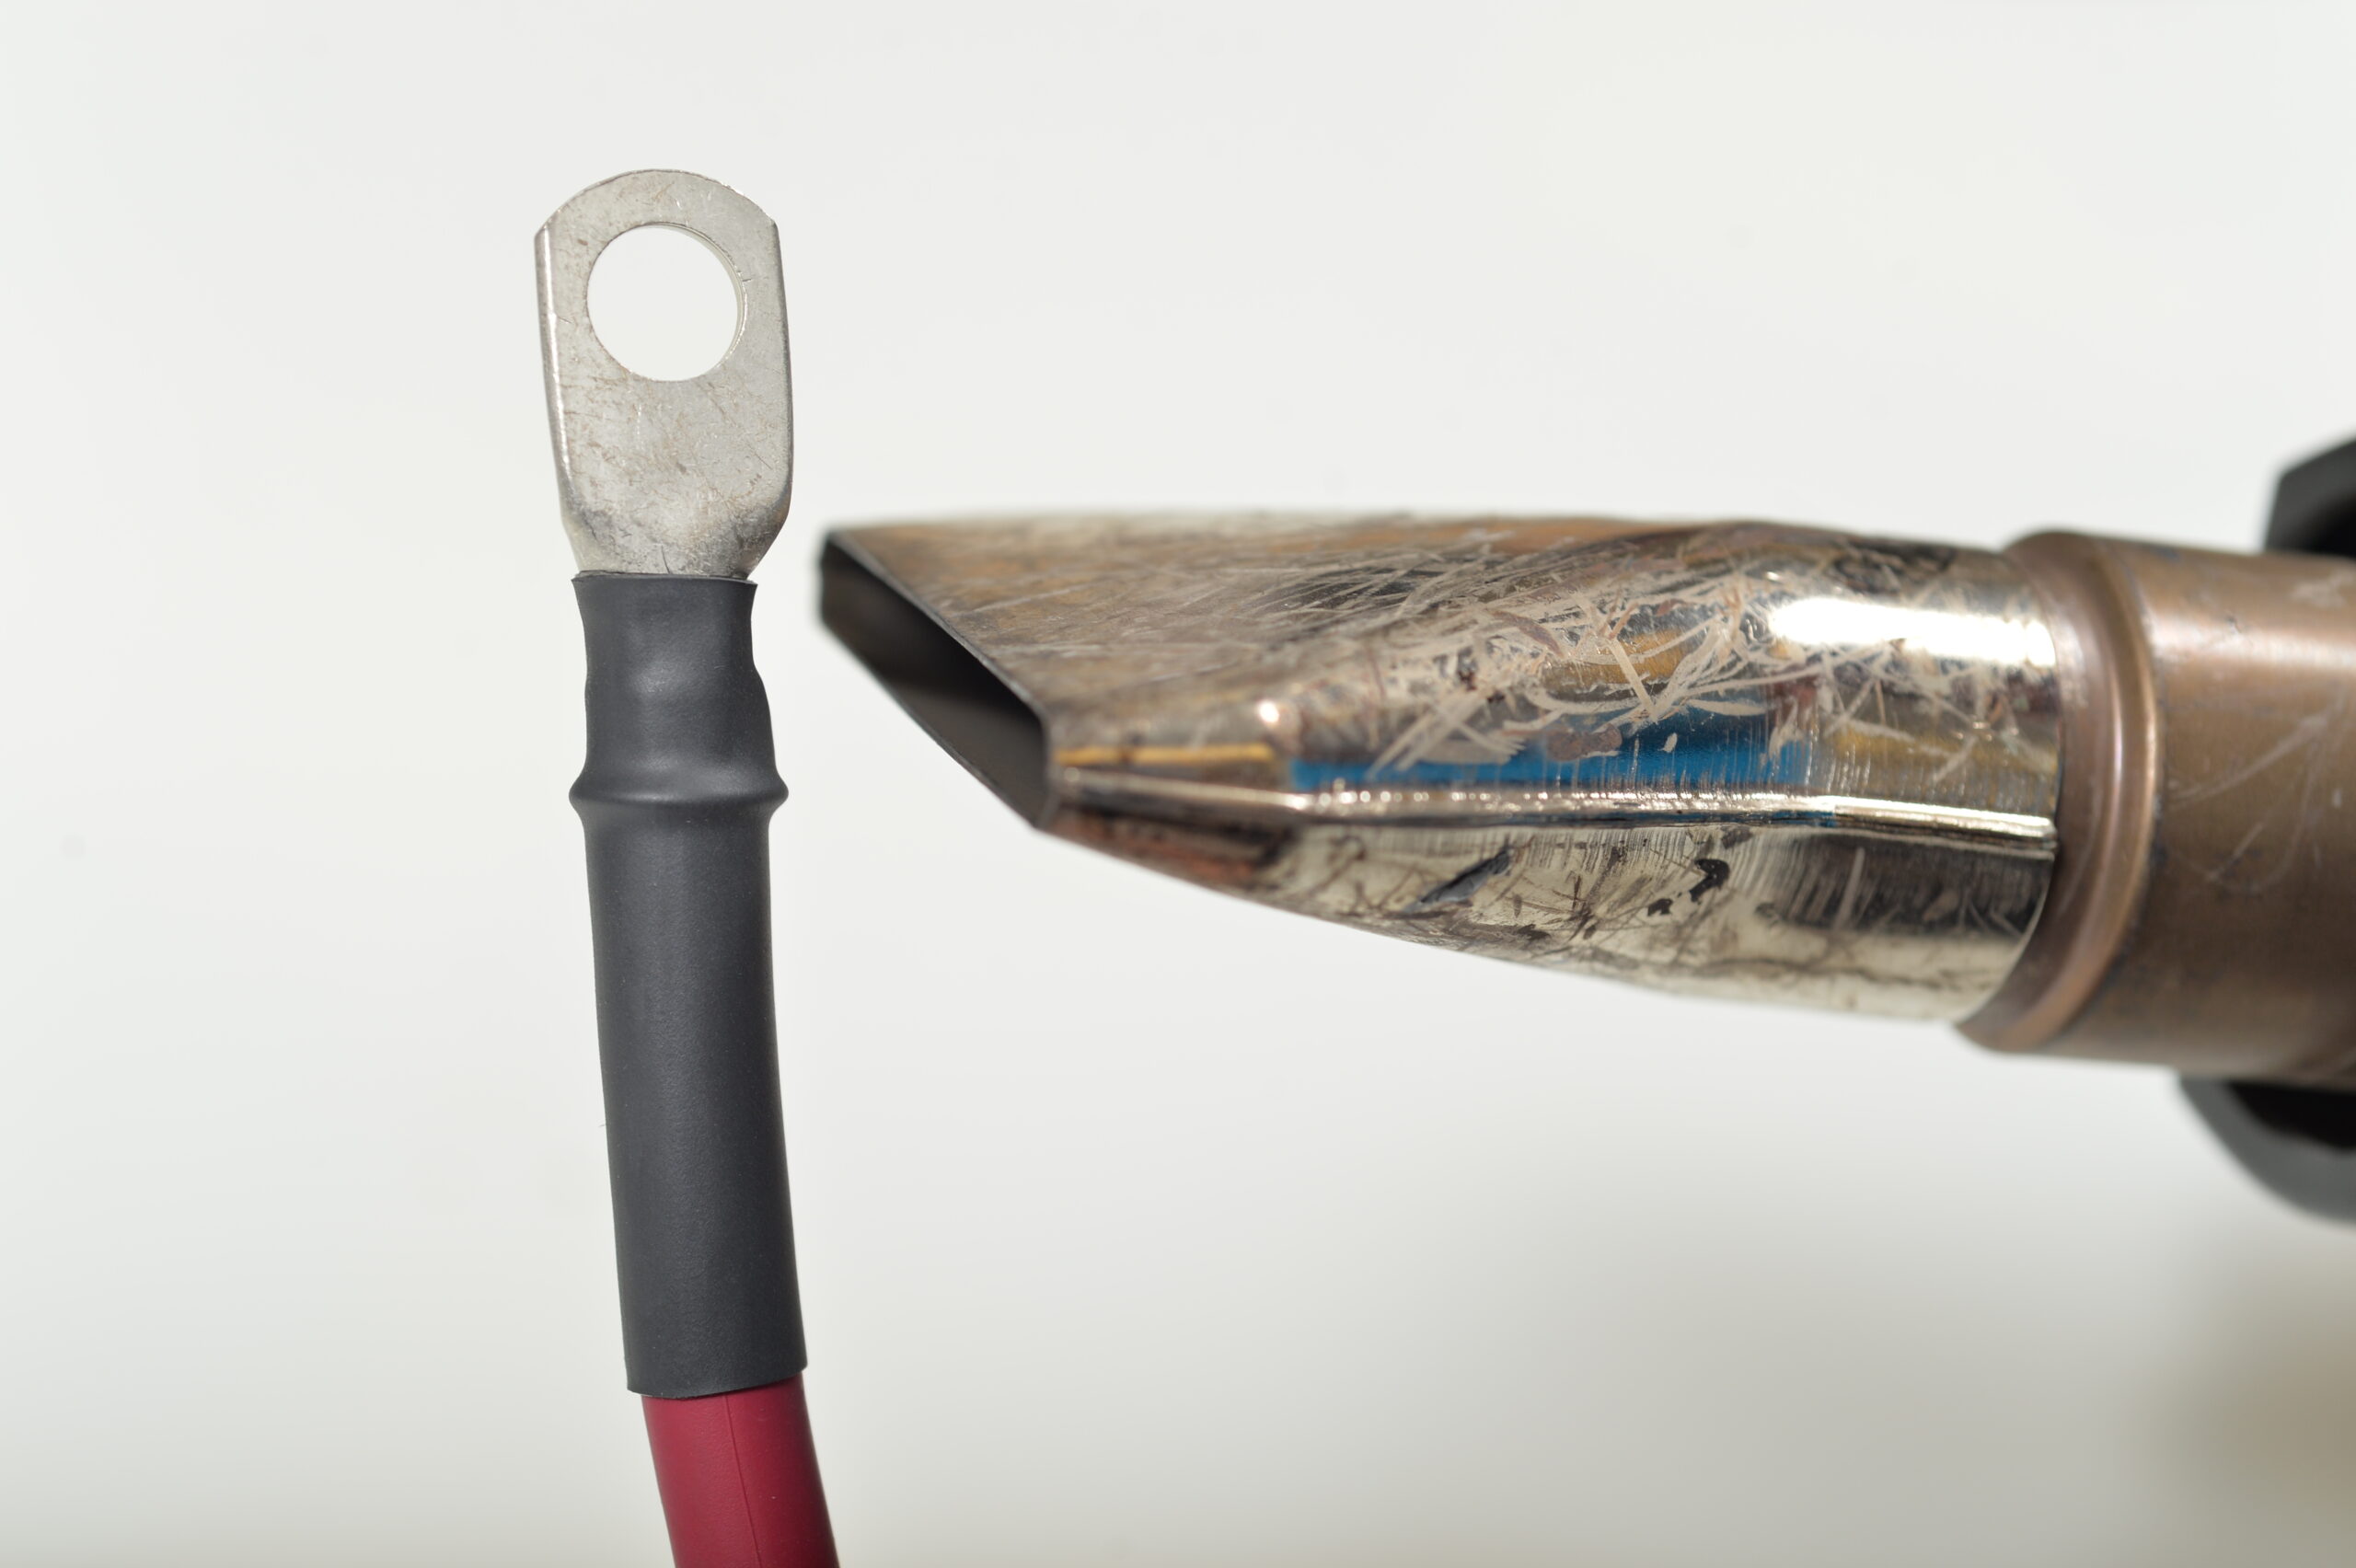
7.2 Position the Tubing: Slide the heat shrink tubing over the lug and cable connection, making sure it covers both the lug barrel and a portion of the cable insulation.
7.3 Heat the Tubing: Use a heat gun to evenly heat the tubing. As it heats, the tubing will contract and conform tightly to the shape of the lug and cable. Move the heat gun in a slow, circular motion to ensure even shrinking and prevent overheating any single area.
7.4 Inspect the Tubing: Once the tubing has fully shrunk, check to ensure it has formed a tight seal around the connection. The tubing should be smooth, with no air pockets or wrinkles, and should feel firm and secure.
8. Repeat as Necessary
If you have additional cables and lugs to crimp, repeat the process for each connection. Consistency is key, so ensure you follow the same steps for each cable to maintain a high level of quality and safety across all connections.
Benefits of Using Heat Shrink Tubing
Heat shrink tubing is more than just an aesthetic finish to your connection—it adds several practical benefits that enhance the durability and longevity of your electrical system:
- Enhanced Insulation: Heat shrink tubing provides an additional layer of insulation, reducing the risk of short circuits and electrical shocks.
- Environmental Protection: It shields the crimped connection from moisture, dust, and corrosive elements that could degrade the connection over time.
- Strain Relief: The tubing helps protect the cable from mechanical stresses like bending, pulling, or vibrations, which can damage the crimp over time.
- Identification: Heat shrink tubing is available in various colors, allowing you to color-code your connections for easier identification and organization in complex systems.
Troubleshooting Common Issues
Even with the best tools and techniques, occasional issues may arise during the crimping process. Here’s how to address some common problems:
- Incomplete Crimps: If the crimp doesn’t look fully compressed, ensure that you’re using the correct die size and that the hydraulic tool is applying sufficient pressure.
- Stray Copper Strands: If you see copper strands outside the lug, you may need to re-strip the cable and make sure all strands are inserted fully into the lug barrel before crimping.
- Heat Shrink Tubing Doesn’t Shrink Properly: Make sure you’re using the correct size tubing and applying even heat. If the tubing isn’t shrinking uniformly, try adjusting the distance or angle of the heat gun.
Conclusion
At WesBell Electronics, we understand that making secure, durable electrical connections is essential to the performance and safety of your projects. By following the steps outlined in this guide, you can crimp welding cable and DLO cable lugs with precision and confidence. Using a hydraulic crimping tool ensures a strong mechanical bond, while heat shrink tubing provides additional protection against environmental and mechanical stresses.
Whether you’re working on a welding project or installing power cables in a demanding industrial environment, proper crimping techniques are critical for ensuring the longevity and safety of your electrical systems. By investing in the right tools and materials, and following industry best practices, you can achieve professional-grade results every time.
For all your cable and wiring needs, WesBell Electronics is here to help with top-quality products and expert advice. Visit our website or contact our team today to learn more about our full range of welding cables, DLO cables, and crimping tools.


